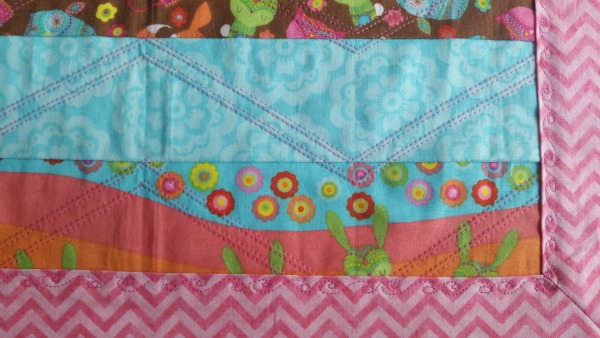
I love machine quilting! And I’m excited to show you a new quilting technique that I saw on WeAllSew.com by Bernina: quilting with a twin needle. A twin needle gives you twice the stitches in the same amount of time. Remember that photo above? The double quilting lines look tedious to sew, but they are super easy with a twin needle. Here’s another example.
For those of you who have used a twin needle before, this post will probably be a review of what you already know. To skip all my explanations, jump head to the STEPS typed with bold font, and then next week, we’ll start quilting. For those of you who are dying to try a twin needle for the first time, read on.
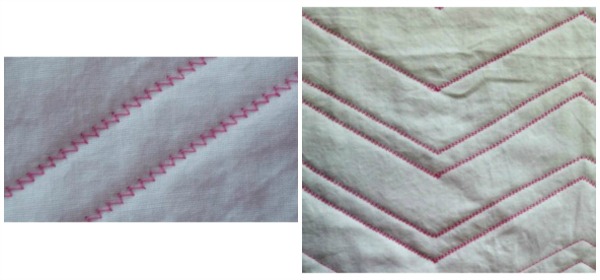
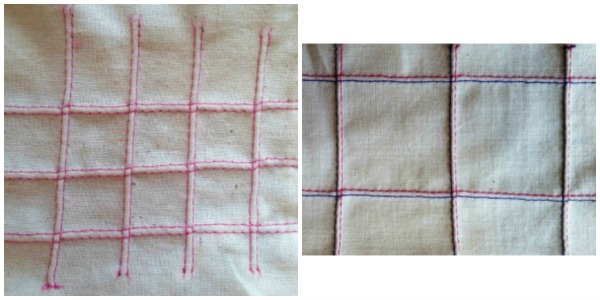
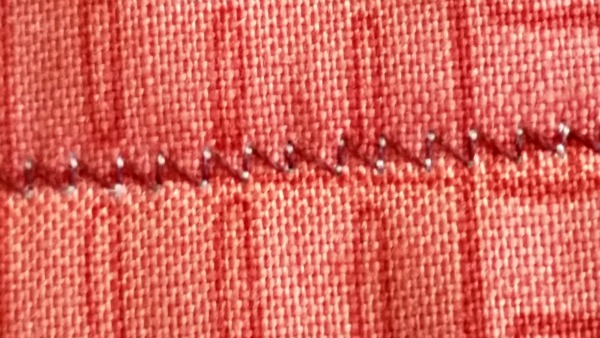
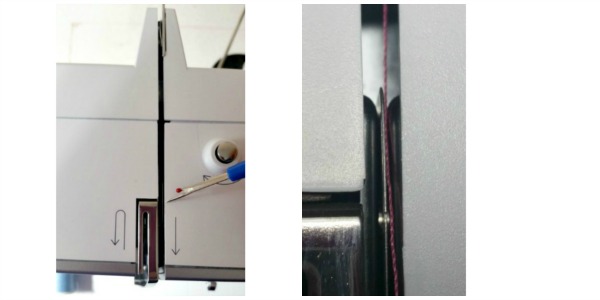
I love the look of stitches made with a twin needle on the quilt top, but the stitching on the back looks completely different. The photo on the left is a close-up of the stitching in the photo on the right.
If your bobbin thread closely matches your backing fabric, these stitches will mostly disappear, especially if your backing fabric has some kind of pattern. And if no one ever sees the back of the quilt—it’s a quilted table runner, perhaps, and the back is always against the table—then the appearance of the stitches won’t matter.
Some people find sewing with a twin needle difficult because their threads keep tangling and then breaking. I have included in my instructions in bold type different things you can do to avoid thread breaks.
• STEP ONE: Put your double needle in your sewing machine.
Twin needles (also called double needles) have 1 needle shank, but 2 needle shafts with a point and eye on each shaft.
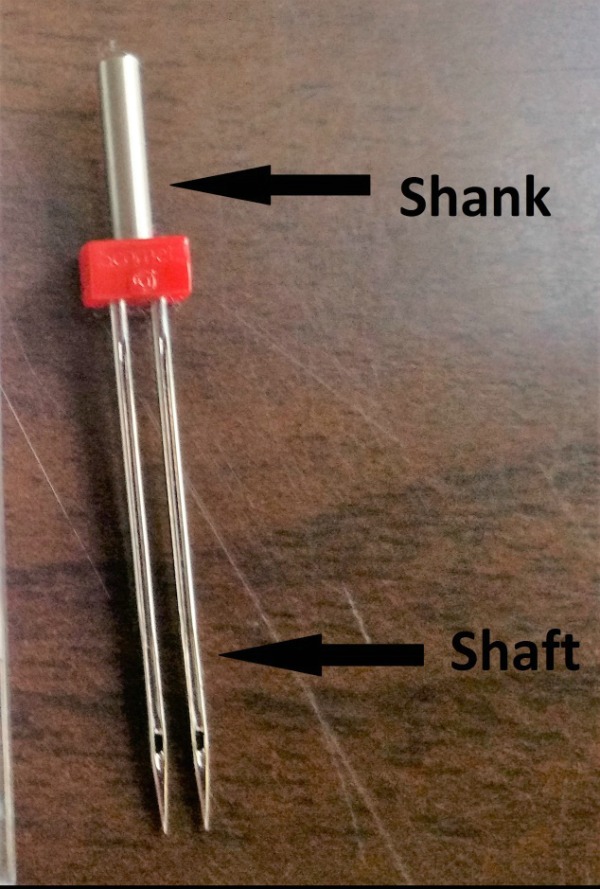
The shank of the twin needle fits in your machine just the way the shank of a regular needle does.
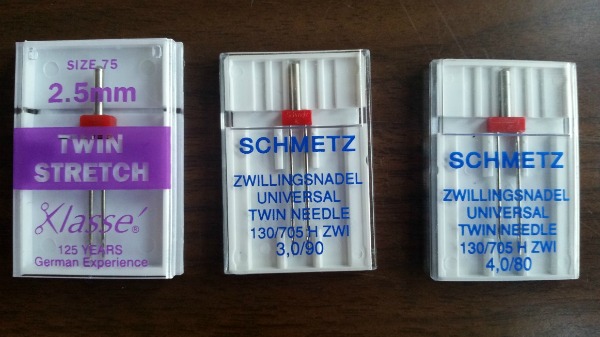
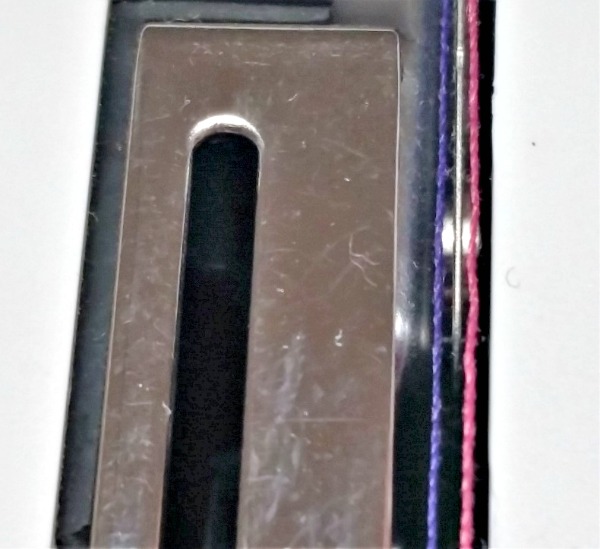
Twin needles are sized according to the size of the needles themselves and the space between the shafts. The needle in the photo above is a 2,0/80, meaning that the space between the shafts is 2 millimeters and the needles themselves are size 80. This is the size of twin needle that I used to quilt the table runner, but twin needles come in many sizes and types. The photo below shows just 3 examples.
Avoid thread breaks by using a new, sharp twin needle. I always buy at least 2 packages, so I have a back-up.
• STEP TWO: pick your thread color.
If you’re going to sew with a twin needle, you will need 2 spools of thread. You can use two different colors of thread—one for each needle—or you can use the same color in both needles.
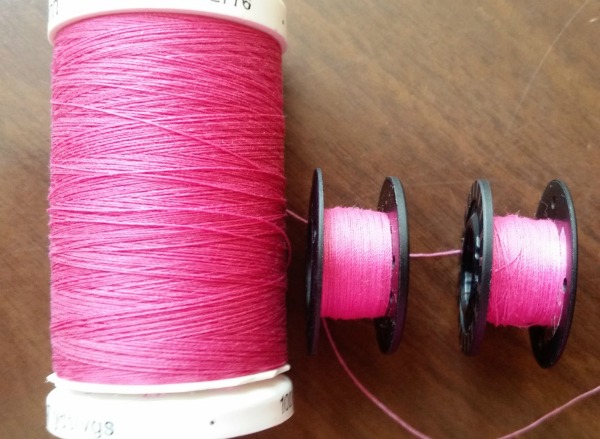
On the Spring Table Runner, I used the same color in both needles, so to avoid buying 2 spools of the same color of thread, I filled a bobbin and used it as the second spool. In the photo below, I have the spool of thread, the bobbin that will act as the second spool, and the bobbin that will be the bobbin. I filled the bobbins half full, which was plenty for this project.
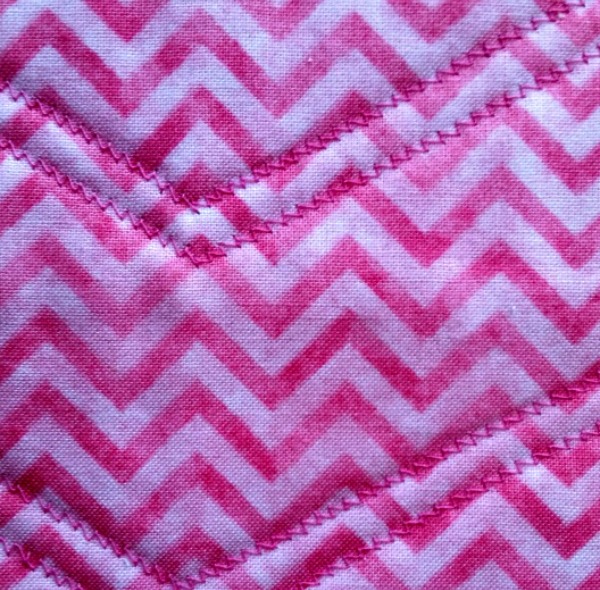
Machine quilting stitches usually look better if you use the same color of thread on the top and in the bobbin. That way, if any of the top thread shows in the bottom stitches, it is nearly impossible to see. This is also true when using twin needles. In the blurry photo below (my camera would not take a good picture), you can see white dots at the top and bottom of the zig zag stitches. The white dots are the top thread, and if it were the same color as the bottom, you wouldn’t be able to see the dots at all. (If you want a light color on the top, to match the quilt top, and a dark color on the bottom to match the backing fabric, you can minimize this problem by adjusting your tension.)
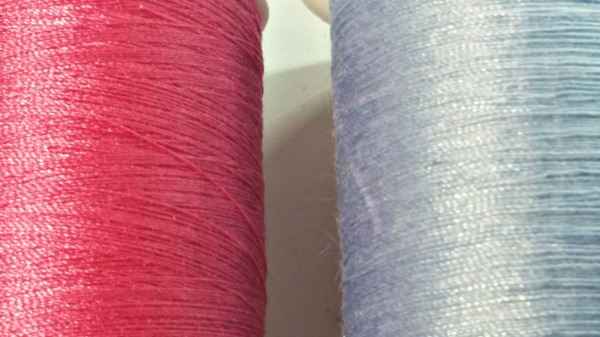
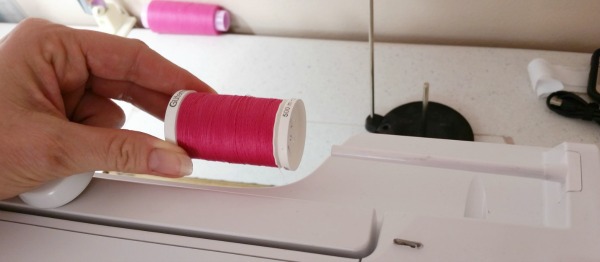
Avoid thread breaks by using only high quality thread. Cheap thread has lots of short fibers, which can catch on the thread in your second needle, causing tangles. Good quality thread has long fibers that don’t catch nearly as often. In the photo below, the pink thread on the left is good quality thread and the blue on the right is cheap. The blue thread has wispy fibers (look at the left side of it), and the pink doesn’t . I like Gutermann, Mettler, and Metrosene threads in my machine. Added bonus: good thread leaves less lint in your machine.
• STEP THREE: Find your spool pins.
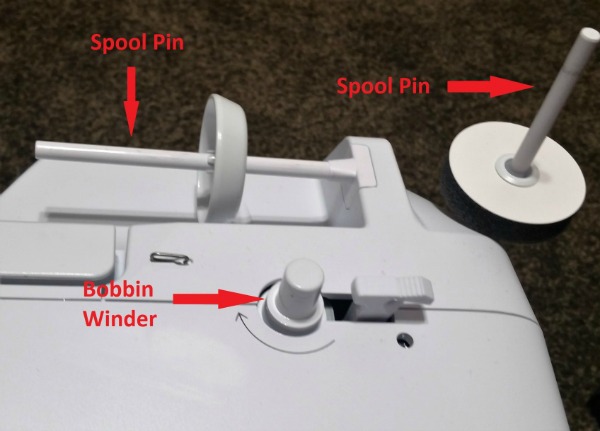
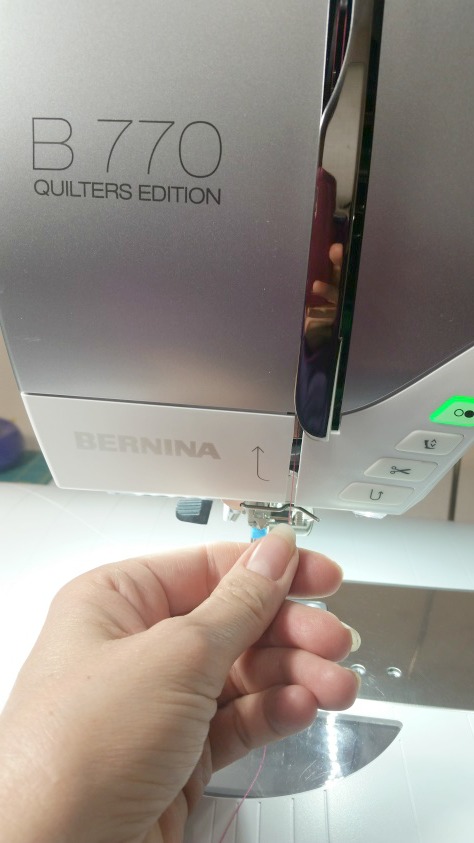
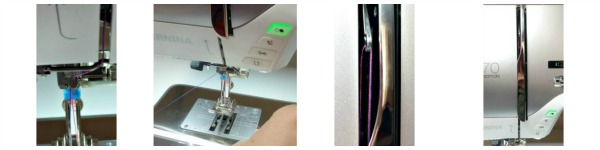
And now you’re wondering, “How in the world does one actually thread a sewing machine when you’re using a twin needle?” First, look at the top of your sewing machine. The photo below is a picture of mine.

On the right are two spool pins and the bobbin winder.
The next photo is the top of an older model Bernina. It has the same components as my machine, including two spool pins.

Your sewing machine probably has 2 spool pins to hold 2 spools of thread. Sewing with a twin needle is easier, however, if you put one spool on the spool pin and the second spool on a cone thread holder behind your machine.
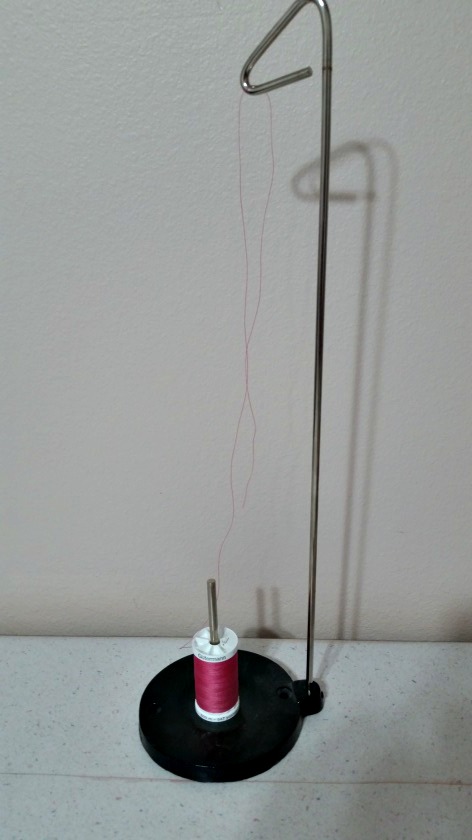
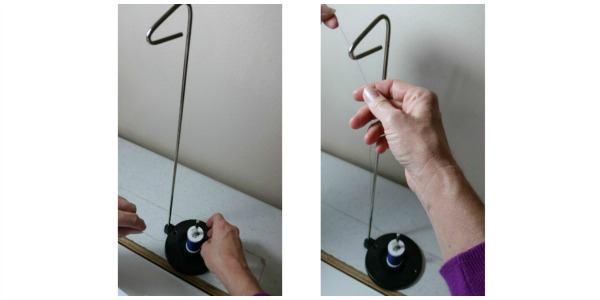
Fabric stores and Amazon sell cone thread holders, because a cone will not fit on the spool pin on your machine. The black, metal stand needs to be heavy enough that the holder won’t fall over when the sewing machine pulls on the thread. (Don’t learn this by experience.) The tall, metal arm holds the thread by the top of the sewing machine, making the thread easier for the machine to use.
Avoid thread breaks by using a cone thread holder as your second spool pin. This increases the distance between the two spools of thread, so they can’t tangle each other as they come into your machine.
• STEP FOUR: Thread your machine.
Put your first spool of thread on the spool pin on your machine. In my illustrations, this thread is pink. It will be on the right side of the other spool of thread.
On the top of your machine, to the left of the spool pin, are the thread take-up lever, the thread guide, the tension disc, and the thread pretension, which you use when you wind your bobbin.
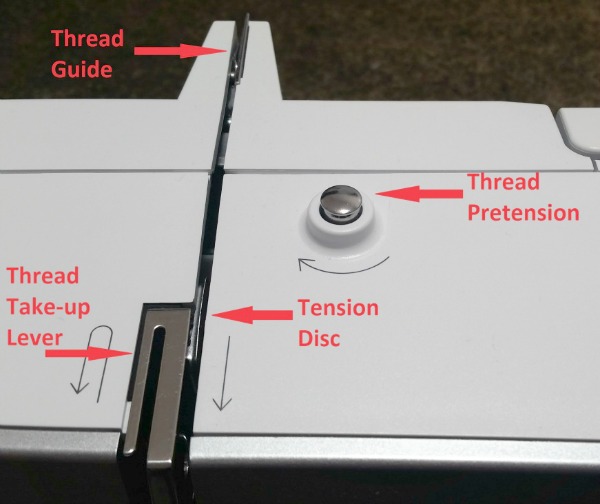
Put the pink thread into the thread guide.
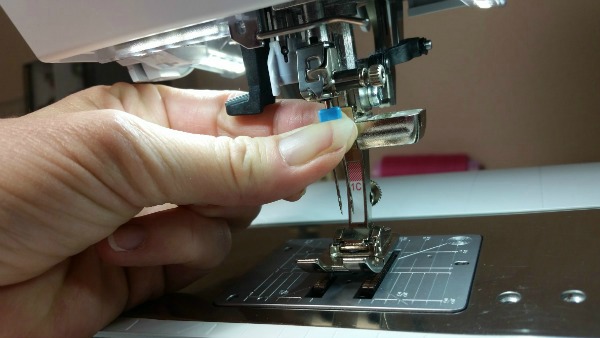
The thread goes from the thread guide to the tension disc. (It’s hard to see, but there is a little disc in that space by the tip of my seam ripper.) Put the pink thread on the right side of the tension disc.
Continue threading your sewing your machine the way you usually do, until you get to your twin needle.
Thread the needle on the right side with the pink thread.
You’ve probably seen the pattern: put the thread on the right-hand spool pin on the right side of the tension disc and into the right-side needle.
Put the cone thread holder behind the machine, to the left of the spool pin holding the pink thread. Put the spool of purple thread on the cone thread holder and move the thread into the arm of the holder.
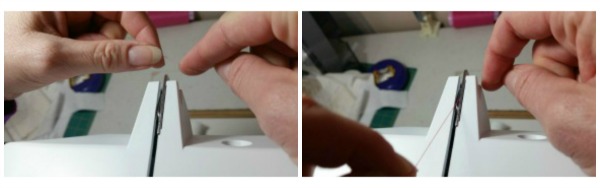
Slide the purple thread into the thread guide, right next to the pink thread. Move the purple thread to the tension disc. The purple thread goes to the left of the disc. In the photo below, the purple thread is on the left of the disc, and the pink is on the right.
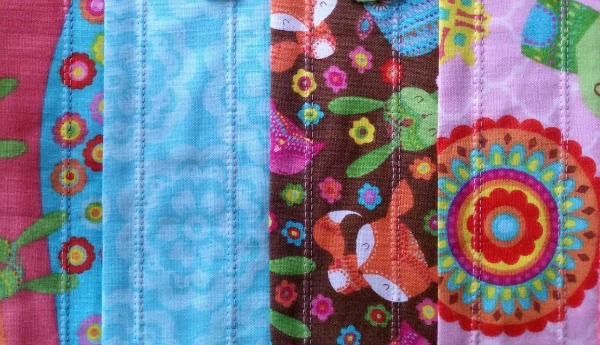
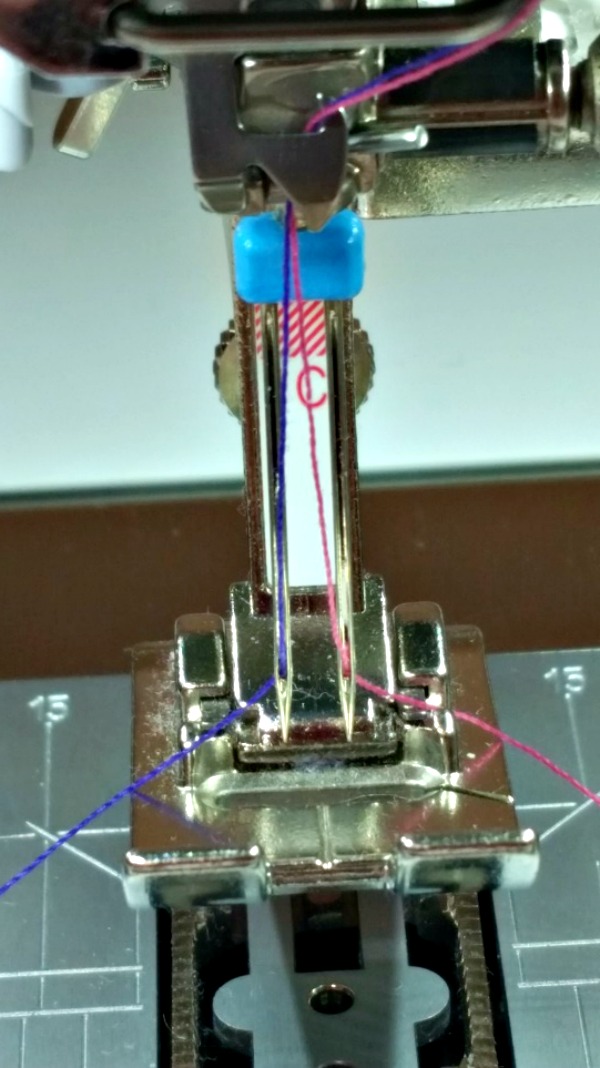
Now continue to thread your machine the way you usually do. The purple thread will be right next to the pink. They will touch and get comfy—that’s good. Put the purple thread through the rest of the machine. It will sit right next to the pink. Below, the photos on the right are close-ups of the photo on the left.
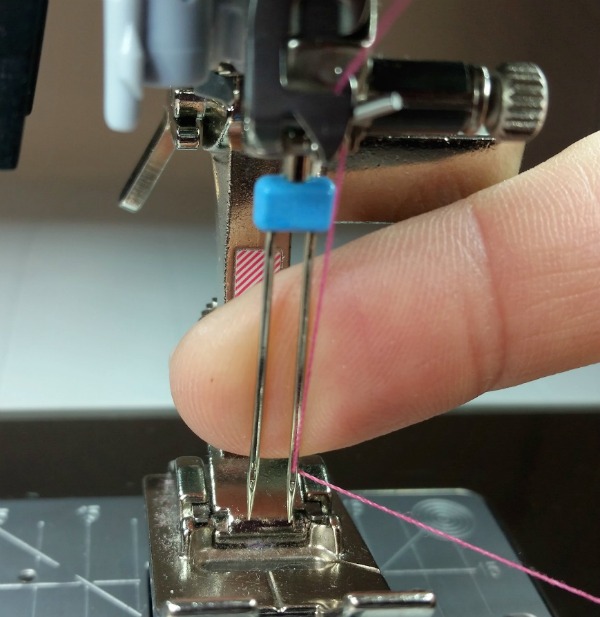
Your purple thread has now reached the needle.
Thread the left-hand needle with the purple thread, and we are ready to sew!
I hope that was much easier than you thought it would be. If you still have questions, click here to watch a short video of me threading my sewing machine in preparation for using a twin needle.
If you have any questions about twin needles, or you have photos of a finished project, post them in the comments. I’d love to hear from you.
Next week we sew! Be sure to join me as we make beautiful stitches together.