We get to quilt today! And with a twin needle! Here is a beautiful example (above) which I think I’ve shown you about 50 times—it’s my favorite.
Before you begin quilting your table runner, I highly recommend that you practice using your twin needle on some sample quilt sandwiches. This will allow you to see how the twin needles work and if you like the look of the stitching. Note: I always make sample sandwiches and experiment with my quilting before I put a single stitch on the real quilt. This is one way to avoid lots of tears.
I make the sample sandwiches out of batting and muslin or batting and fabric from the quilt itself. (This is the best way to see how your quilt will really behave when you sew it.) For photos and directions to make a quilt sandwich, click here.
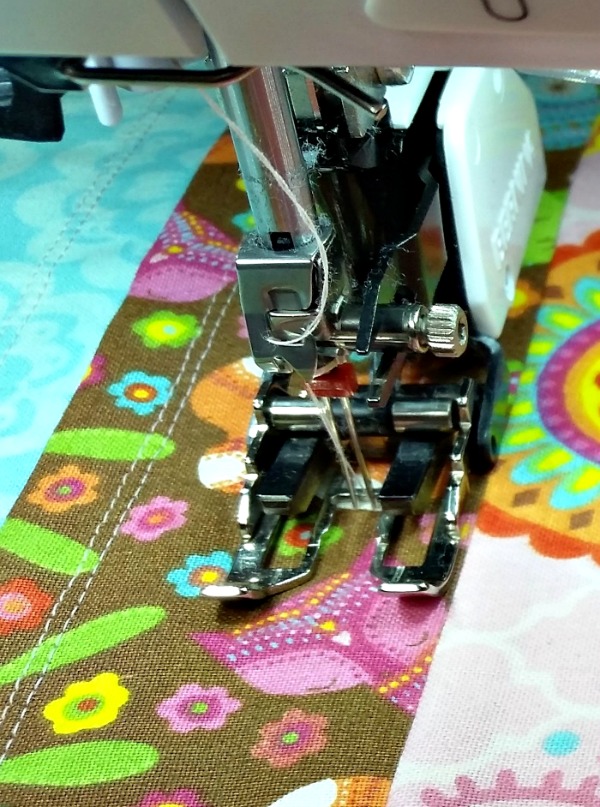
Below is a photo of the first sample I made. This is scrap fabric from the quilt, and I used a twin needle and a walking foot and sewed in straight lines.
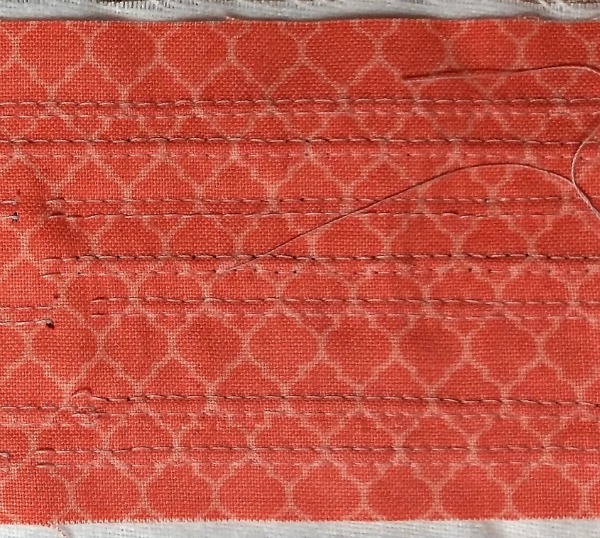
These stitches look great, until you look at the back of the sample. And the back is a mess!
Because the top thread is light and the bottom thread is dark, you can easily see all the problems. (Note to self: use the same thread color in both the top and bottom, making it much harder to see mistakes.) But the very large amount of top thread on the bottom of the sample suggests a tension problem.
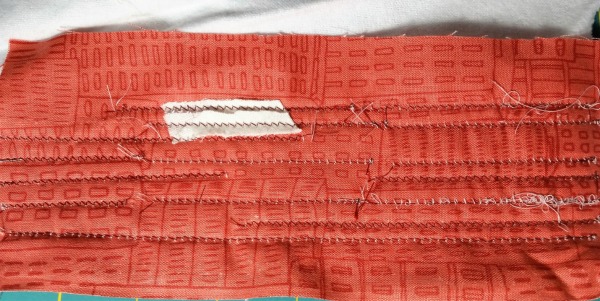
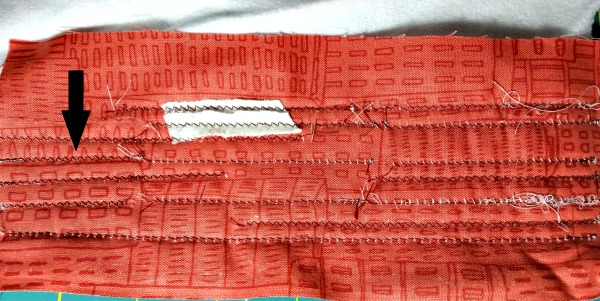
To fix this, I experimented with my tension, turning it up and stitching a row, then turning it down and stitching a row, until I got a good looking row of stitches with no bottom thread on the top and a minimum of top thread on the bottom. (I ended up sewing with my tension set rather high.) The arrow in the photo below points to the best looking row.
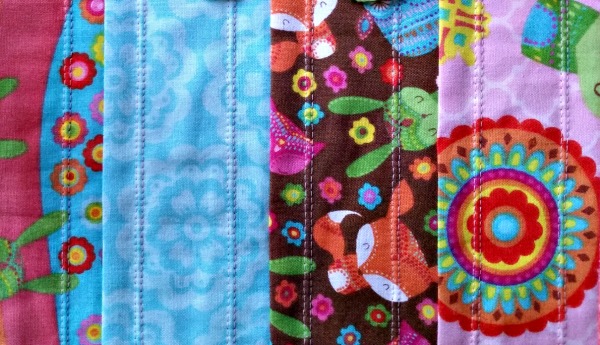
Besides checking the look of my stitches, I also use my sample quilt sandwiches to try different quilting patterns. I quilted the first Spring Table Runner in straight lines, using a twin needle and a walking foot. Some of you have asked how I manage to sew in a straight line, no wobbling, and I achieve that by sewing with the edge of my walking foot right next to the seam between the strips.
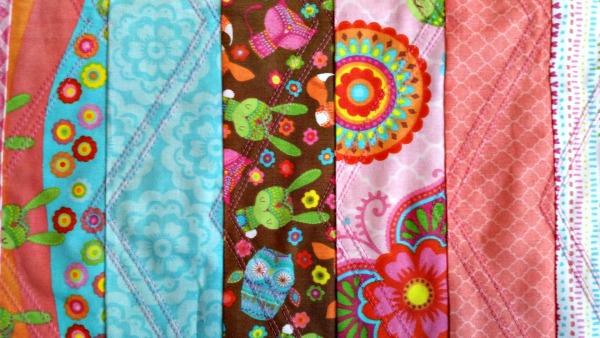
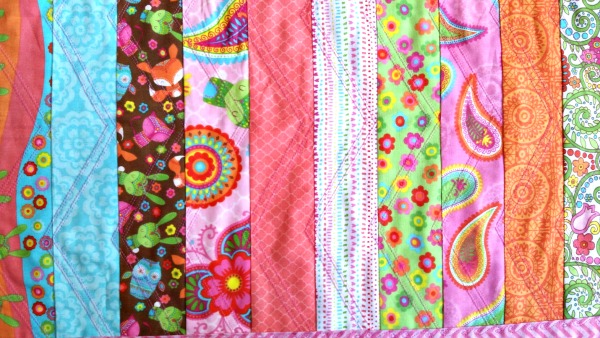
Here’s a section of the finished product.
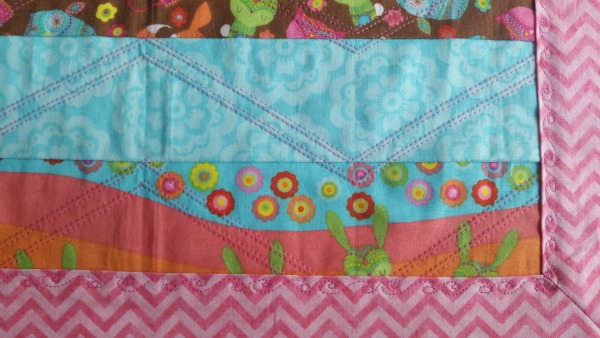
For the second Spring Table Runner, I wanted try a new quilting pattern. I decided to quilt chevrons:
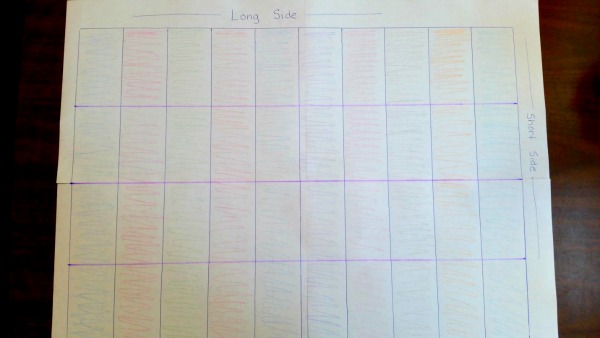
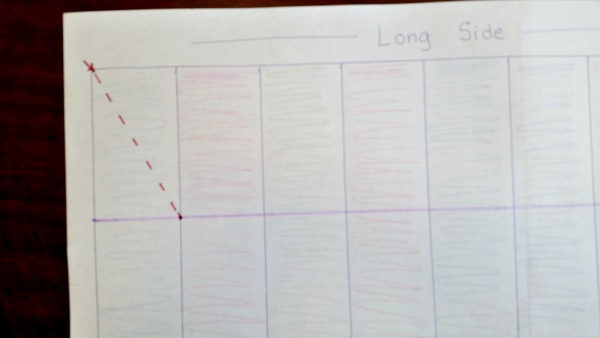
In order to practice this design before I sewed it onto the quilt top itself, I created a sample quilt top out of muslin. I drew a rectangle on a piece of muslin the same size as my quilt top minus seam allowances, so 14″ x 20″. Using a dark, ball-point pen, I then drew lines every 2″, parallel to the short sides of my quilt, to mimic the seam lines between the strips on my quilt top. It’s not very pretty, but it did the job.
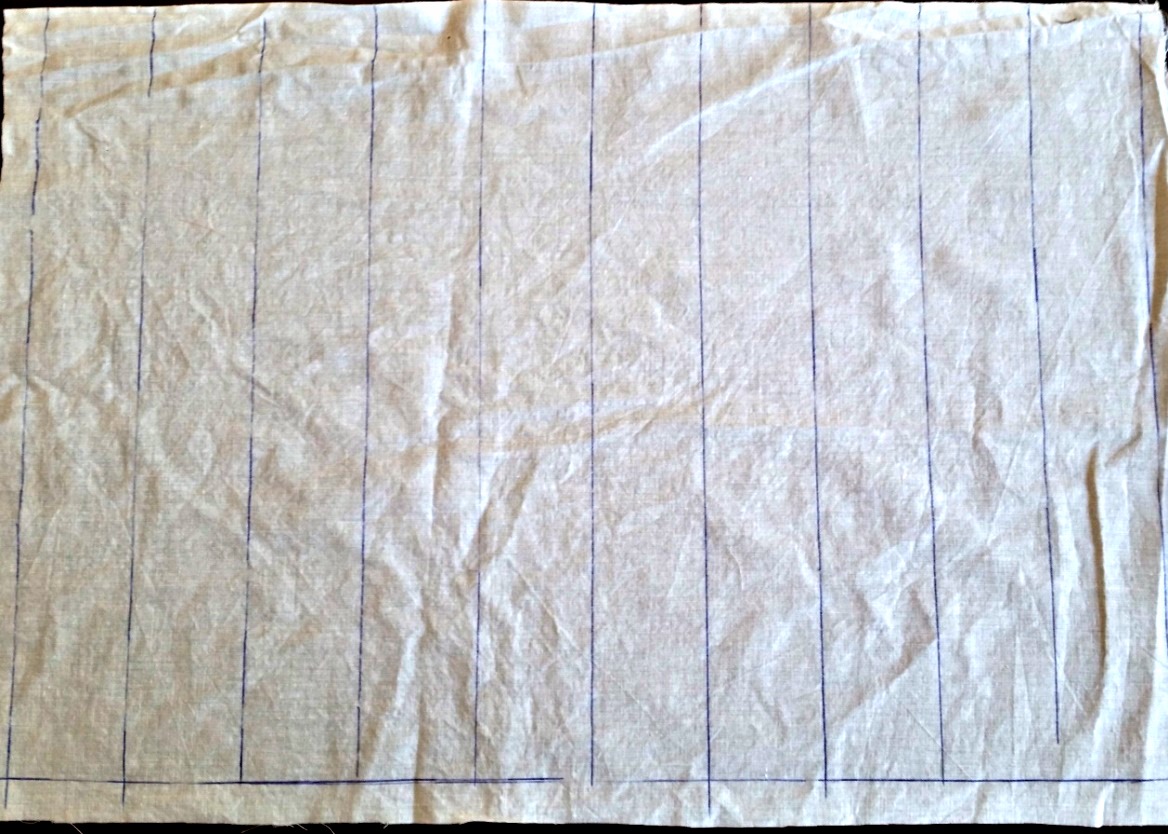
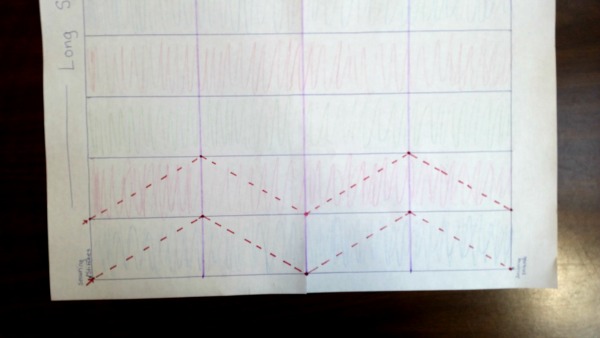
This is how my sample quilt top looks drawn on a piece of paper.
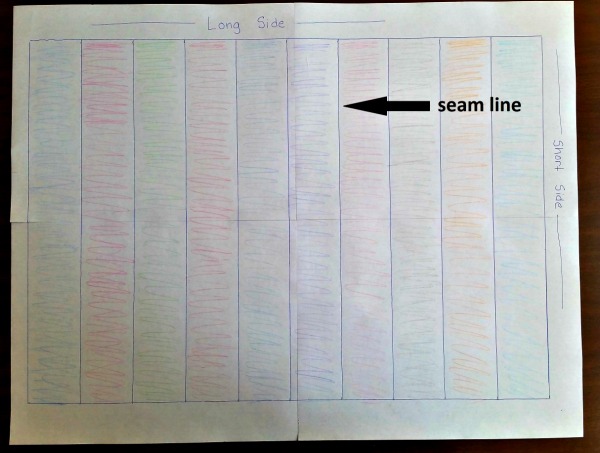
My seam lines are 2″ apart, parallel to the short sides of the quilt and perpendicular to the long sides. And I (hastily) colored my “strips,” so they would be easier to see.
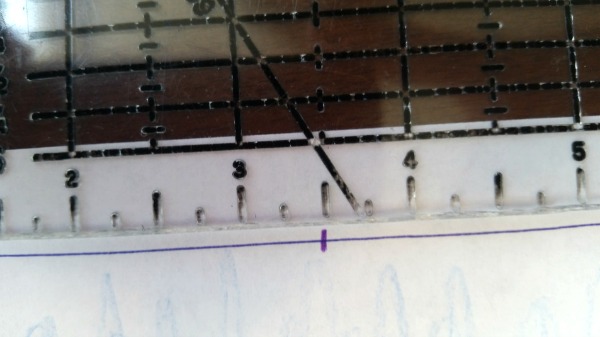
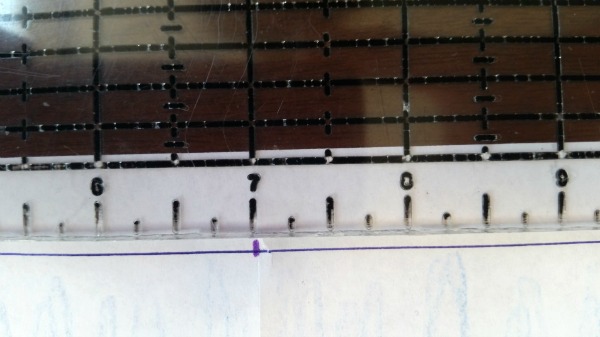
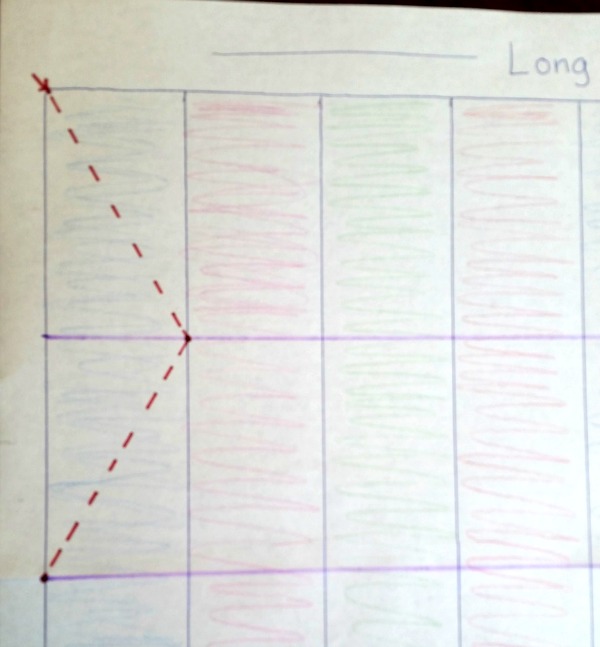
In order to quilt the chevron pattern onto your quilt, you will need to mark 3 lines on your quilt top. Put your ruler on one of the short sides of the quilt.
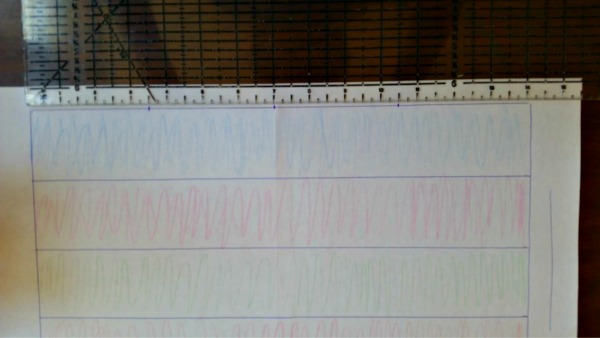
Using a disappearing fabric marker, put a mark at 3-1/2″, 7″ and 10-1/2″. Note: a good fabric marker is essential. Get one that disappears when exposed to water or air, but try it on sample fabric first. I use a Ritz Quilting Fine Point Mark-B-Gone Marking Pen in Purple.
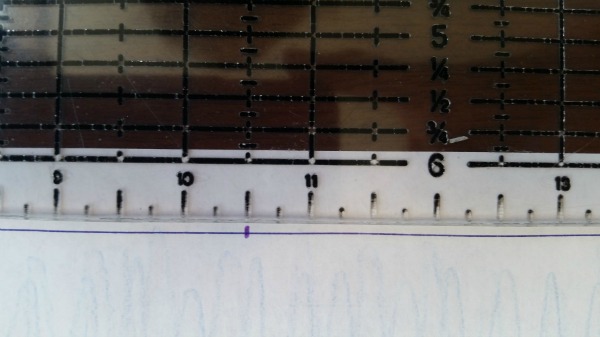
Mark the other short side of the quilt the same way. Then draw 3 lines across the top of the quilt, connecting your marks. These are the purple lines in the photo below.
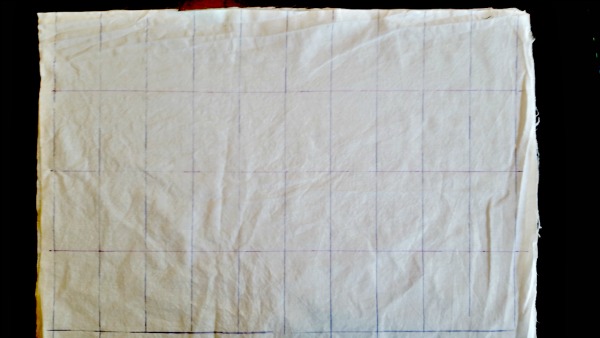
Here are the lines on my muslin sample.
After your muslin sample quilt top is marked, make it into a quilt sandwich and practice stitching before you sew your quilt.
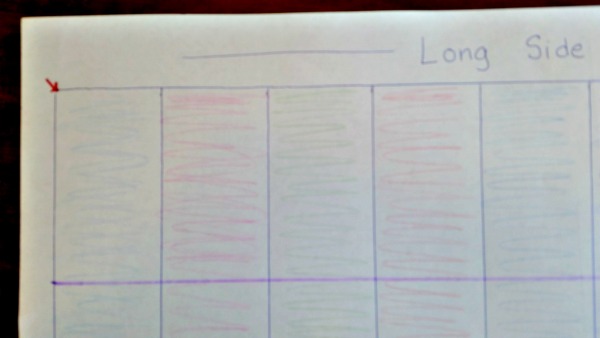
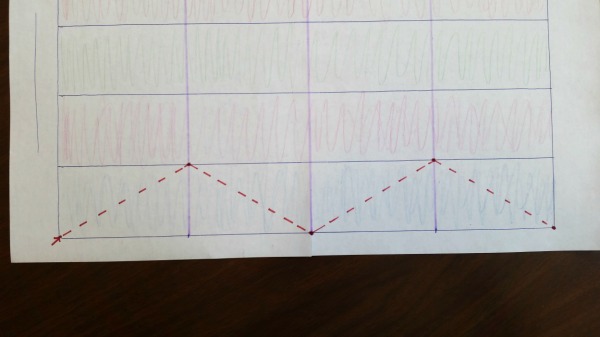
Whether you are sewing with a regular or twin needle, on your muslin sample or your quilt, the sewing instructions are the same. Begin sewing in the upper left corner of the quilt. In the photo below, I’ve marked that spot with a red arrow.
Always start sewing with 3-4 securing stitches, stitch length 0. Then sew down at a diagonal from the top left corner to the first intersection between the seam and your purple line.
Leave your needle in the down position, lift your presser foot, and pivot the fabric slightly so you can continue sewing down, but to the left. Stop at the intersection between the edge of the quilt top and the next purple line.
Pivot again so that your presser foot is facing down and to the right, and then sew to the next intersection of the seam and the purple line. Pivot for the last time and then sew down and to the left. Your stitching line now looks like this:
The chevron looks cool, and it was so easy!
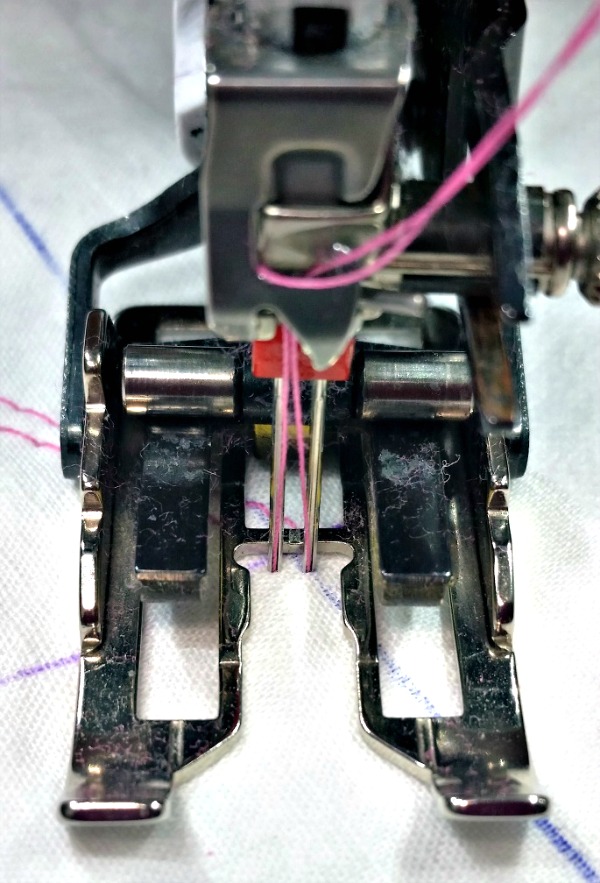
(Important side note about pivoting with a twin needle: Even though it is harder to pivot around two needlepoints than one, you can still pivot if you use a twin needle. Just do it slowly. The photo below shows the twin needles after I have pivoted my fabric. The needles are no longer sitting side by side.
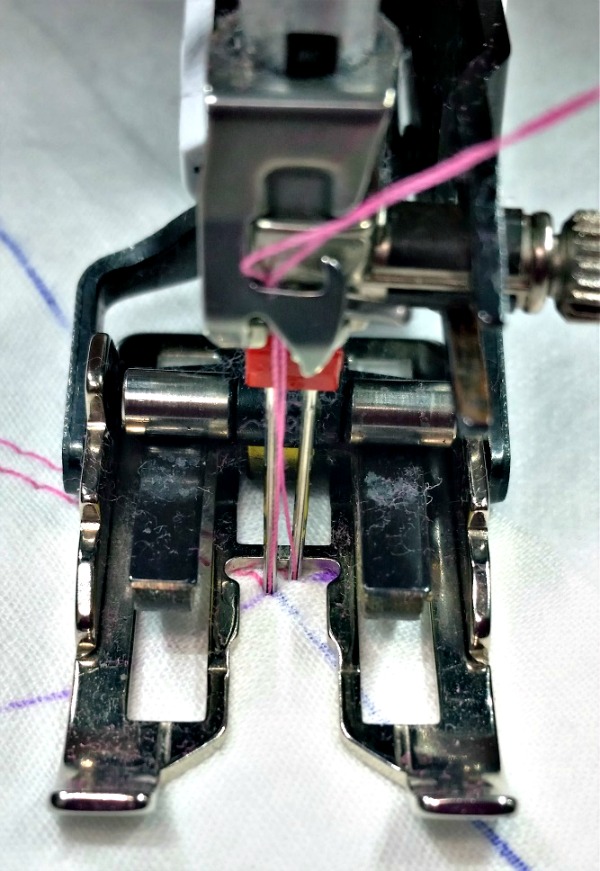
After I take one slow stitch, the needles move back to the correct position.
You will not be able to pivot with a twin needle on angles tighter than the one we’re quilting here. Instead, you will lift your needle out of the fabric, raise your presser foot, and turn your fabric so the foot is in the same place, but pointed in the new direction you want to sew.)
Continue sewing the rest of the quilt top in the same way. Here is a photo of the next stitching line:
After I quilted the chevrons on the entire quilt top, I decided I wanted a second row of stitching close to the first. In the photo below, this line is drawn in green.
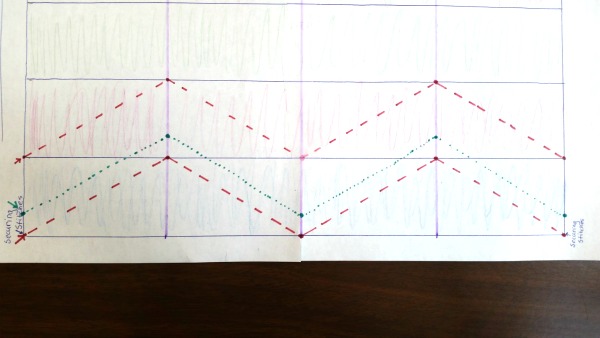
You sew this line the same way you did the first stitching lines, the lines in red. Start at the top left corner of the quilt, but this time, move your presser foot so that as you look at the foot, the left edge of the foot is next to the red line.

After some securing stitches, sew while keeping the edge of the foot on the red line.
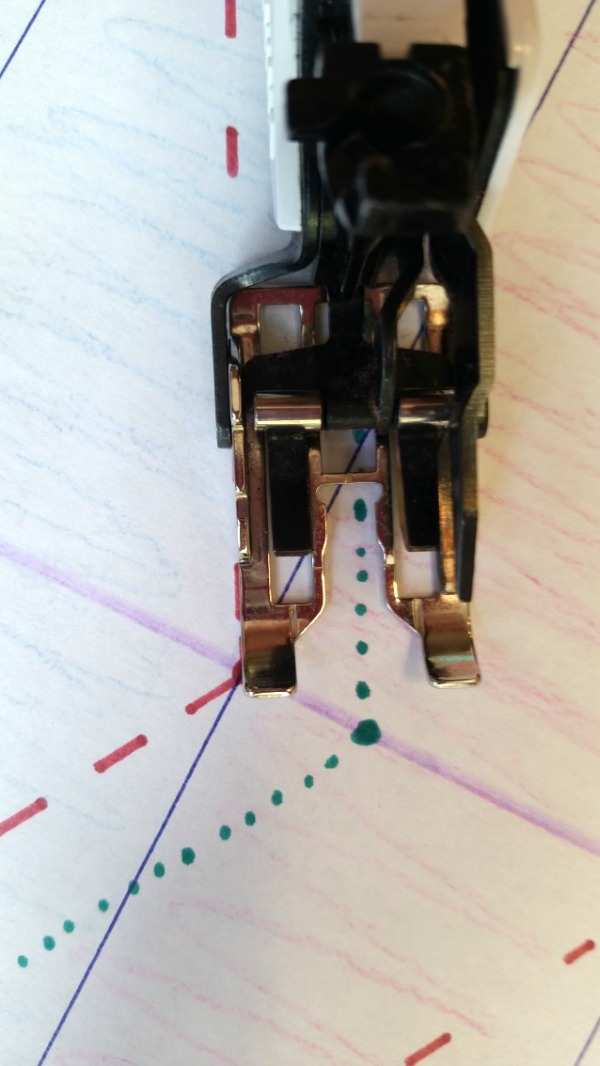
When you get to your first pivot point, make sure your needle is on the purple line. Don’t pivot until your get there. Continue sewing until you have added these lines to the entire quilt. This is how the chevrons look on my muslin sample.
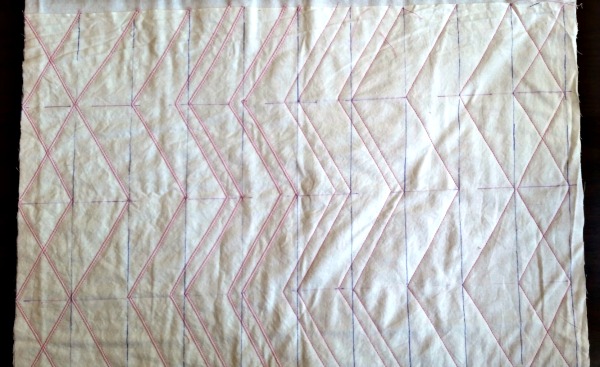
The photo above shows you that I experimented with sewing this chevron in different ways. I wanted to see what I liked the best. The ability to experiment is one of the great things about sewing a sample. This is how the chevron pattern looks on the quilt.
As you can see, because I used a disappearing fabric marker, the purple lines I drew are completely gone.
The chevron quilting pattern looks classy, but it’s very easy. I think you’ll love it as much as I do. Post photos of your quilting in the comments. I’d love to see your table runners.
Join me next week as we finish this quilt with a border and mitered corners made from the backing fabric.