| by Allison Sharp,Jennifer’s sister | Have you ever wanted a picnic quilt that looked bright and inviting on one side, but had durable, water-resistant fabric on the other? I have, so I decided to make one with a pieced top, polyester batting to resist water, and backing made from heavy-duty, water- and sun-resistant fabric. For the quilt top, I found a great pattern, Twisted Happy Blocks, by Mary Johnson. In Mary’s pattern, each large square contains a smaller square in a focal fabric which is twisted about 30 degrees and then surrounded by fun border fabrics. Look at her delightful Dr. Seuss quilt:

Dr. Seuss Quilt
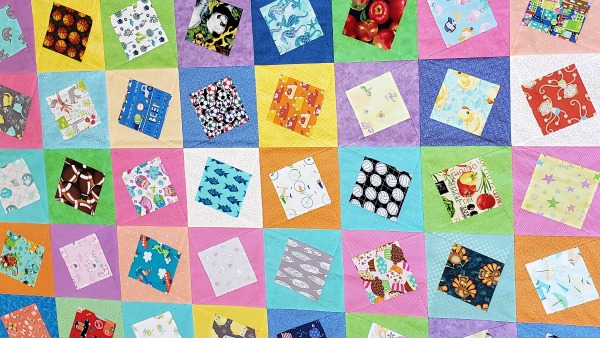
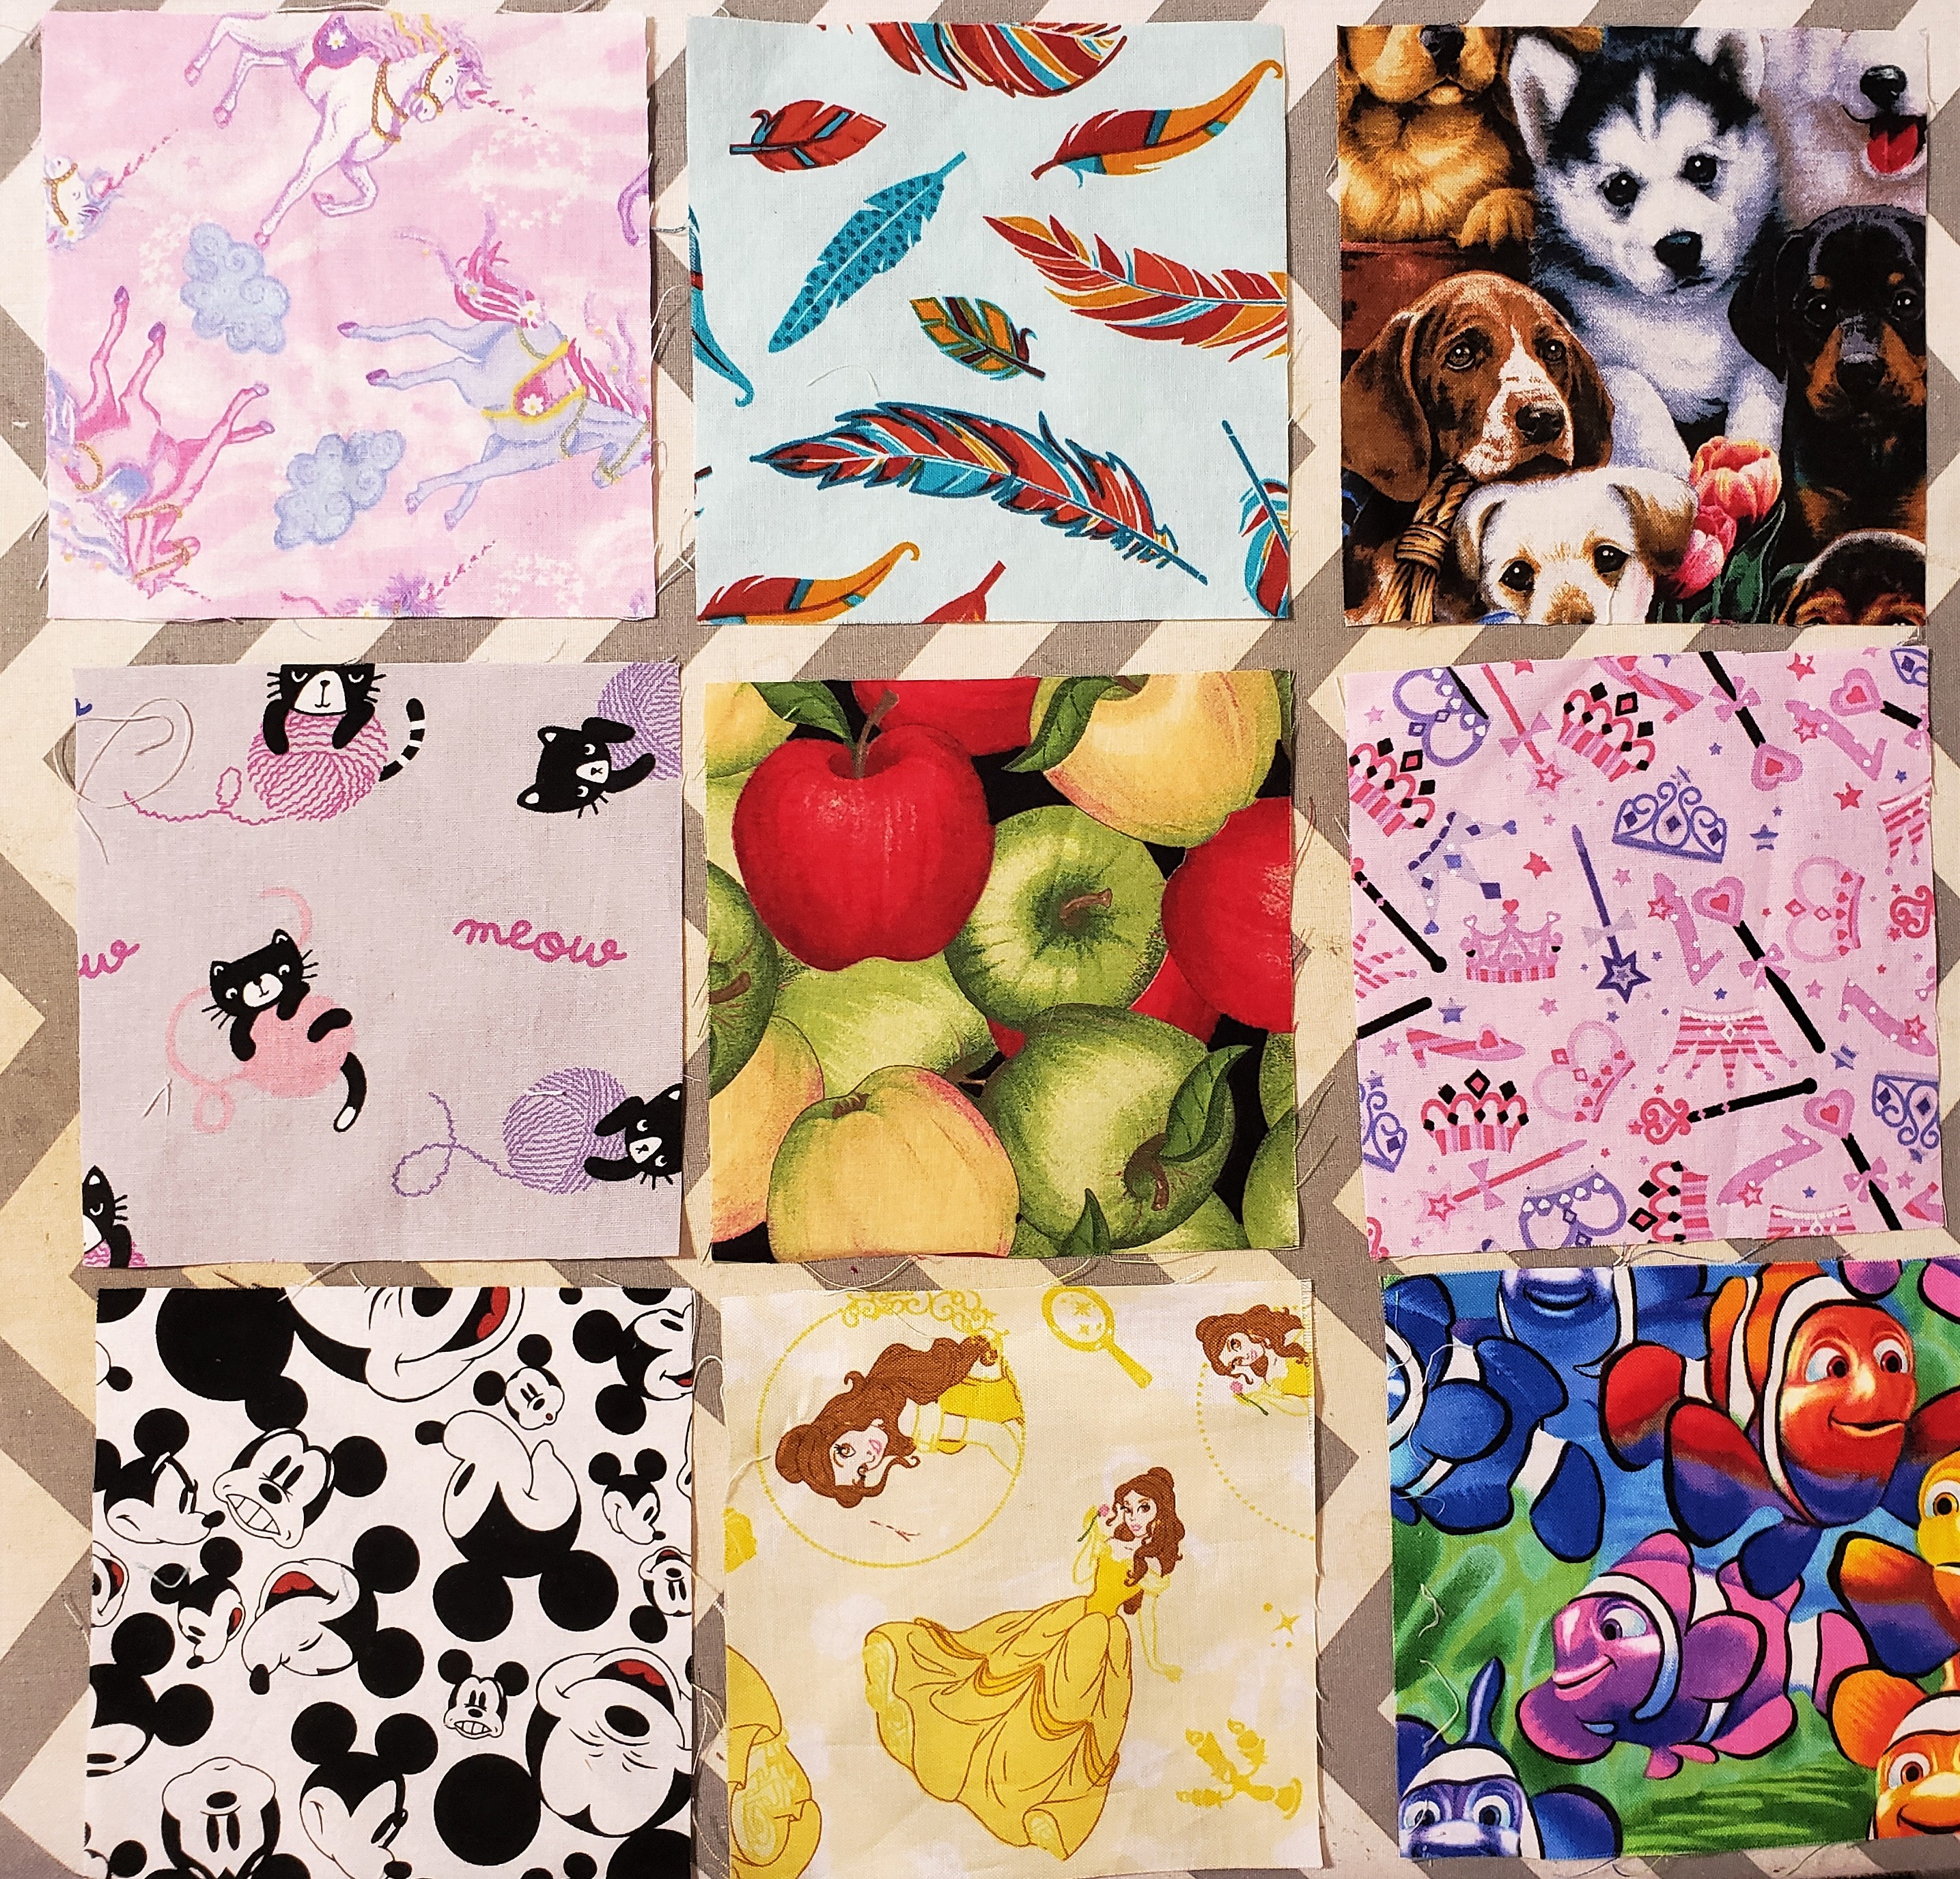
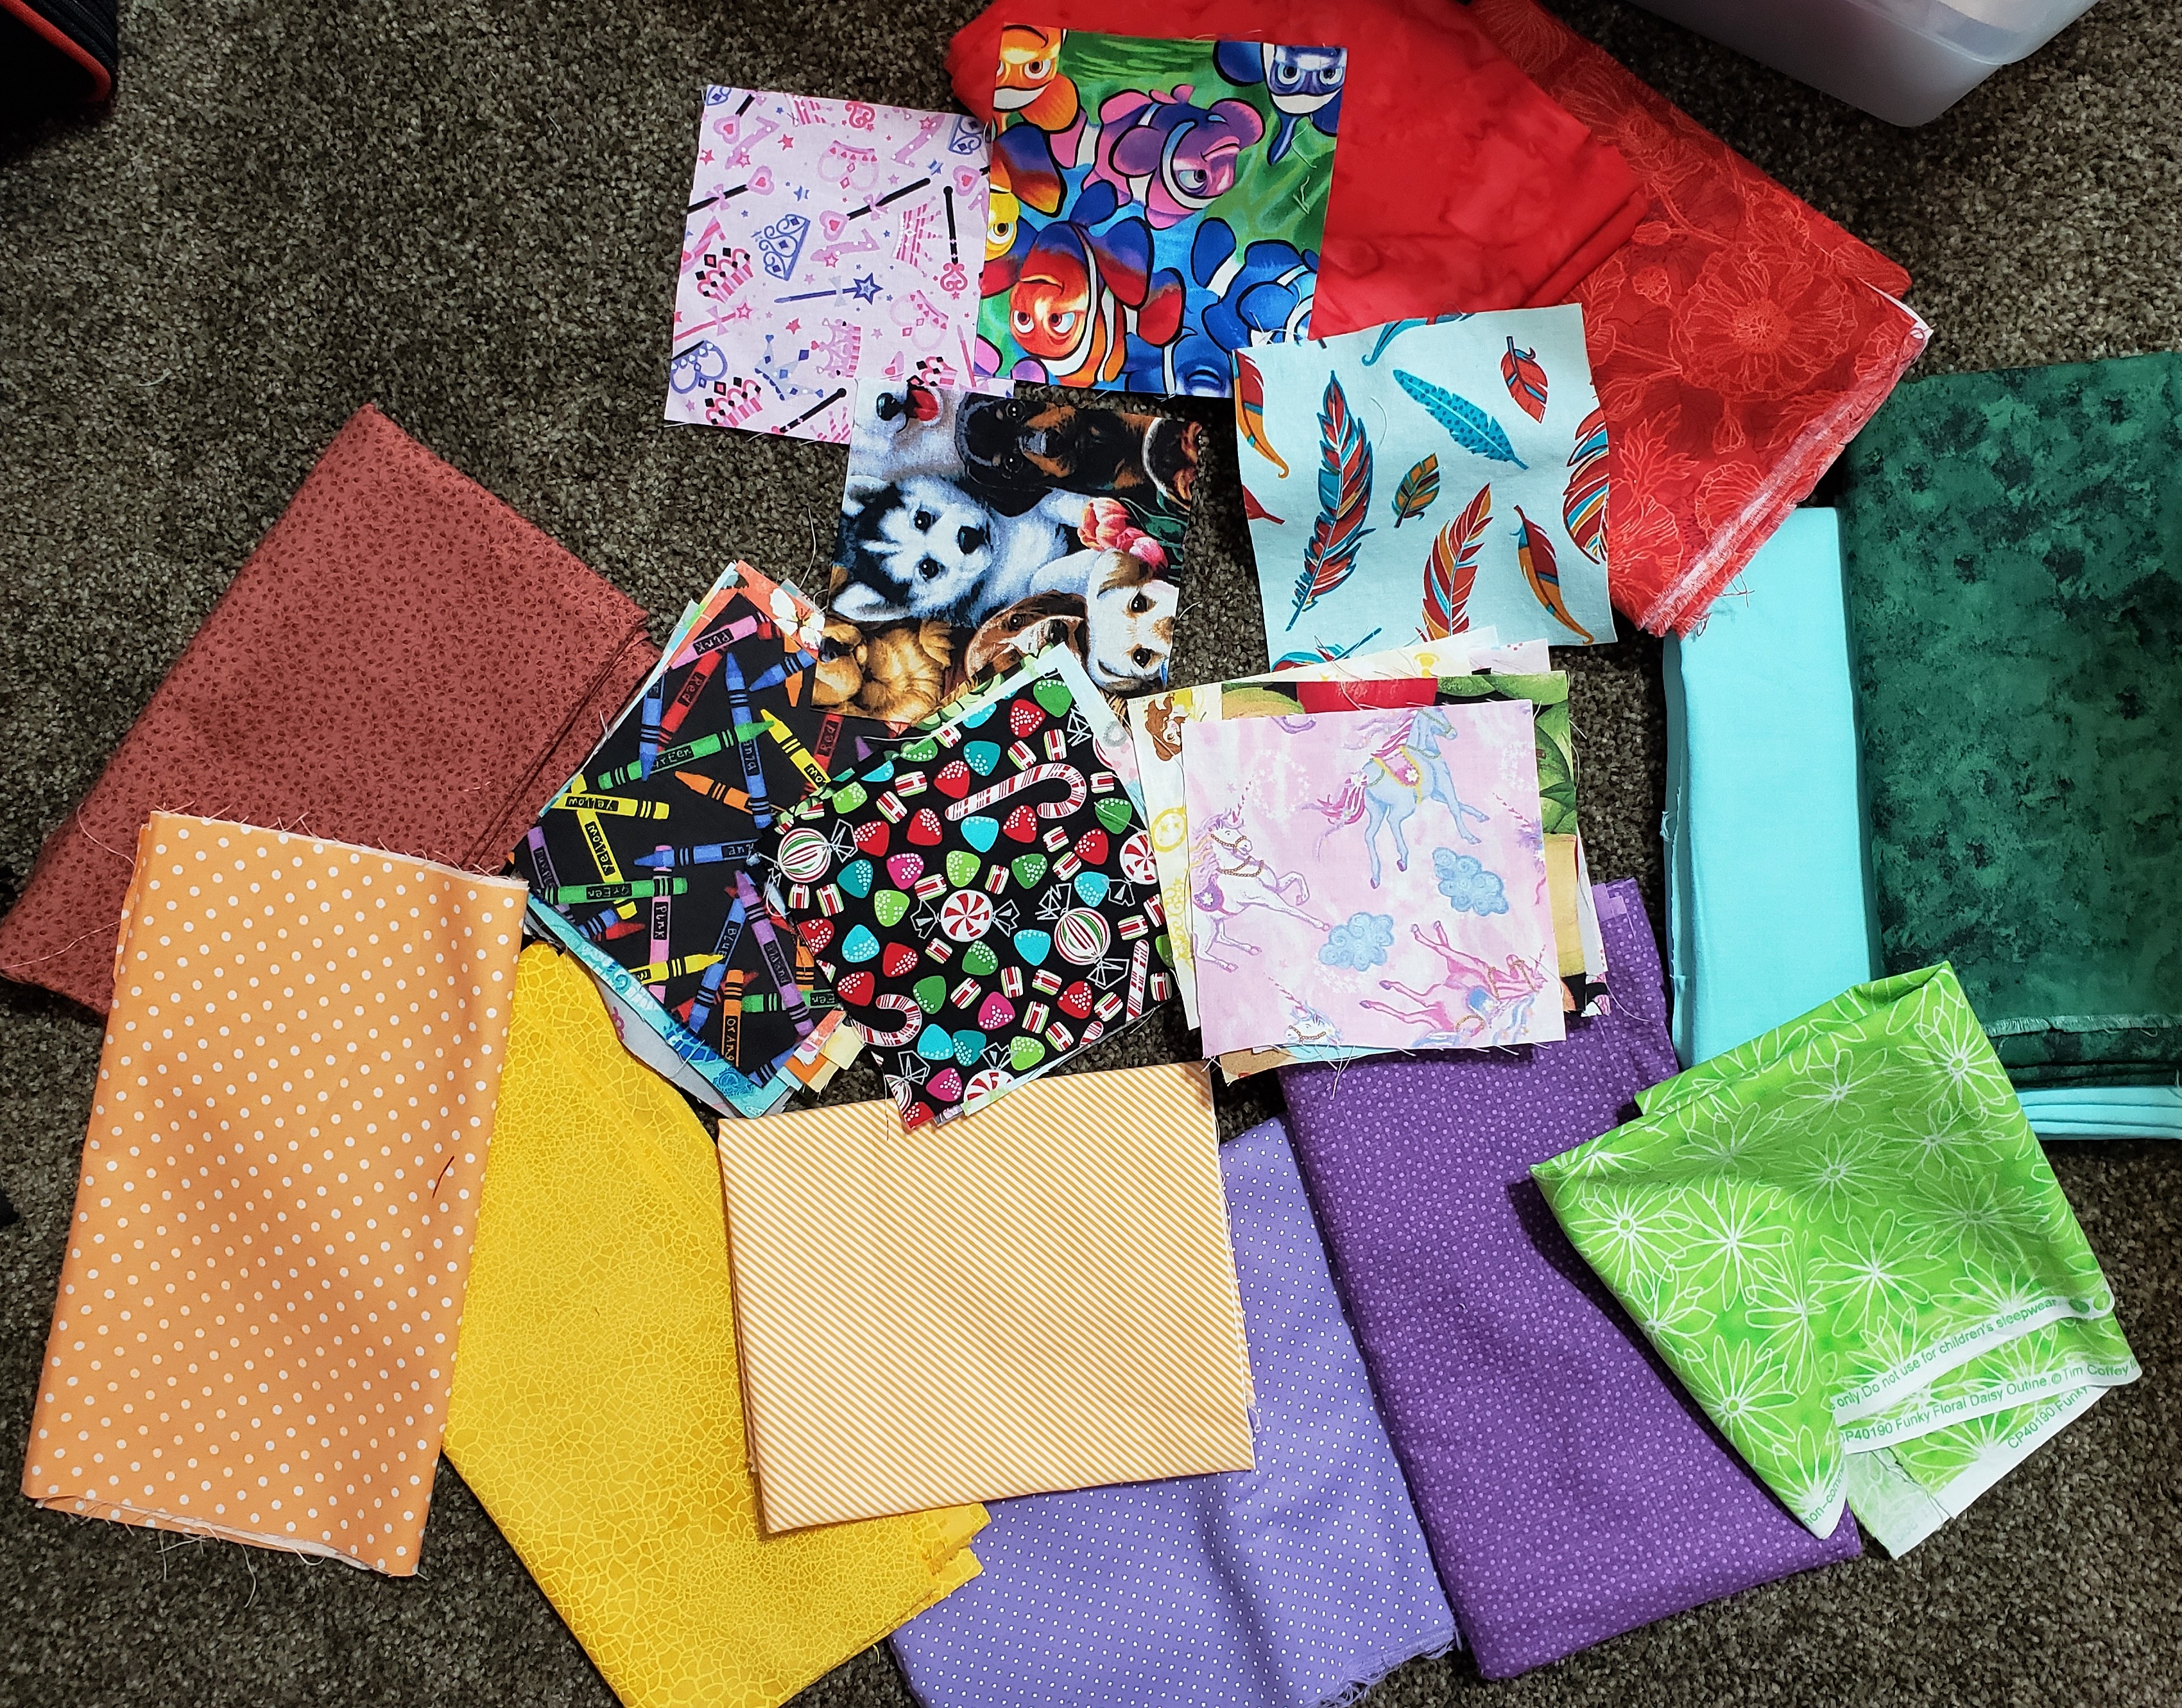
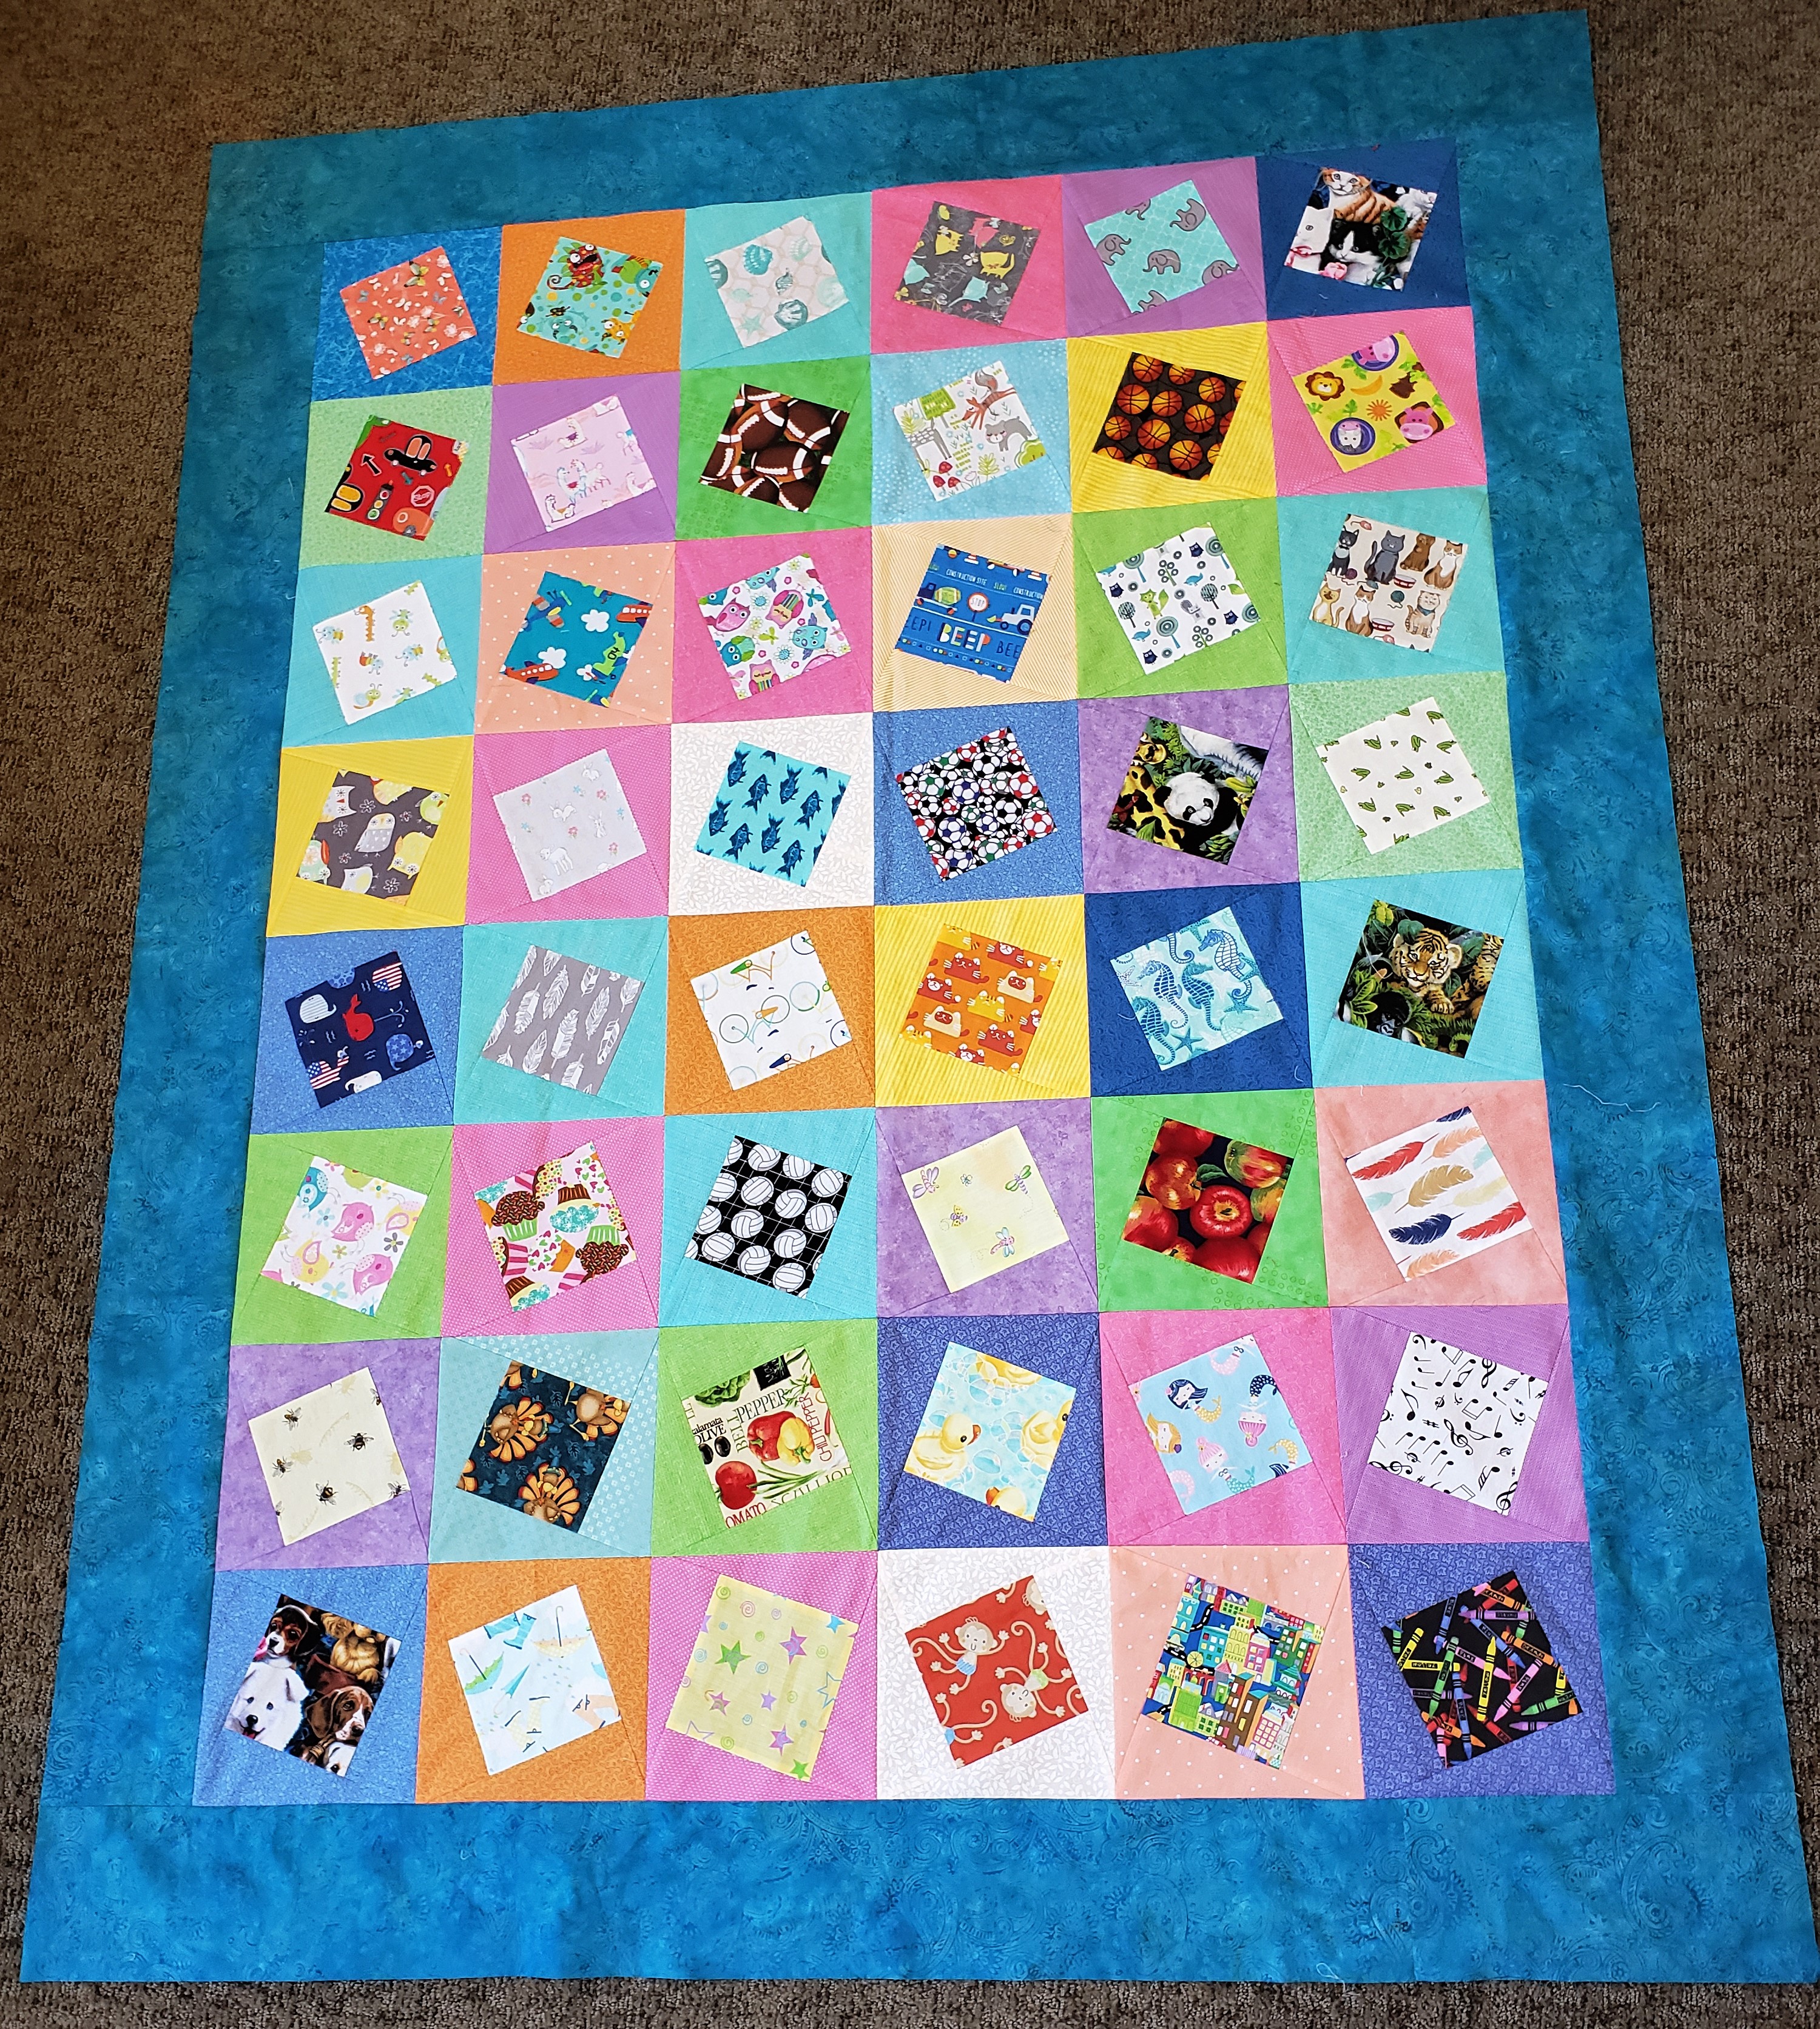
Because Mary’s design is such a cute way to show off some fun quilt prints, I decided to use this design to highlight some I-Spy quilt squares. (Some of you may remember that about two years ago, I made my darling granddaughter an I-Spy quilt. Read about it here.) It is remarkably easy to find I-Spy quilt squares to purchase on the internet. Here are some that I bought:
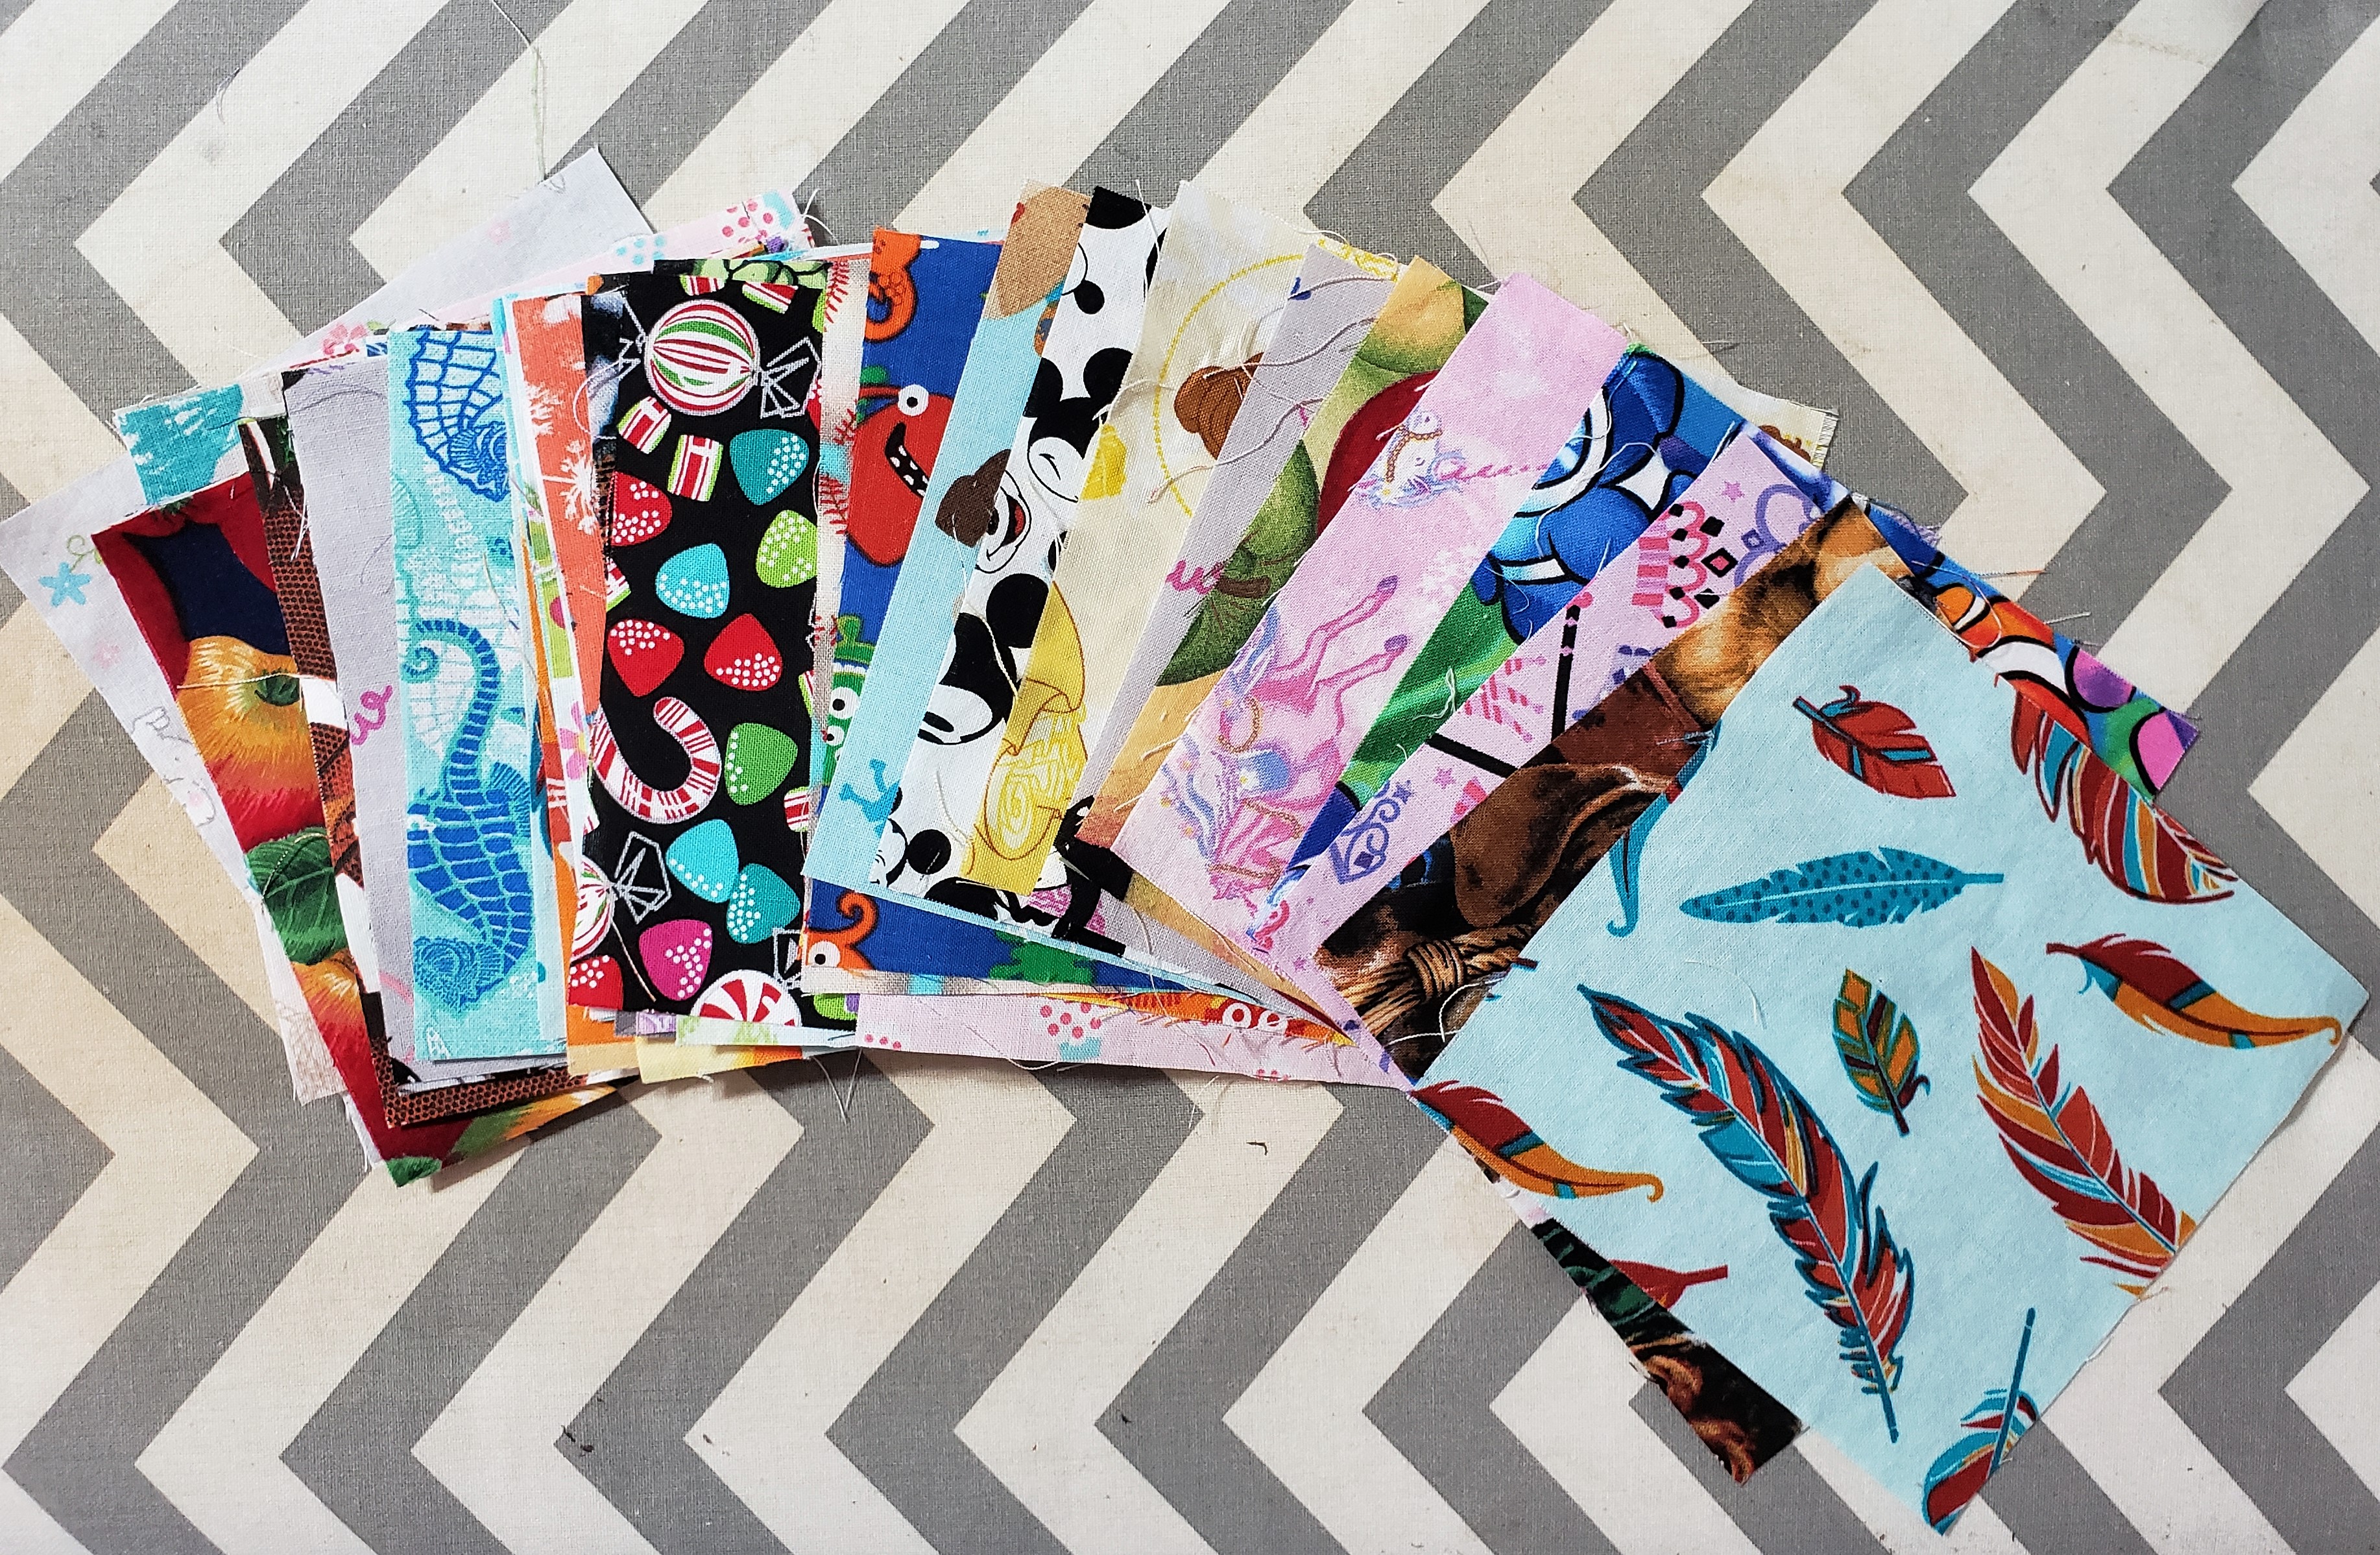
Next, I had to find the right border fabrics for each I-Spy square. I ended up sitting on the floor in the middle of my sewing room, surrounded by fabric and squares, patiently trying each square with several fabrics. Tip #1: do not do this if you are in a hurry or you value neatness and order.
After I found border fabric to match each square, I cut two rectangles of border fabric for each square, pinned the squares to the rectangles, then laid them on my family room floor so I could decide which colors should sit next to which. Yes, I spent a lot of time on the floor arranging this quilt.
After I decided the arrangement of the squares, I took a photo in case the squares ever got out of order and I had to arrange them again. Don’t skip this step! Someone in your family might randomly decide to vacuum and so pick up all the squares. (You can’t really complain if someone spontaneously vacuums.)
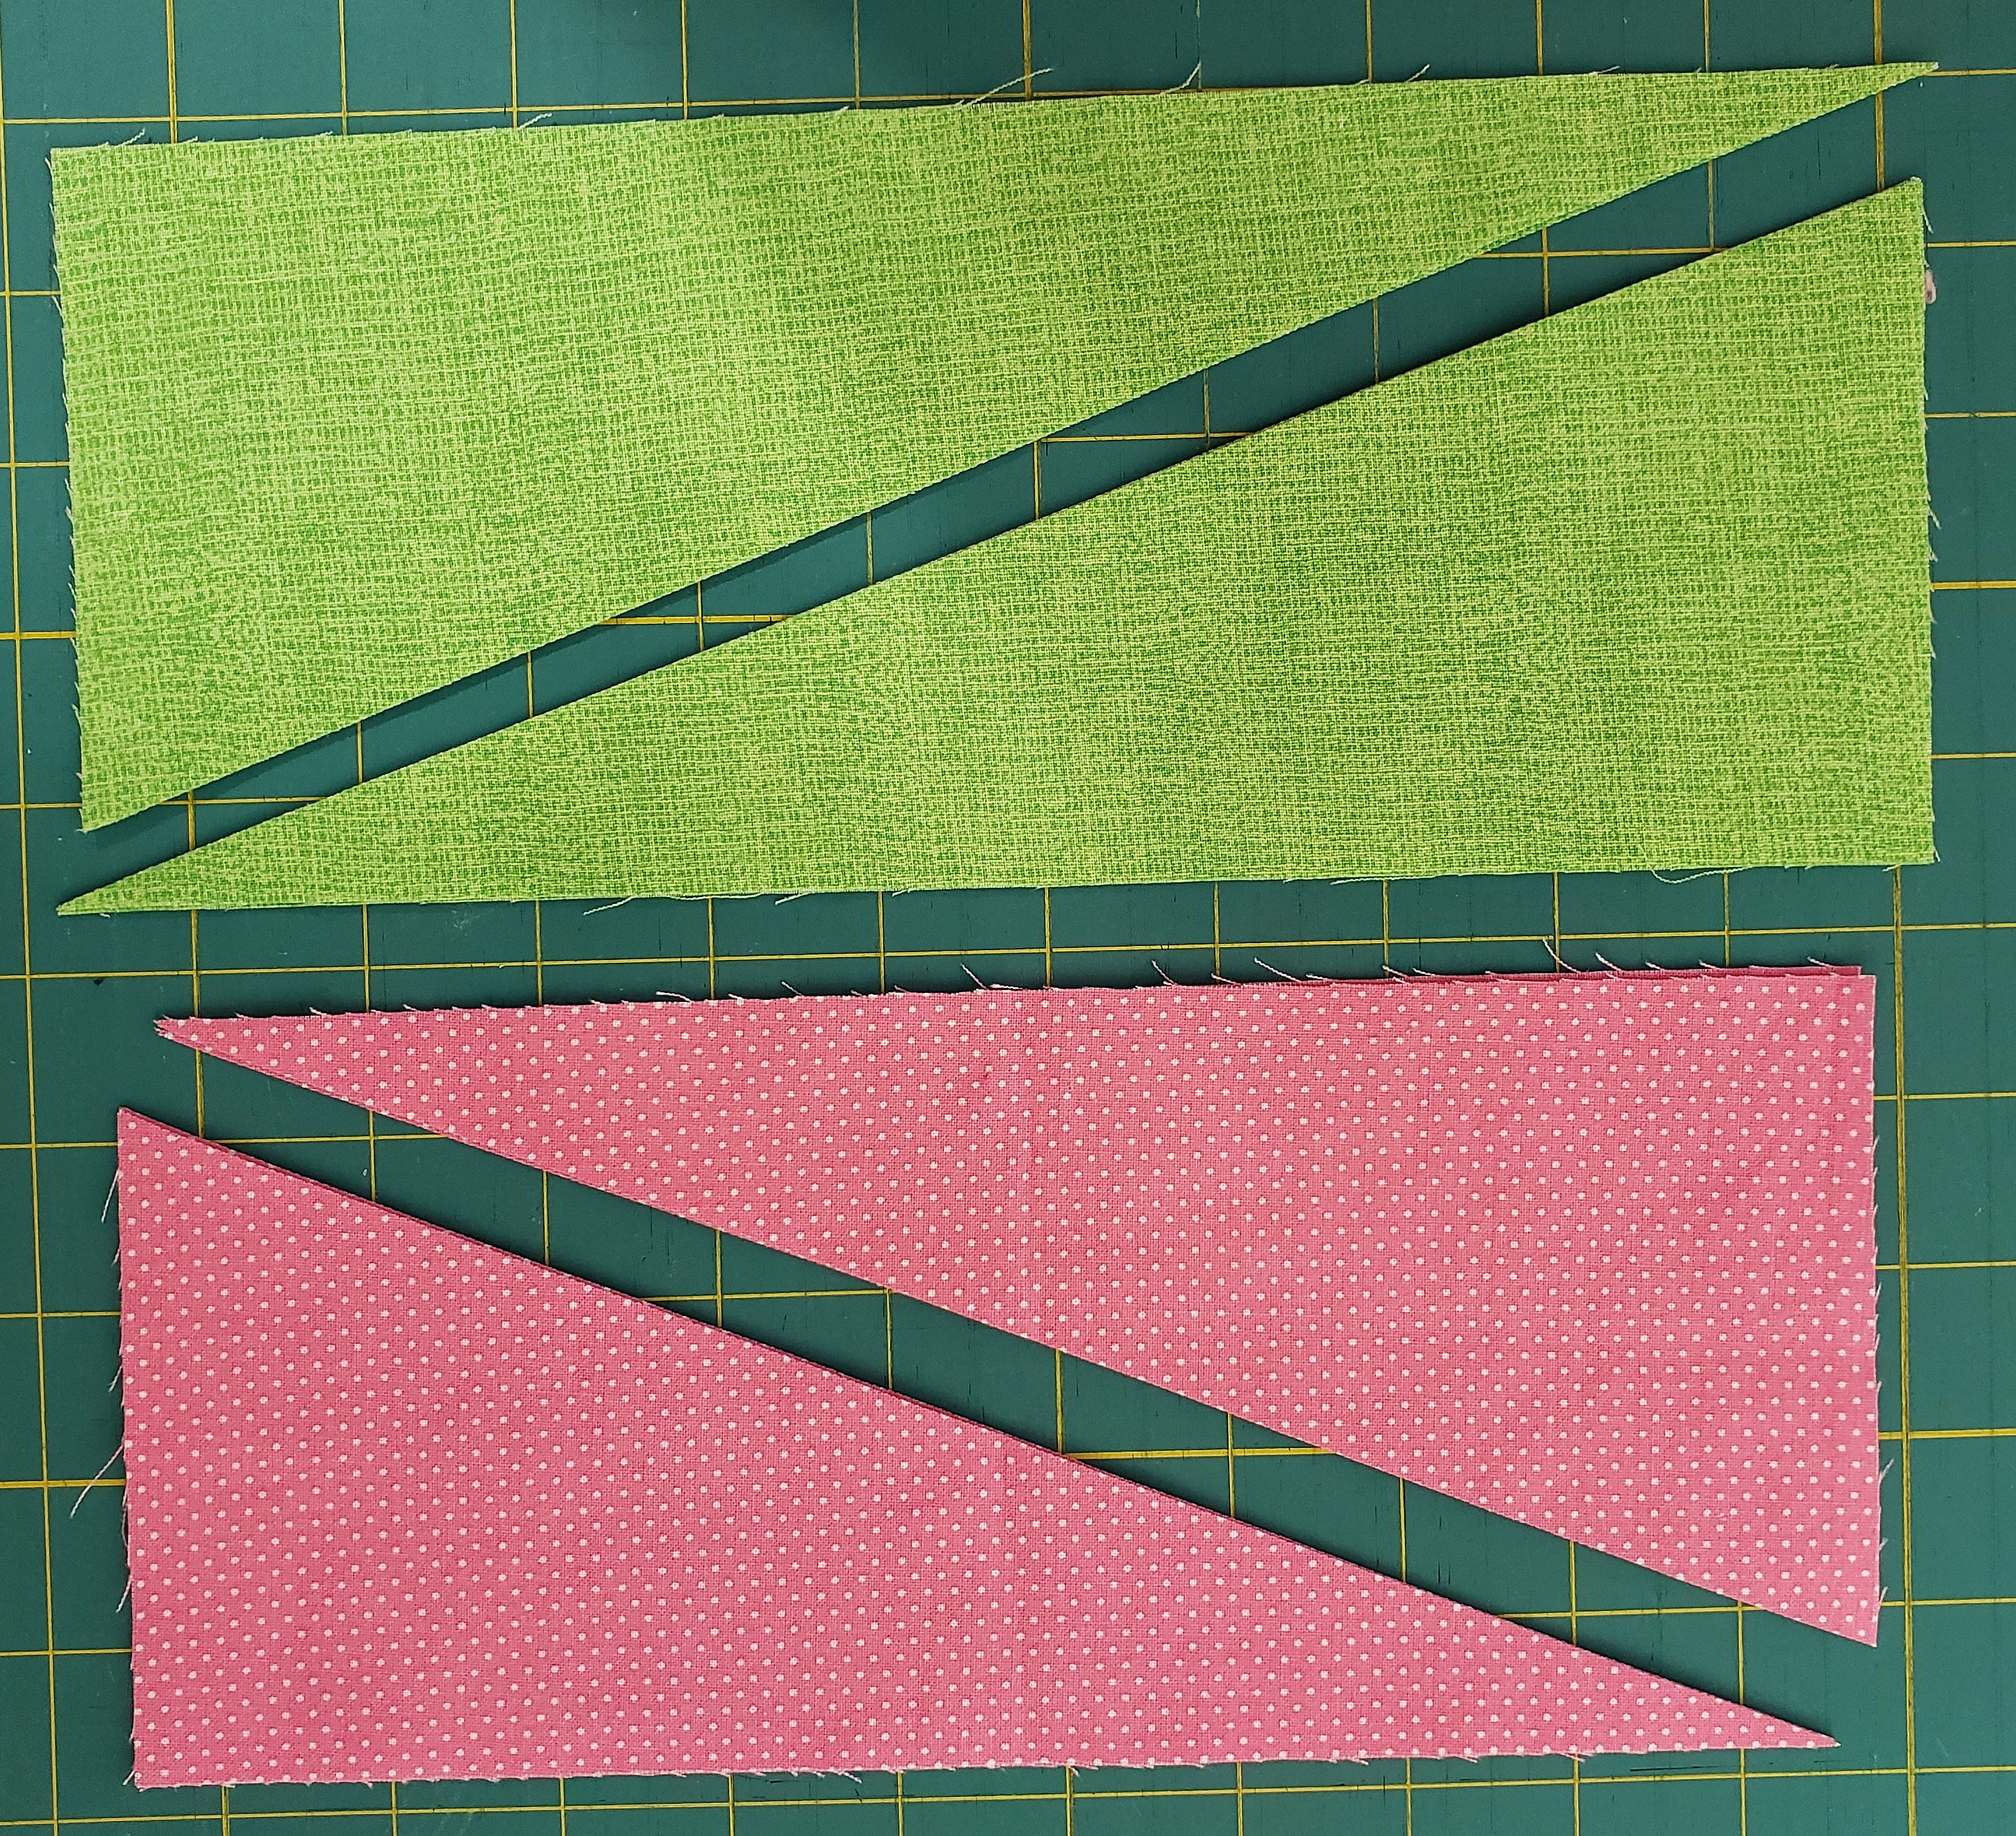
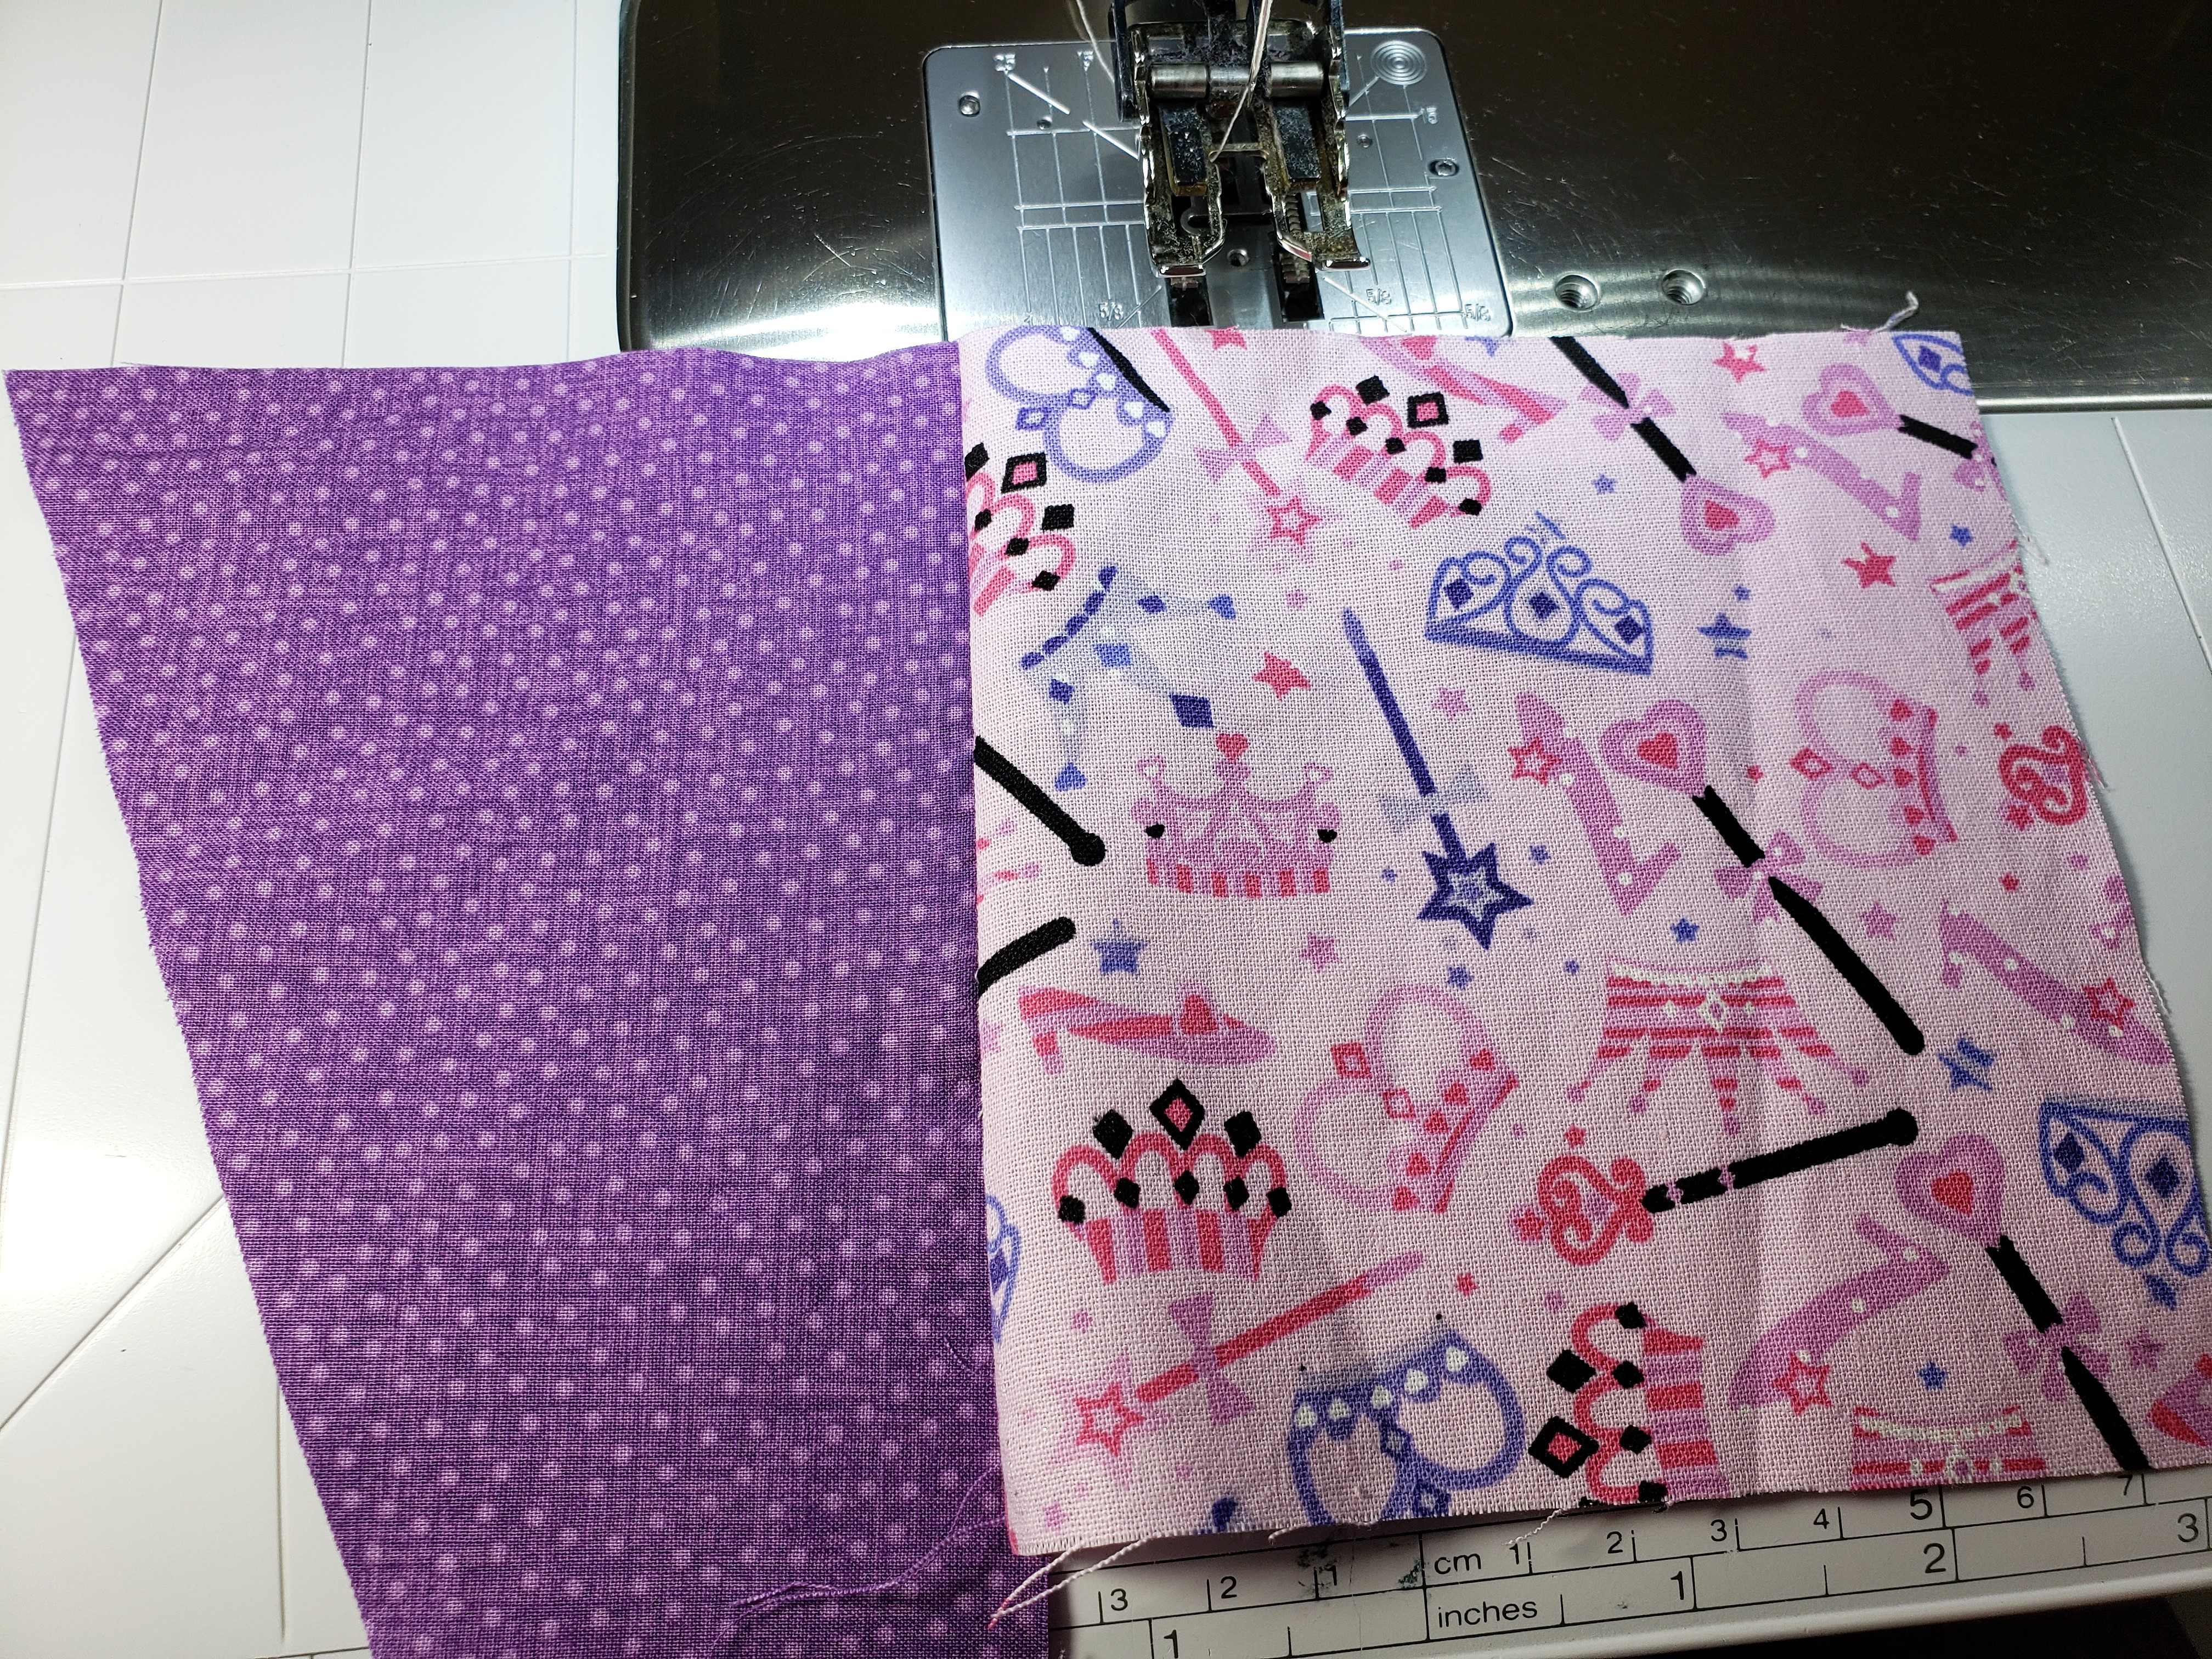
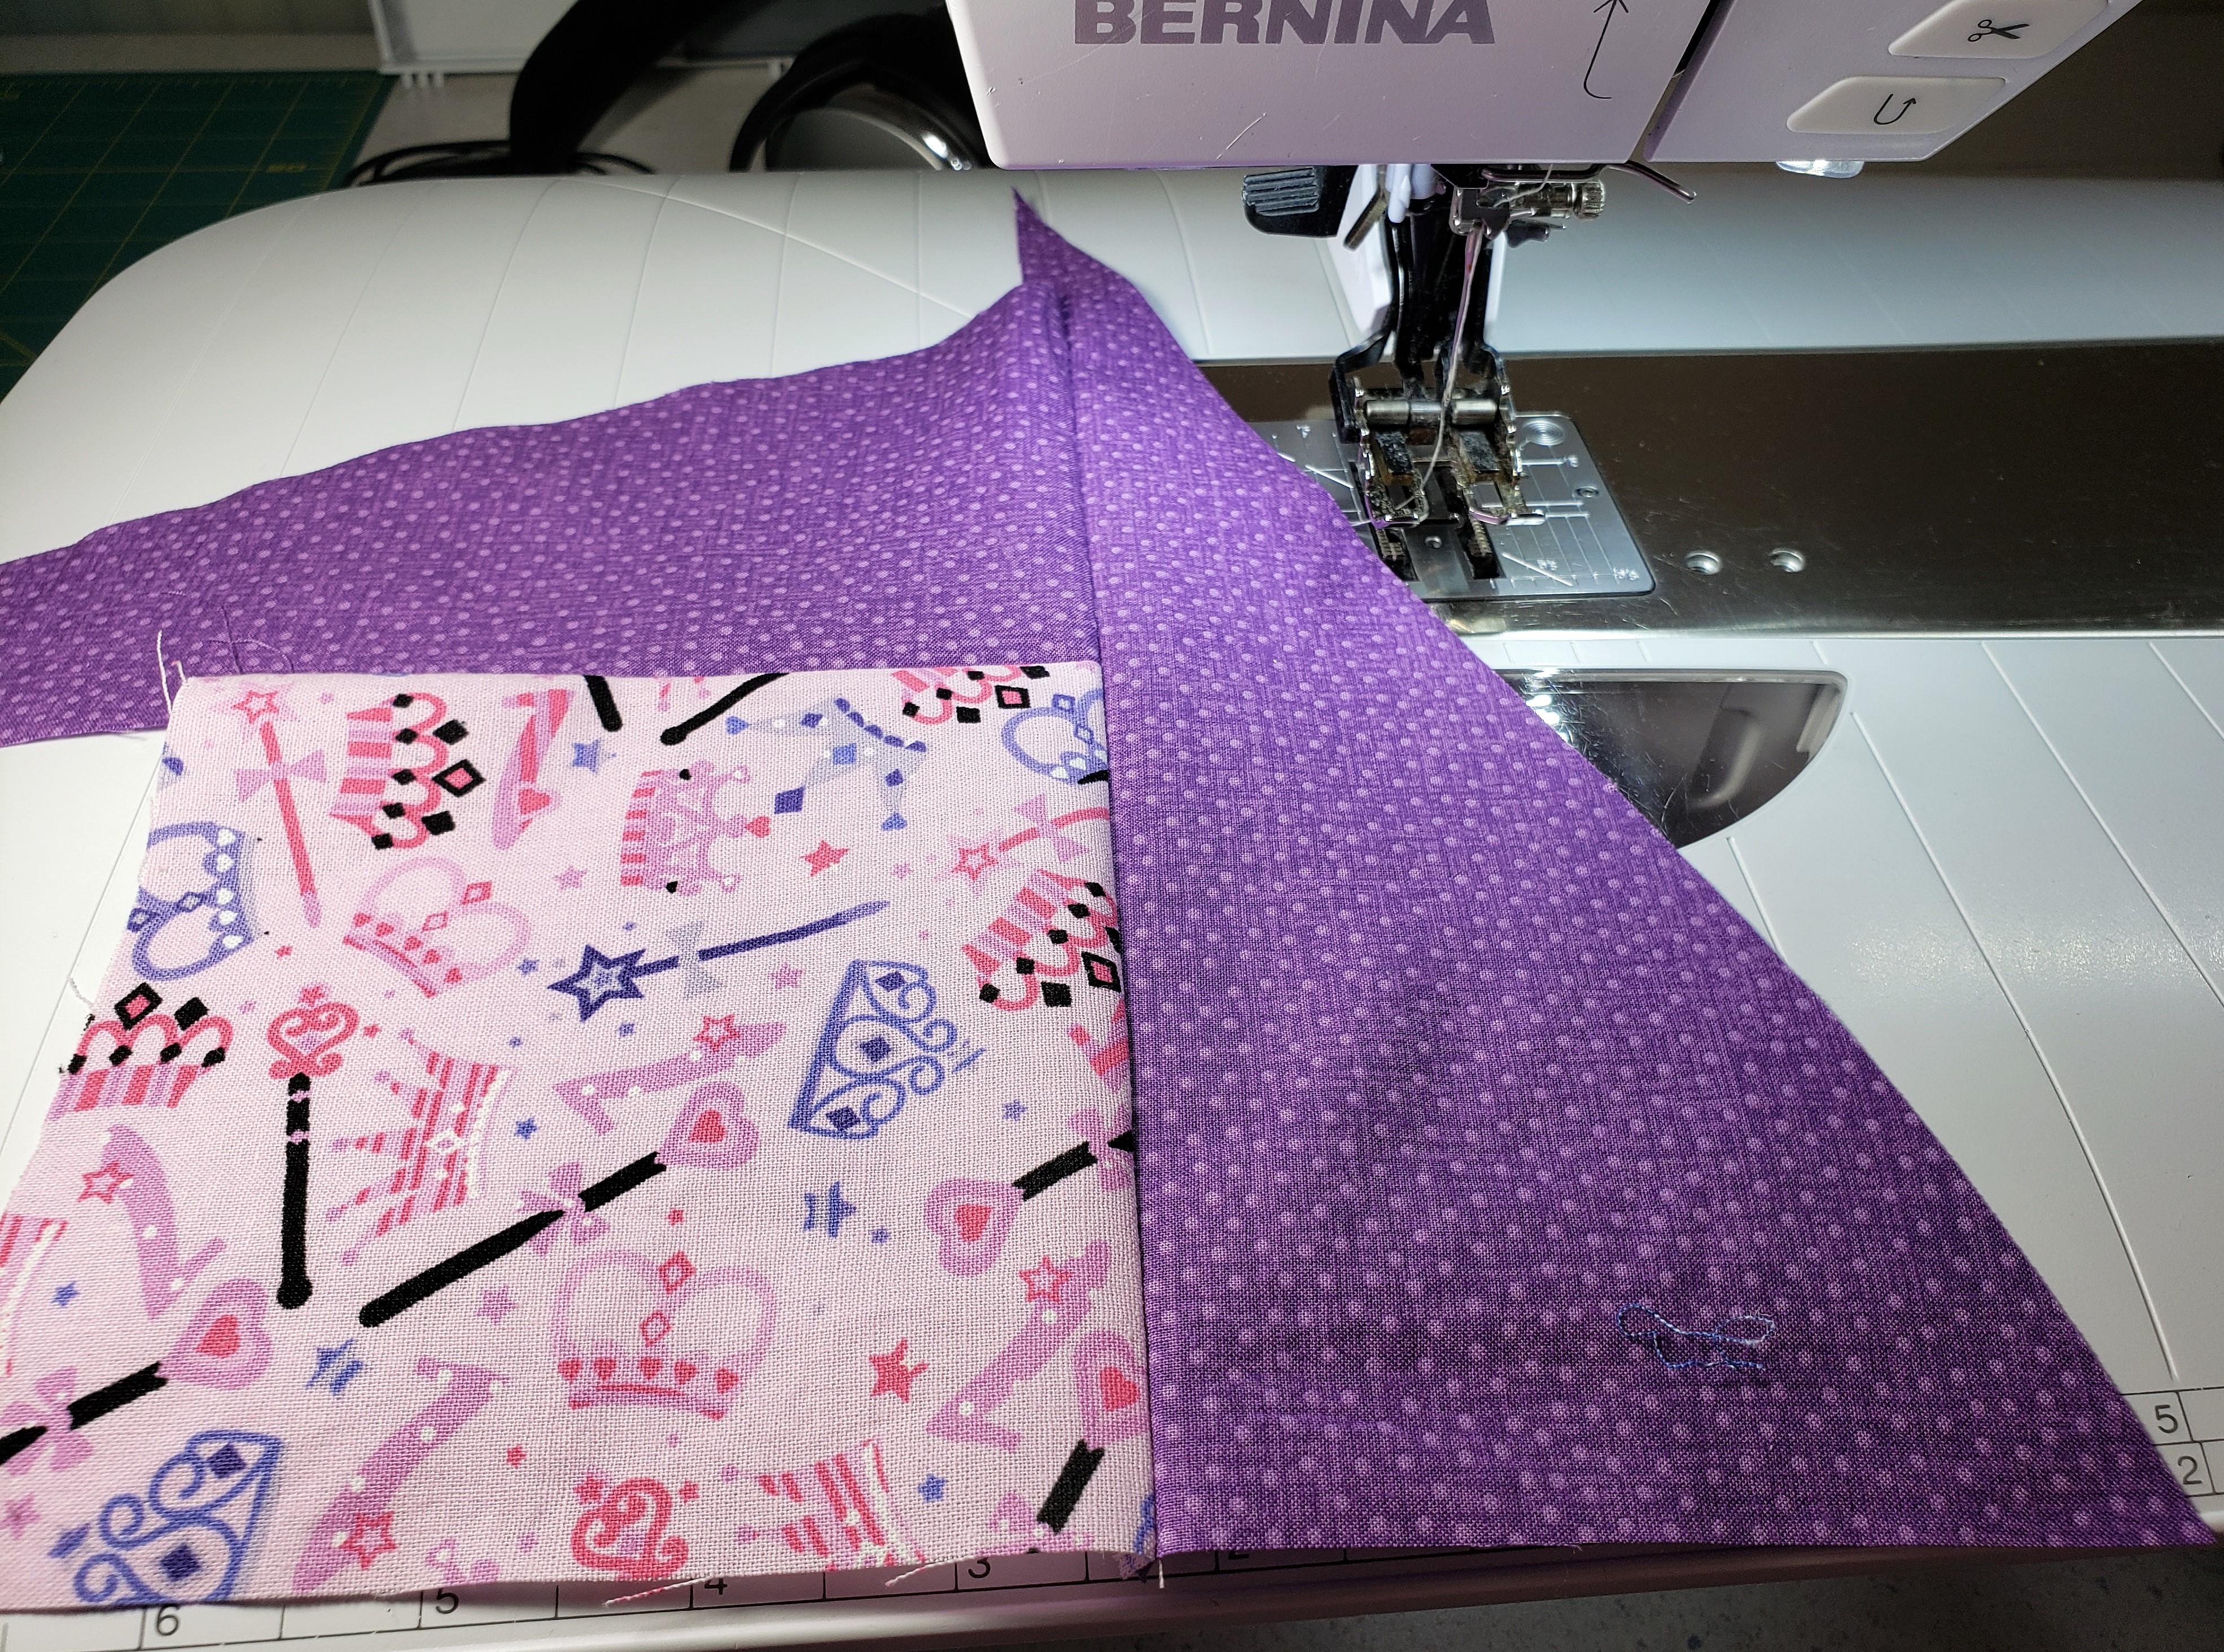
In Mary’s Dr. Seuss quilt above, each square tilts the same direction, but I decided I wanted my squares to alternate the direction they would twist, and you determine the direction the squares twist by the way you cut the rectangles. If you cut your rectangles from the bottom left to top right and then sew those pieces to the square, the square will twist in one direction. But if you cut your rectangles from the top left to the bottom right and then sew the pieces to the square, the square will twist in the other direction. Tip #2: Make yourself two sample squares, each twisting in a different direction, so you can see exactly how this works.
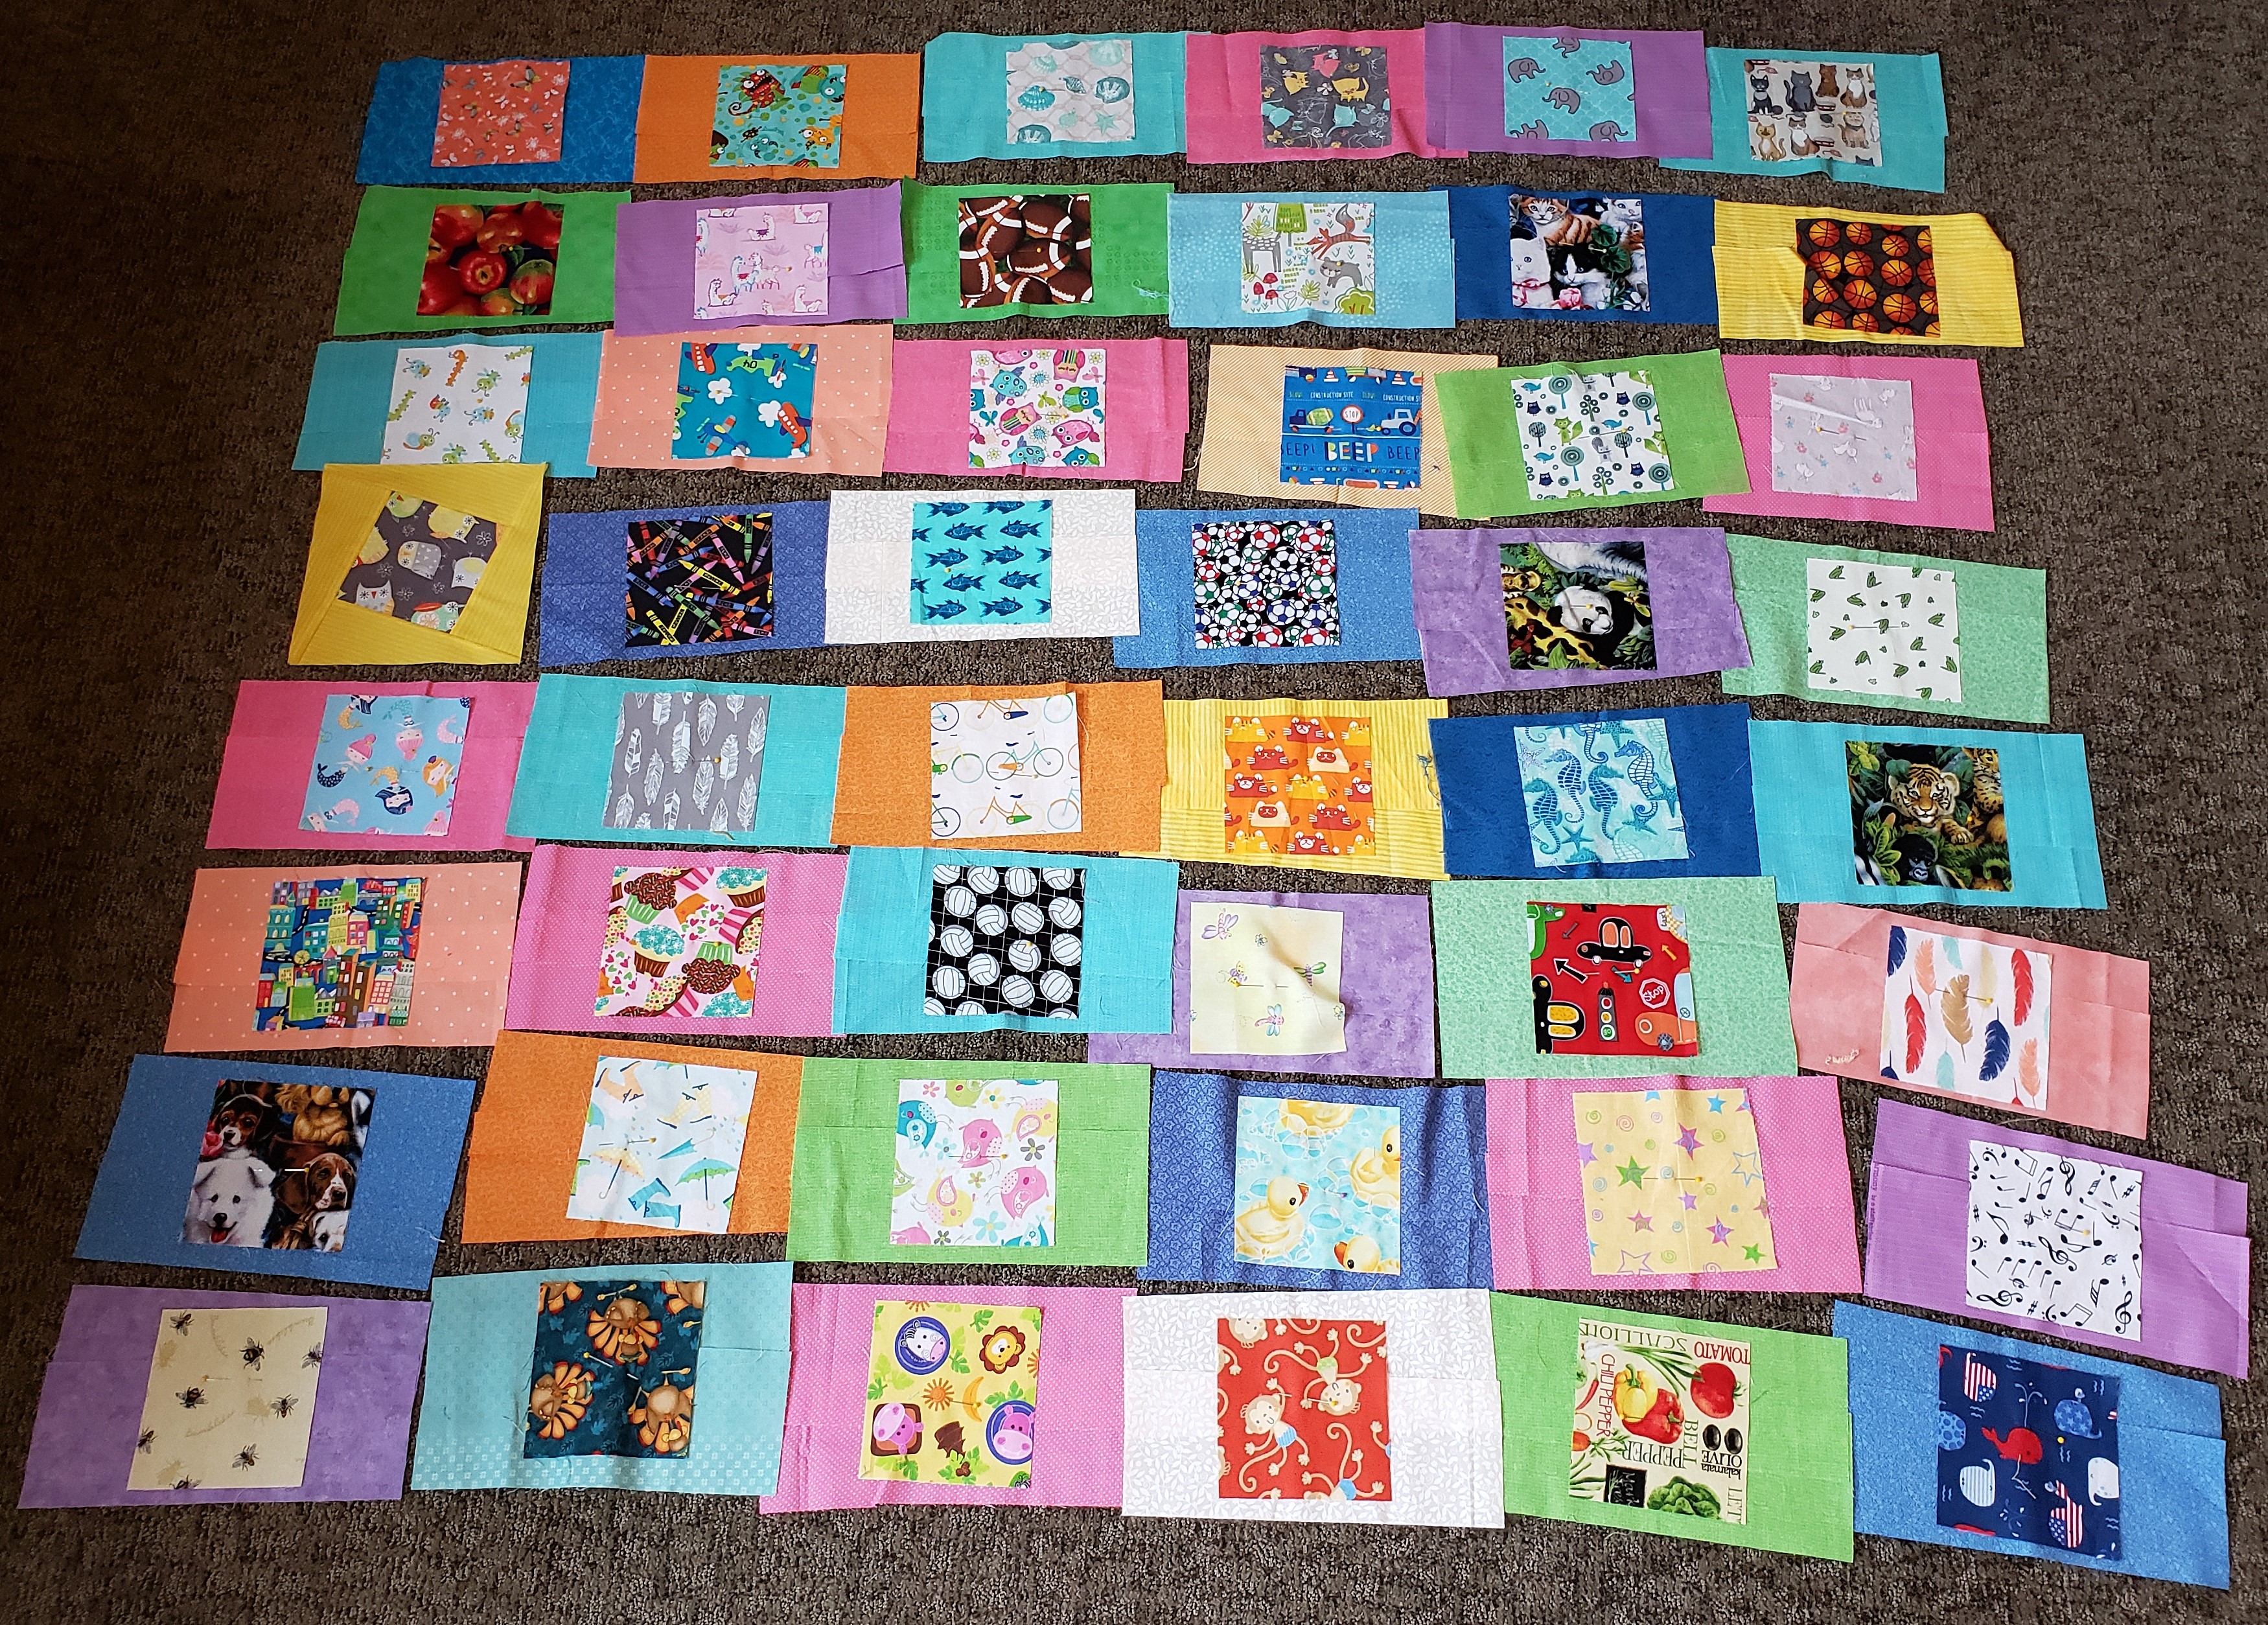
I am enough of a perfectionist that I wanted 1) all the squares sitting exactly next to the ones I wanted them to sit by, and 2) all the squares alternating the way they twisted. I finally accomplished this by sewing two columns of squares at a time. First, I gathered up the squares in the two columns that all twisted to the right, cut the rectangles the correct way, and then sewed the four pieces of the rectangles to each square.
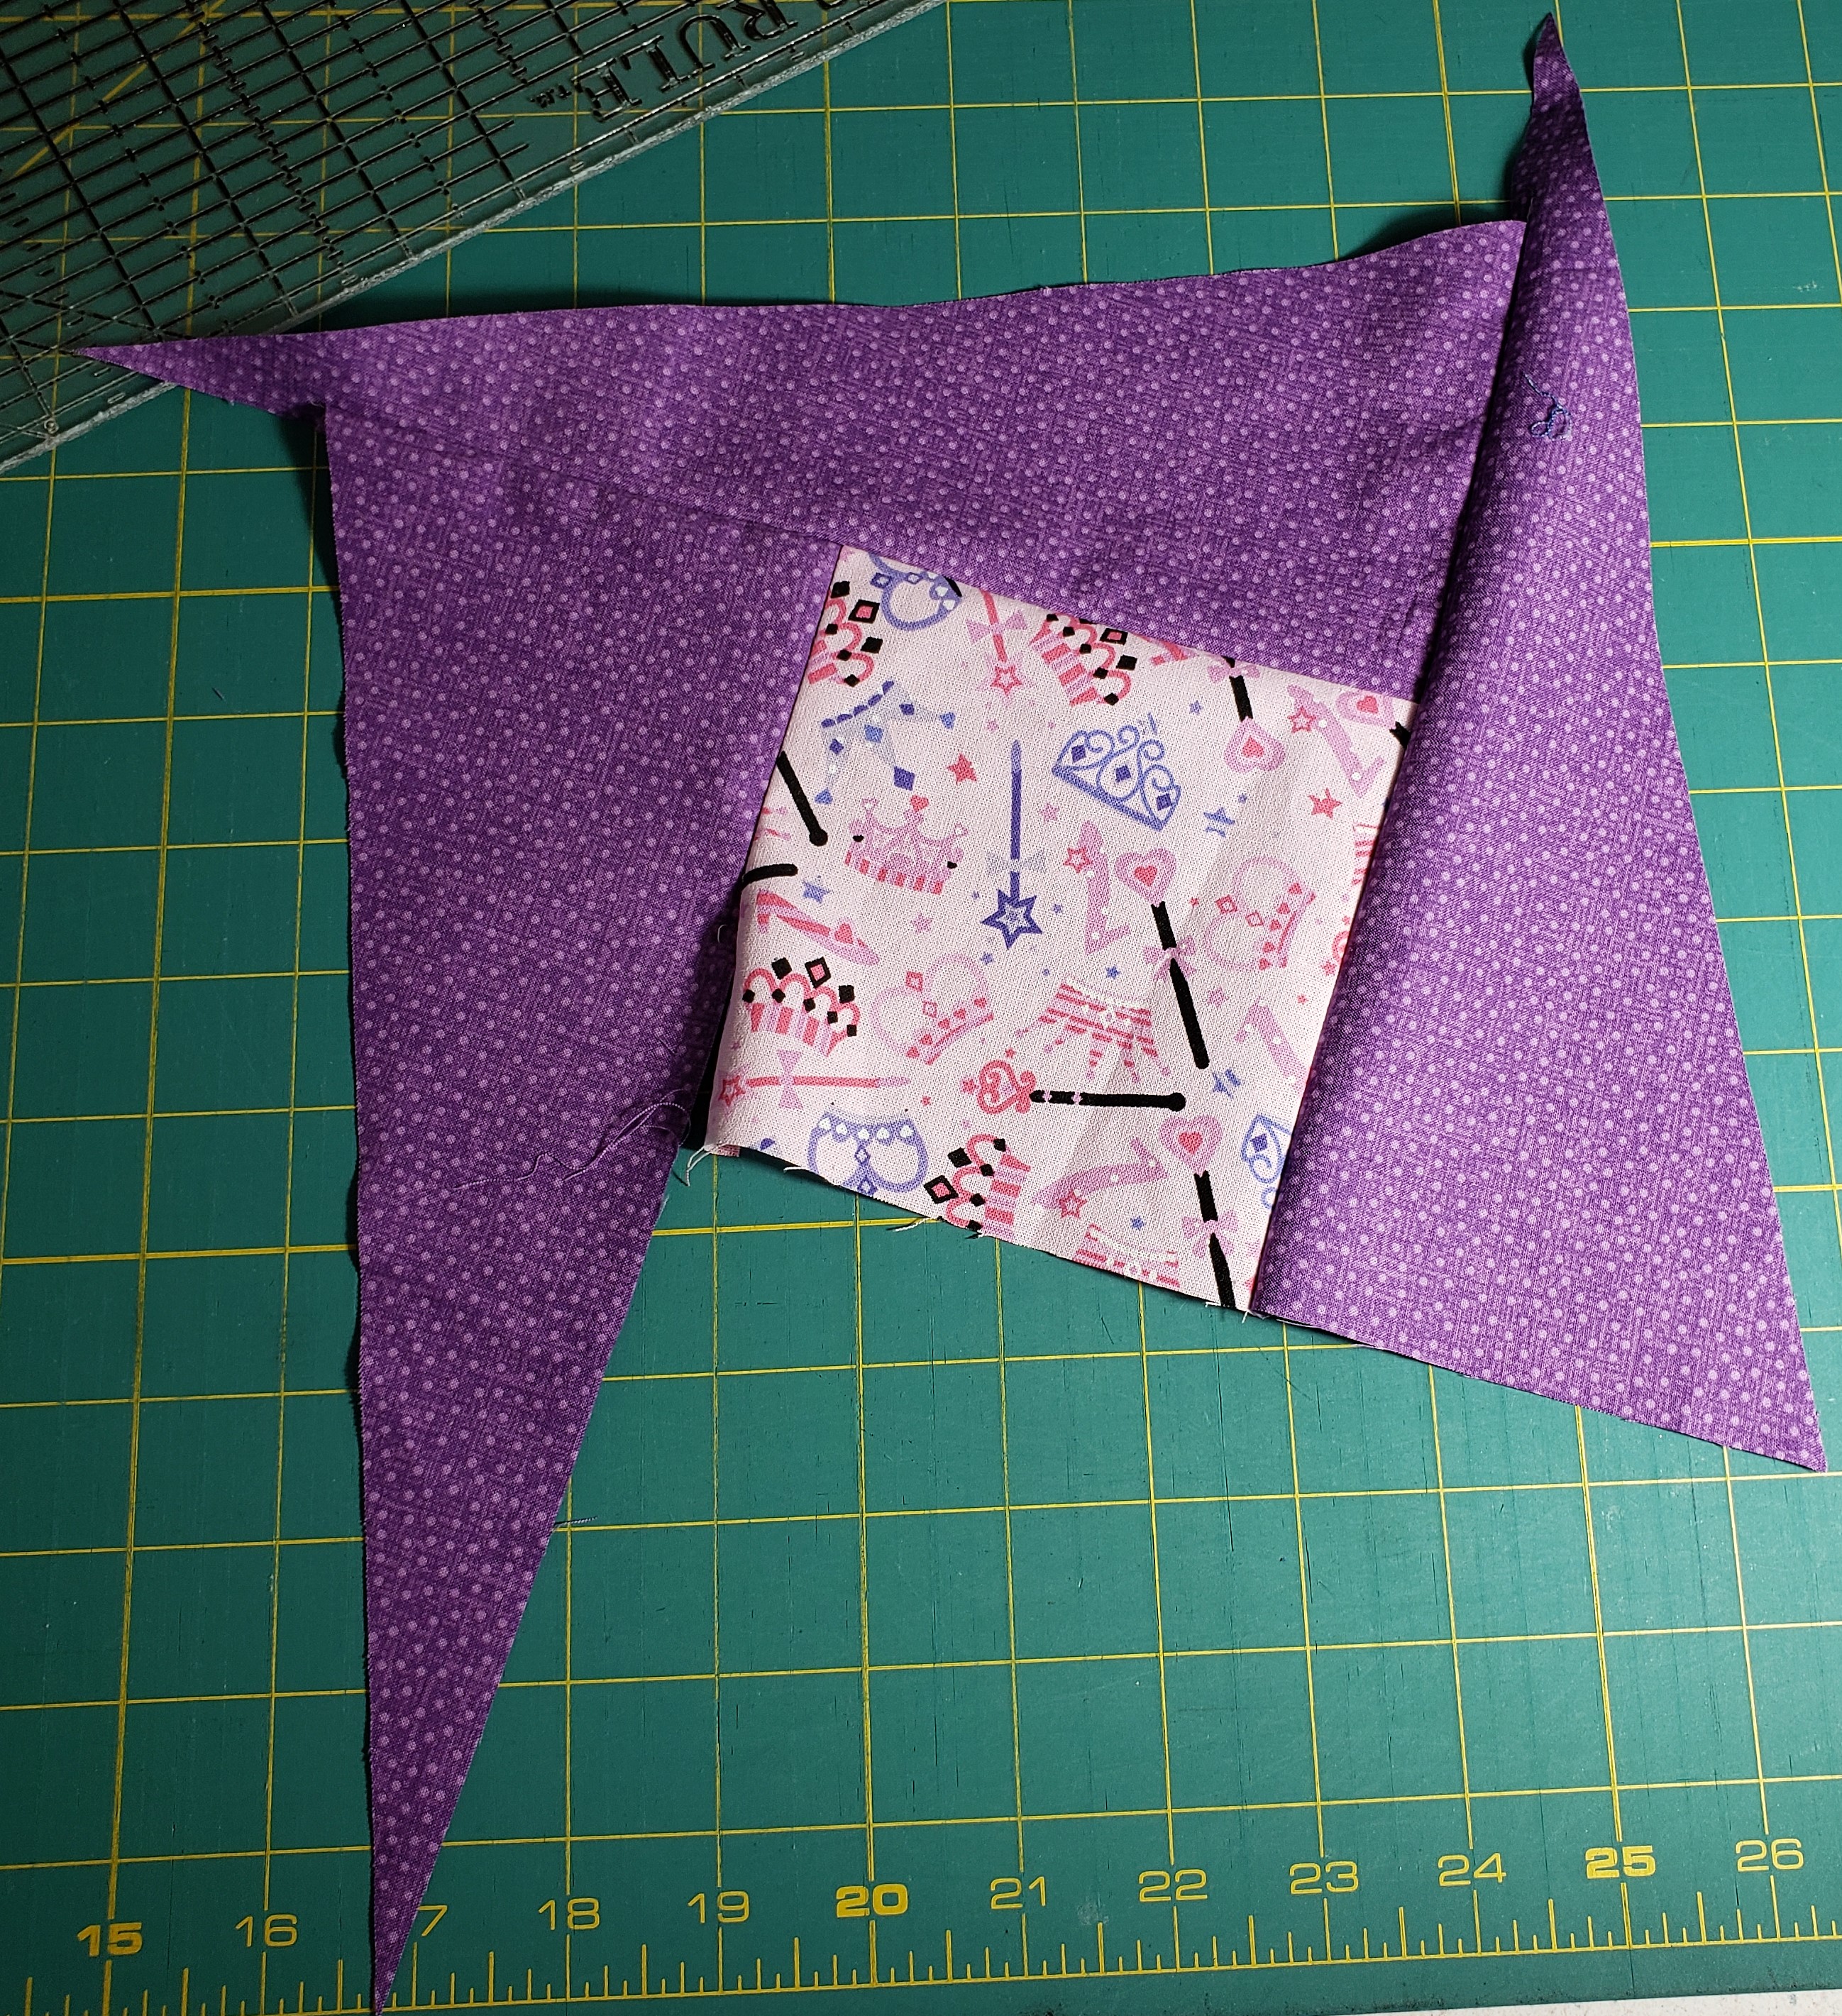
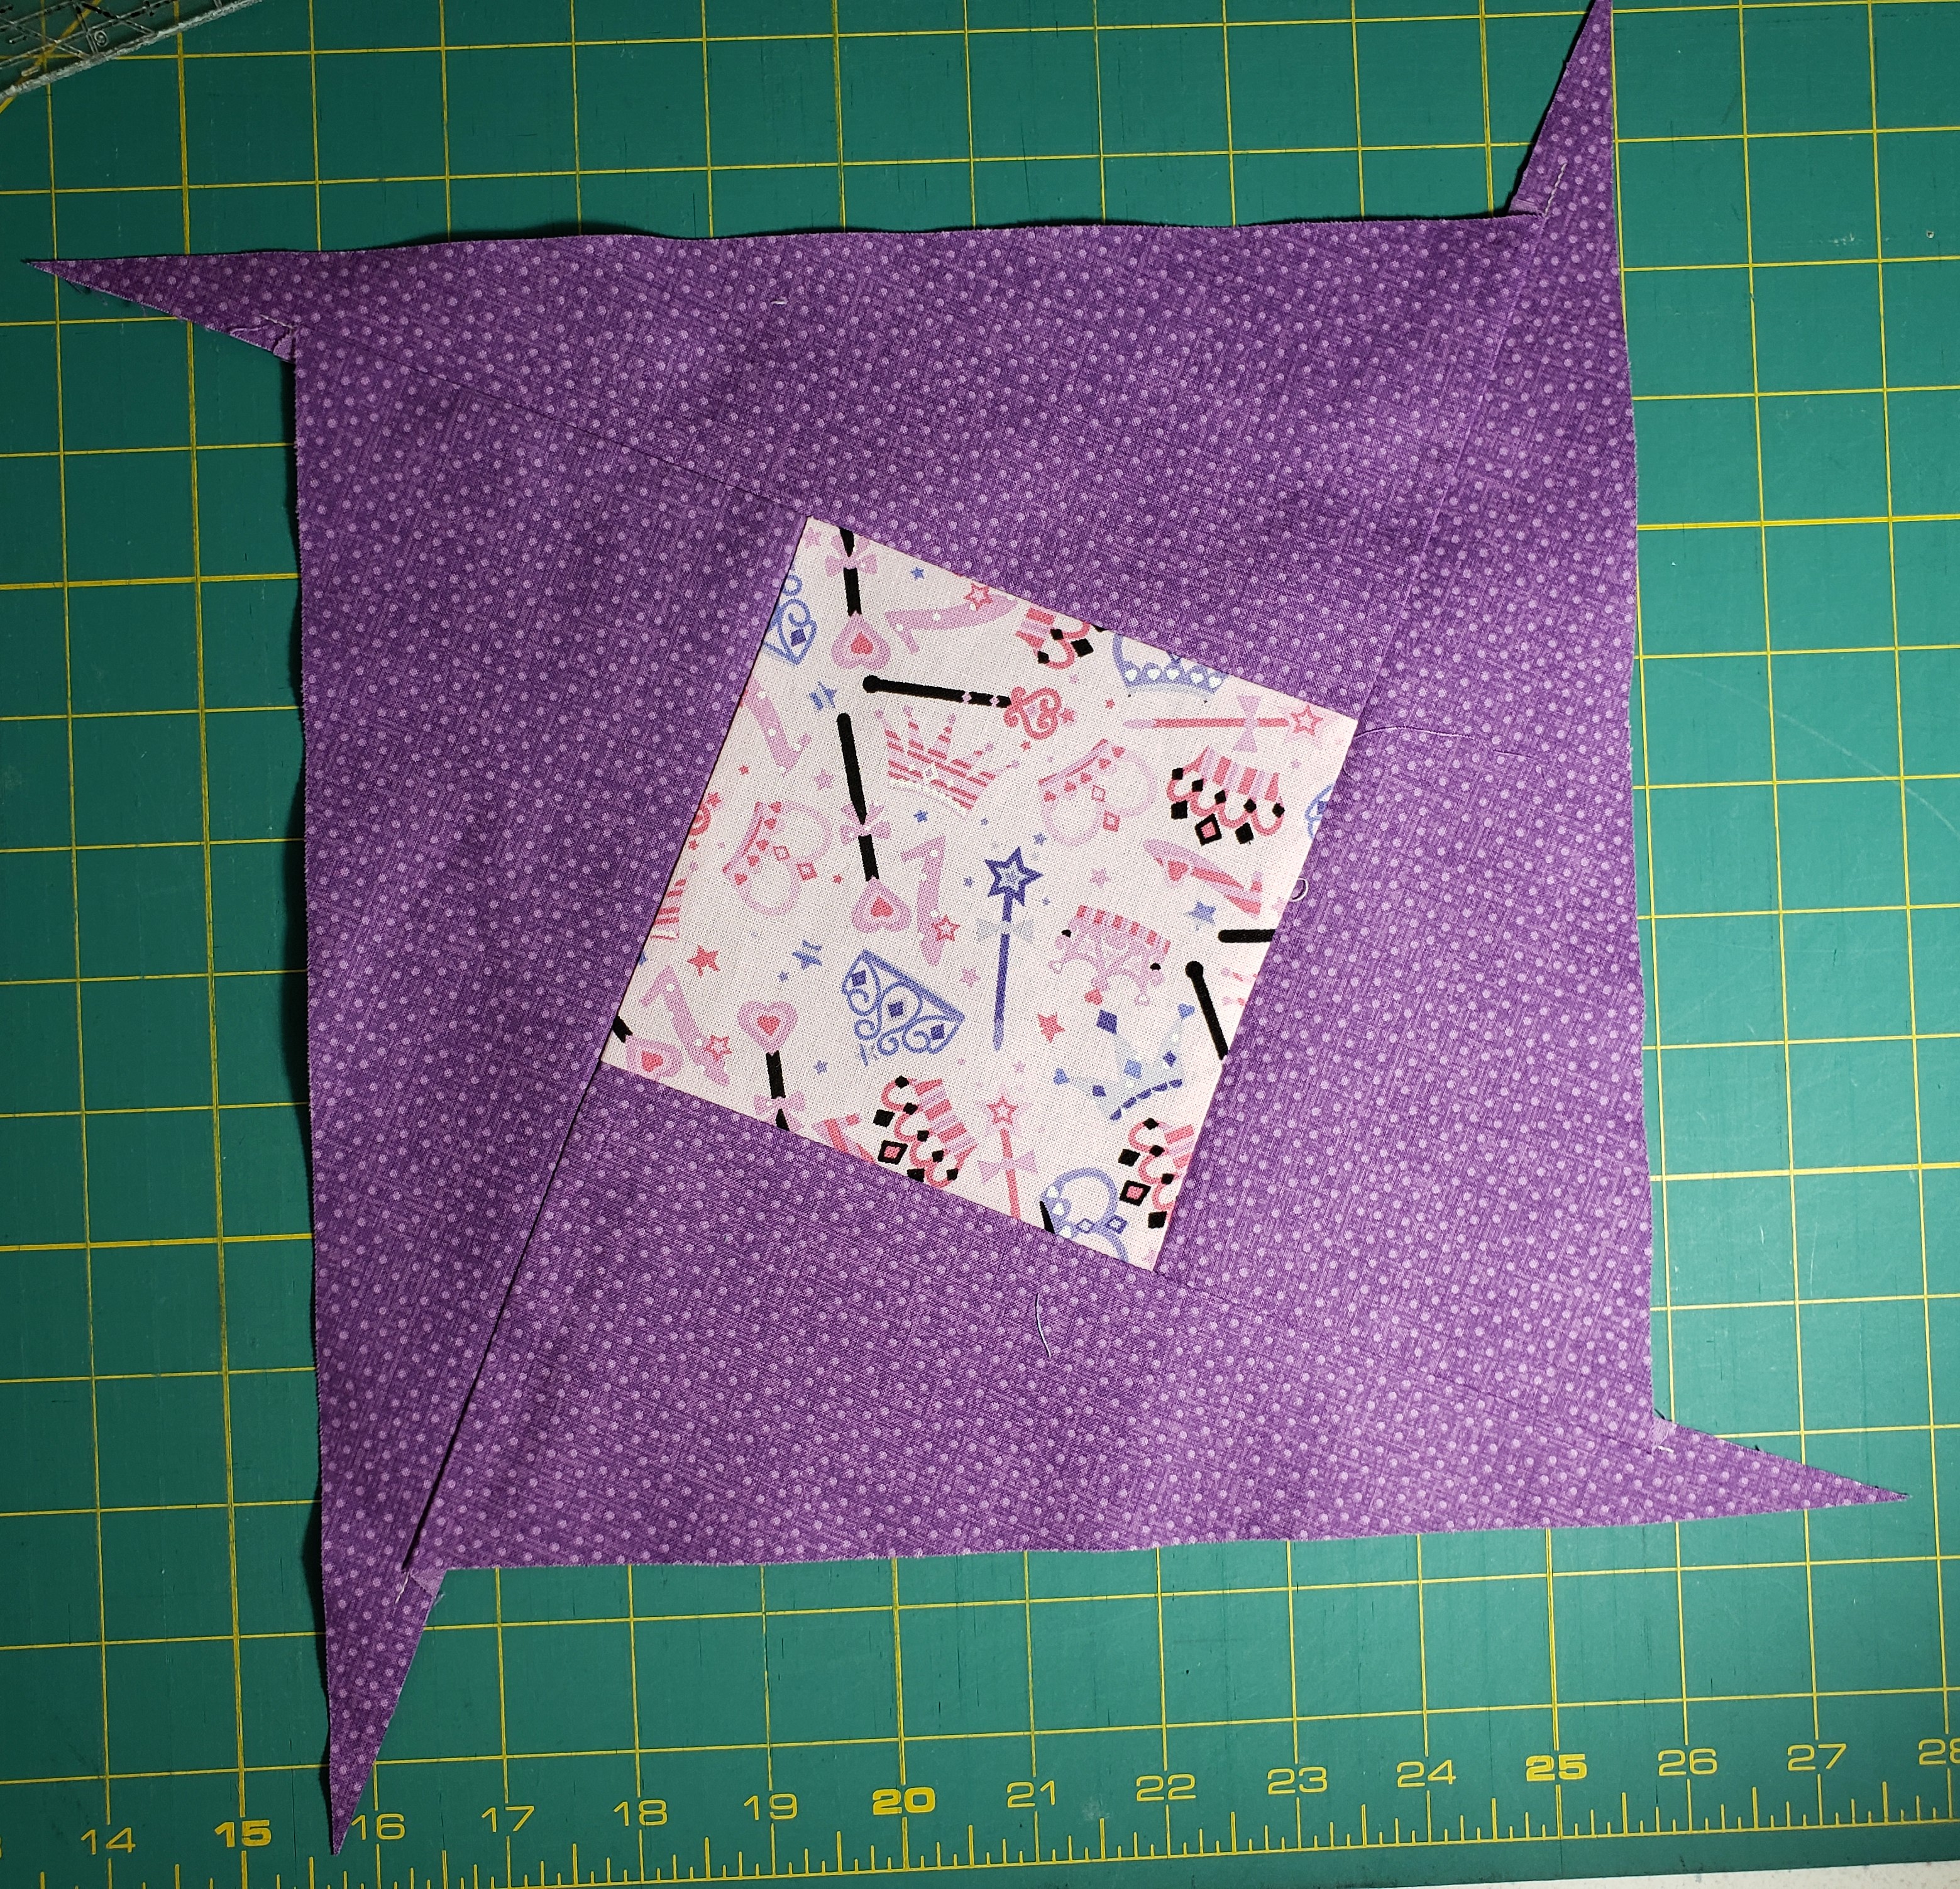
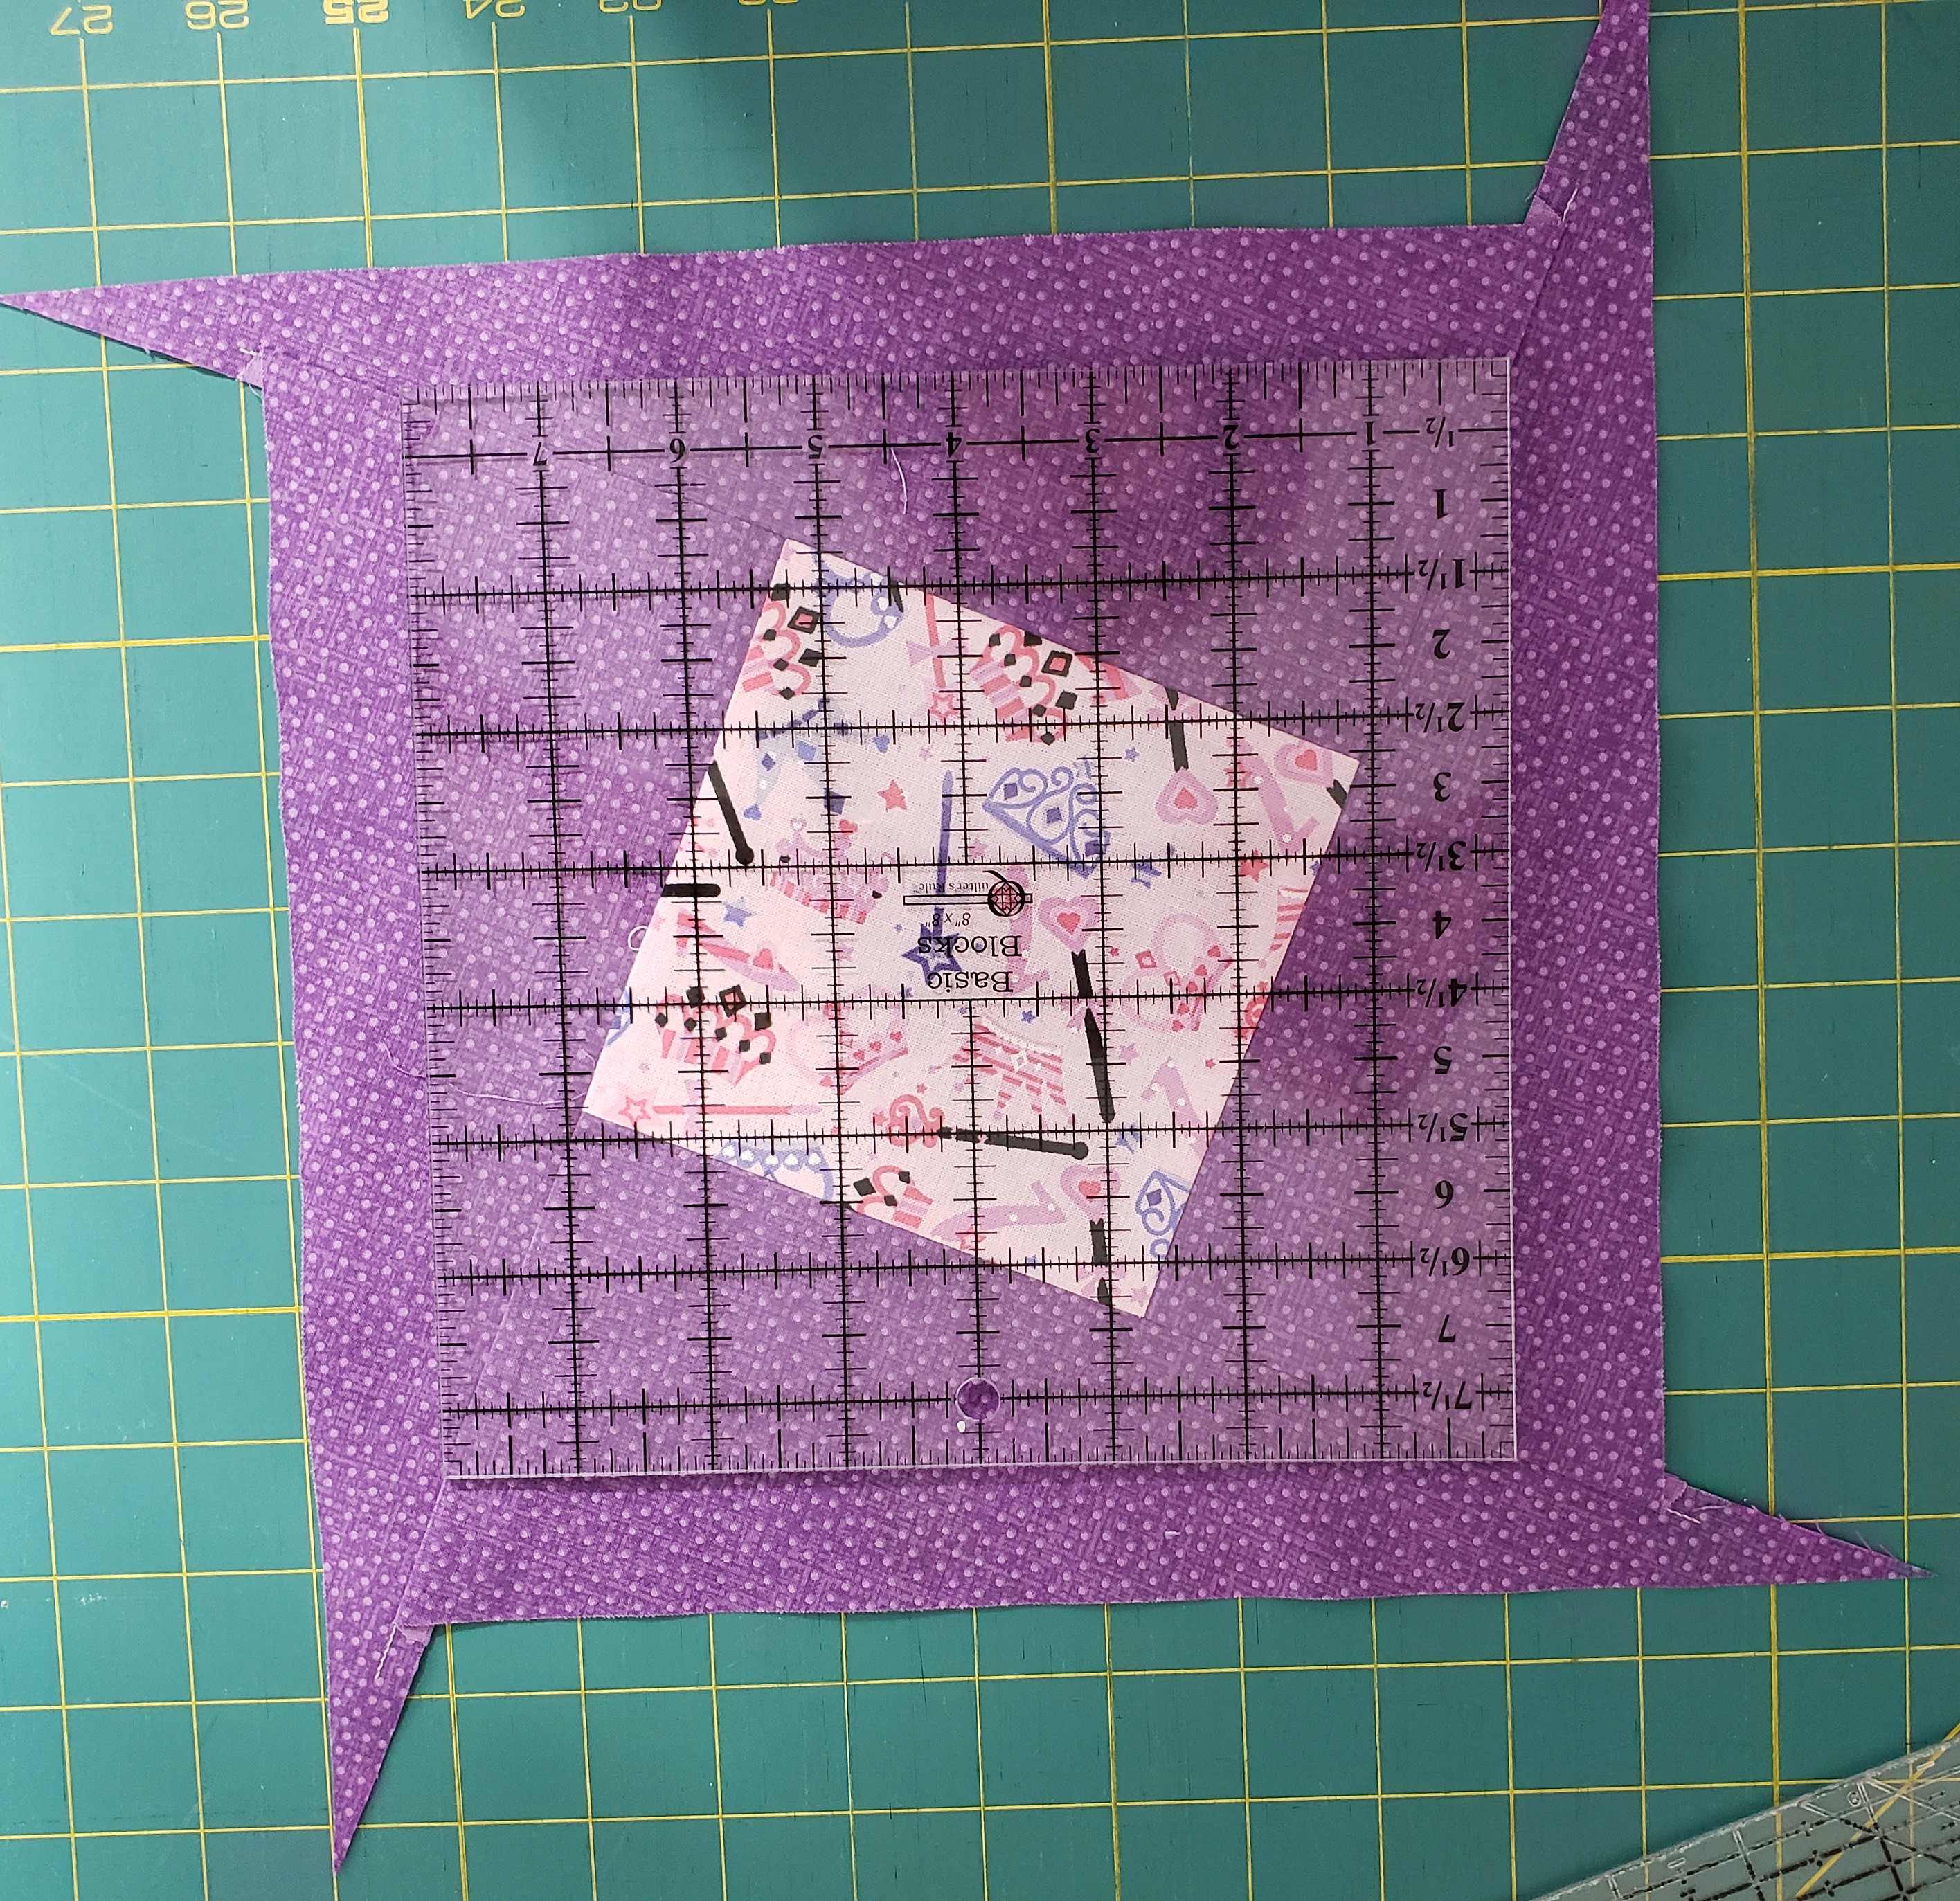
Then, I trimmed each square into a, well, square square, without long tails.
Finally, I put the squares back on the floor in their correct spots, gathered up the squares that twisted in the other direction, took them to the sewing room, and sewed them. In the photo below, you can see that the squares in columns one and two are done. In columns three and four, all the squares twisting to the right are finished, and there are blank spots on the carpet where the squares twisting to the left belong. (They’re in the sewing room, patiently waiting to be sewn.) The squares in columns five and six are still I-Spy squares pinned to rectangles.

When the squares were finally finished, I sewed them together and added a beautiful border around the entire quilt. (And the quilt is still on the family room floor. You would be correct in assuming that the floor didn’t get vacuumed much during the construction of this quilt.) But it is such a beautiful quilt! The lack of vacuuming was certainly worth it.
Next came the experimental part of this quilt: using a sun- and water-resistant home decor fabric for the back and binding of the quilt. This fabric is beautiful, but it is not soft or snugly. This is the kind of fabric you would use to make cushions for outdoor furniture or a large beach umbrella. This fabric is fairly heavy, and I think my arms grew muscles just pulling the quilt in and out of my sewing machine, but I’m happy to report that it quilted up beautifully. Here’s a photo of the back of the quilt.
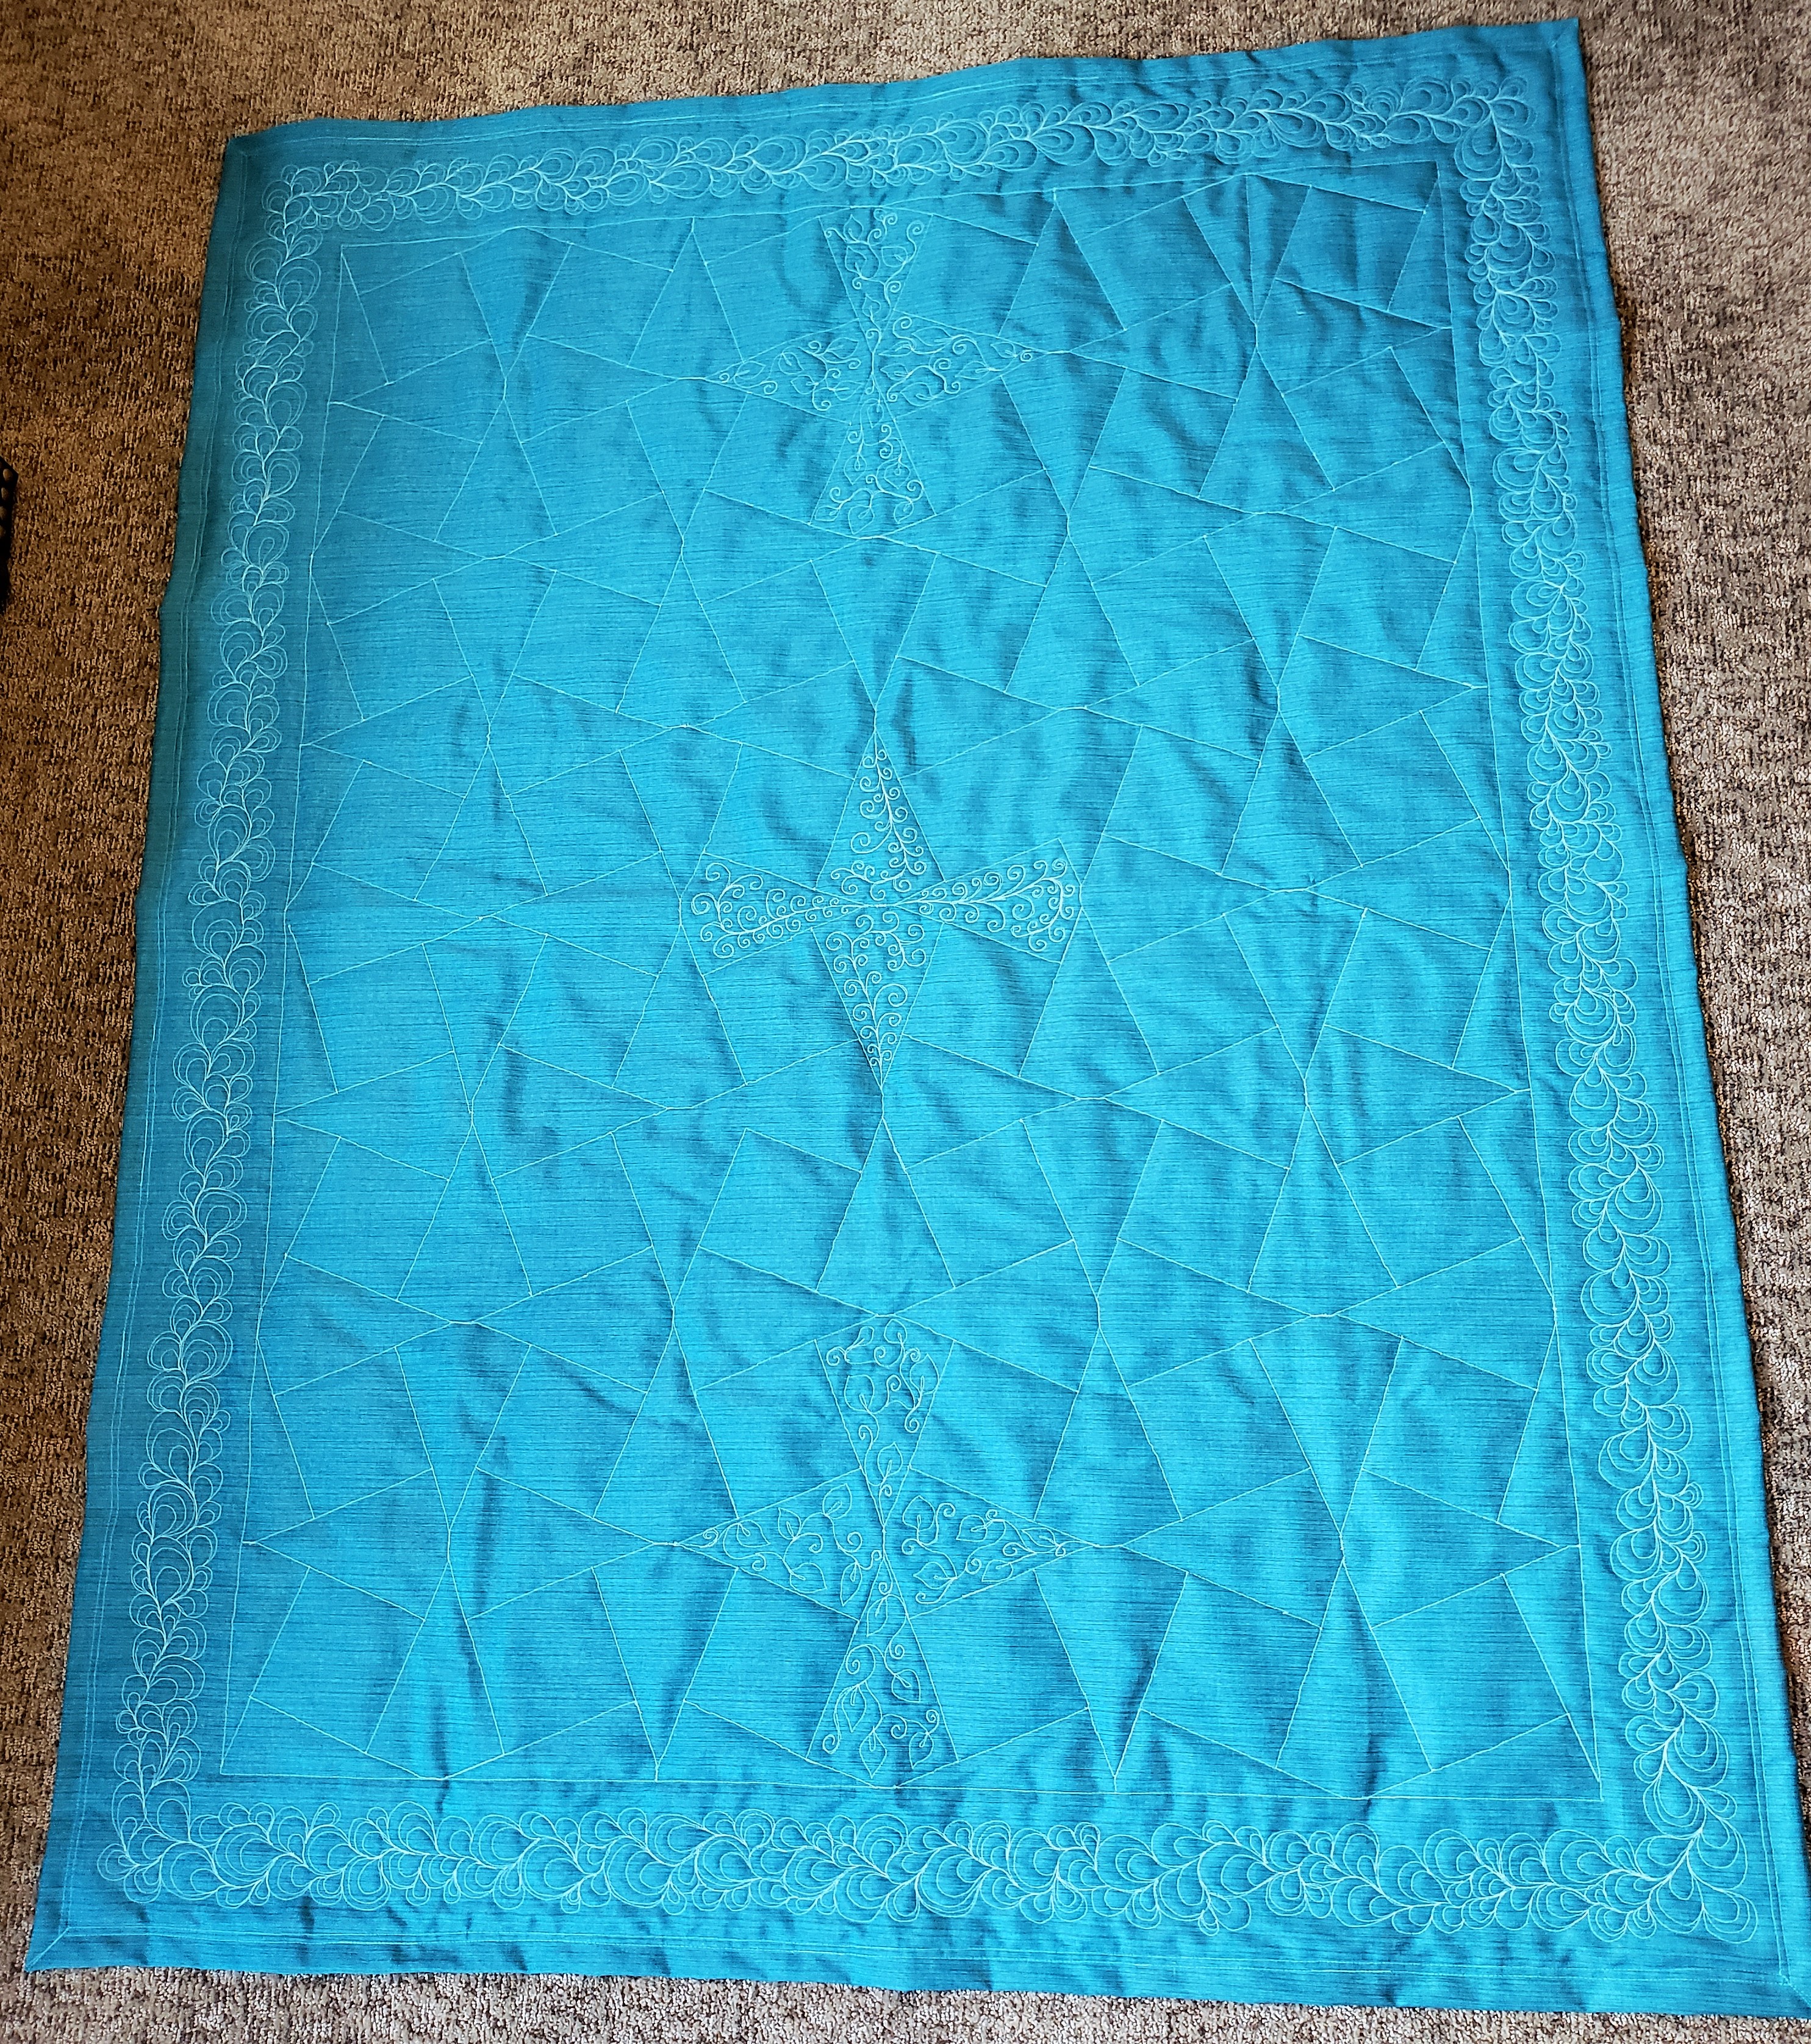
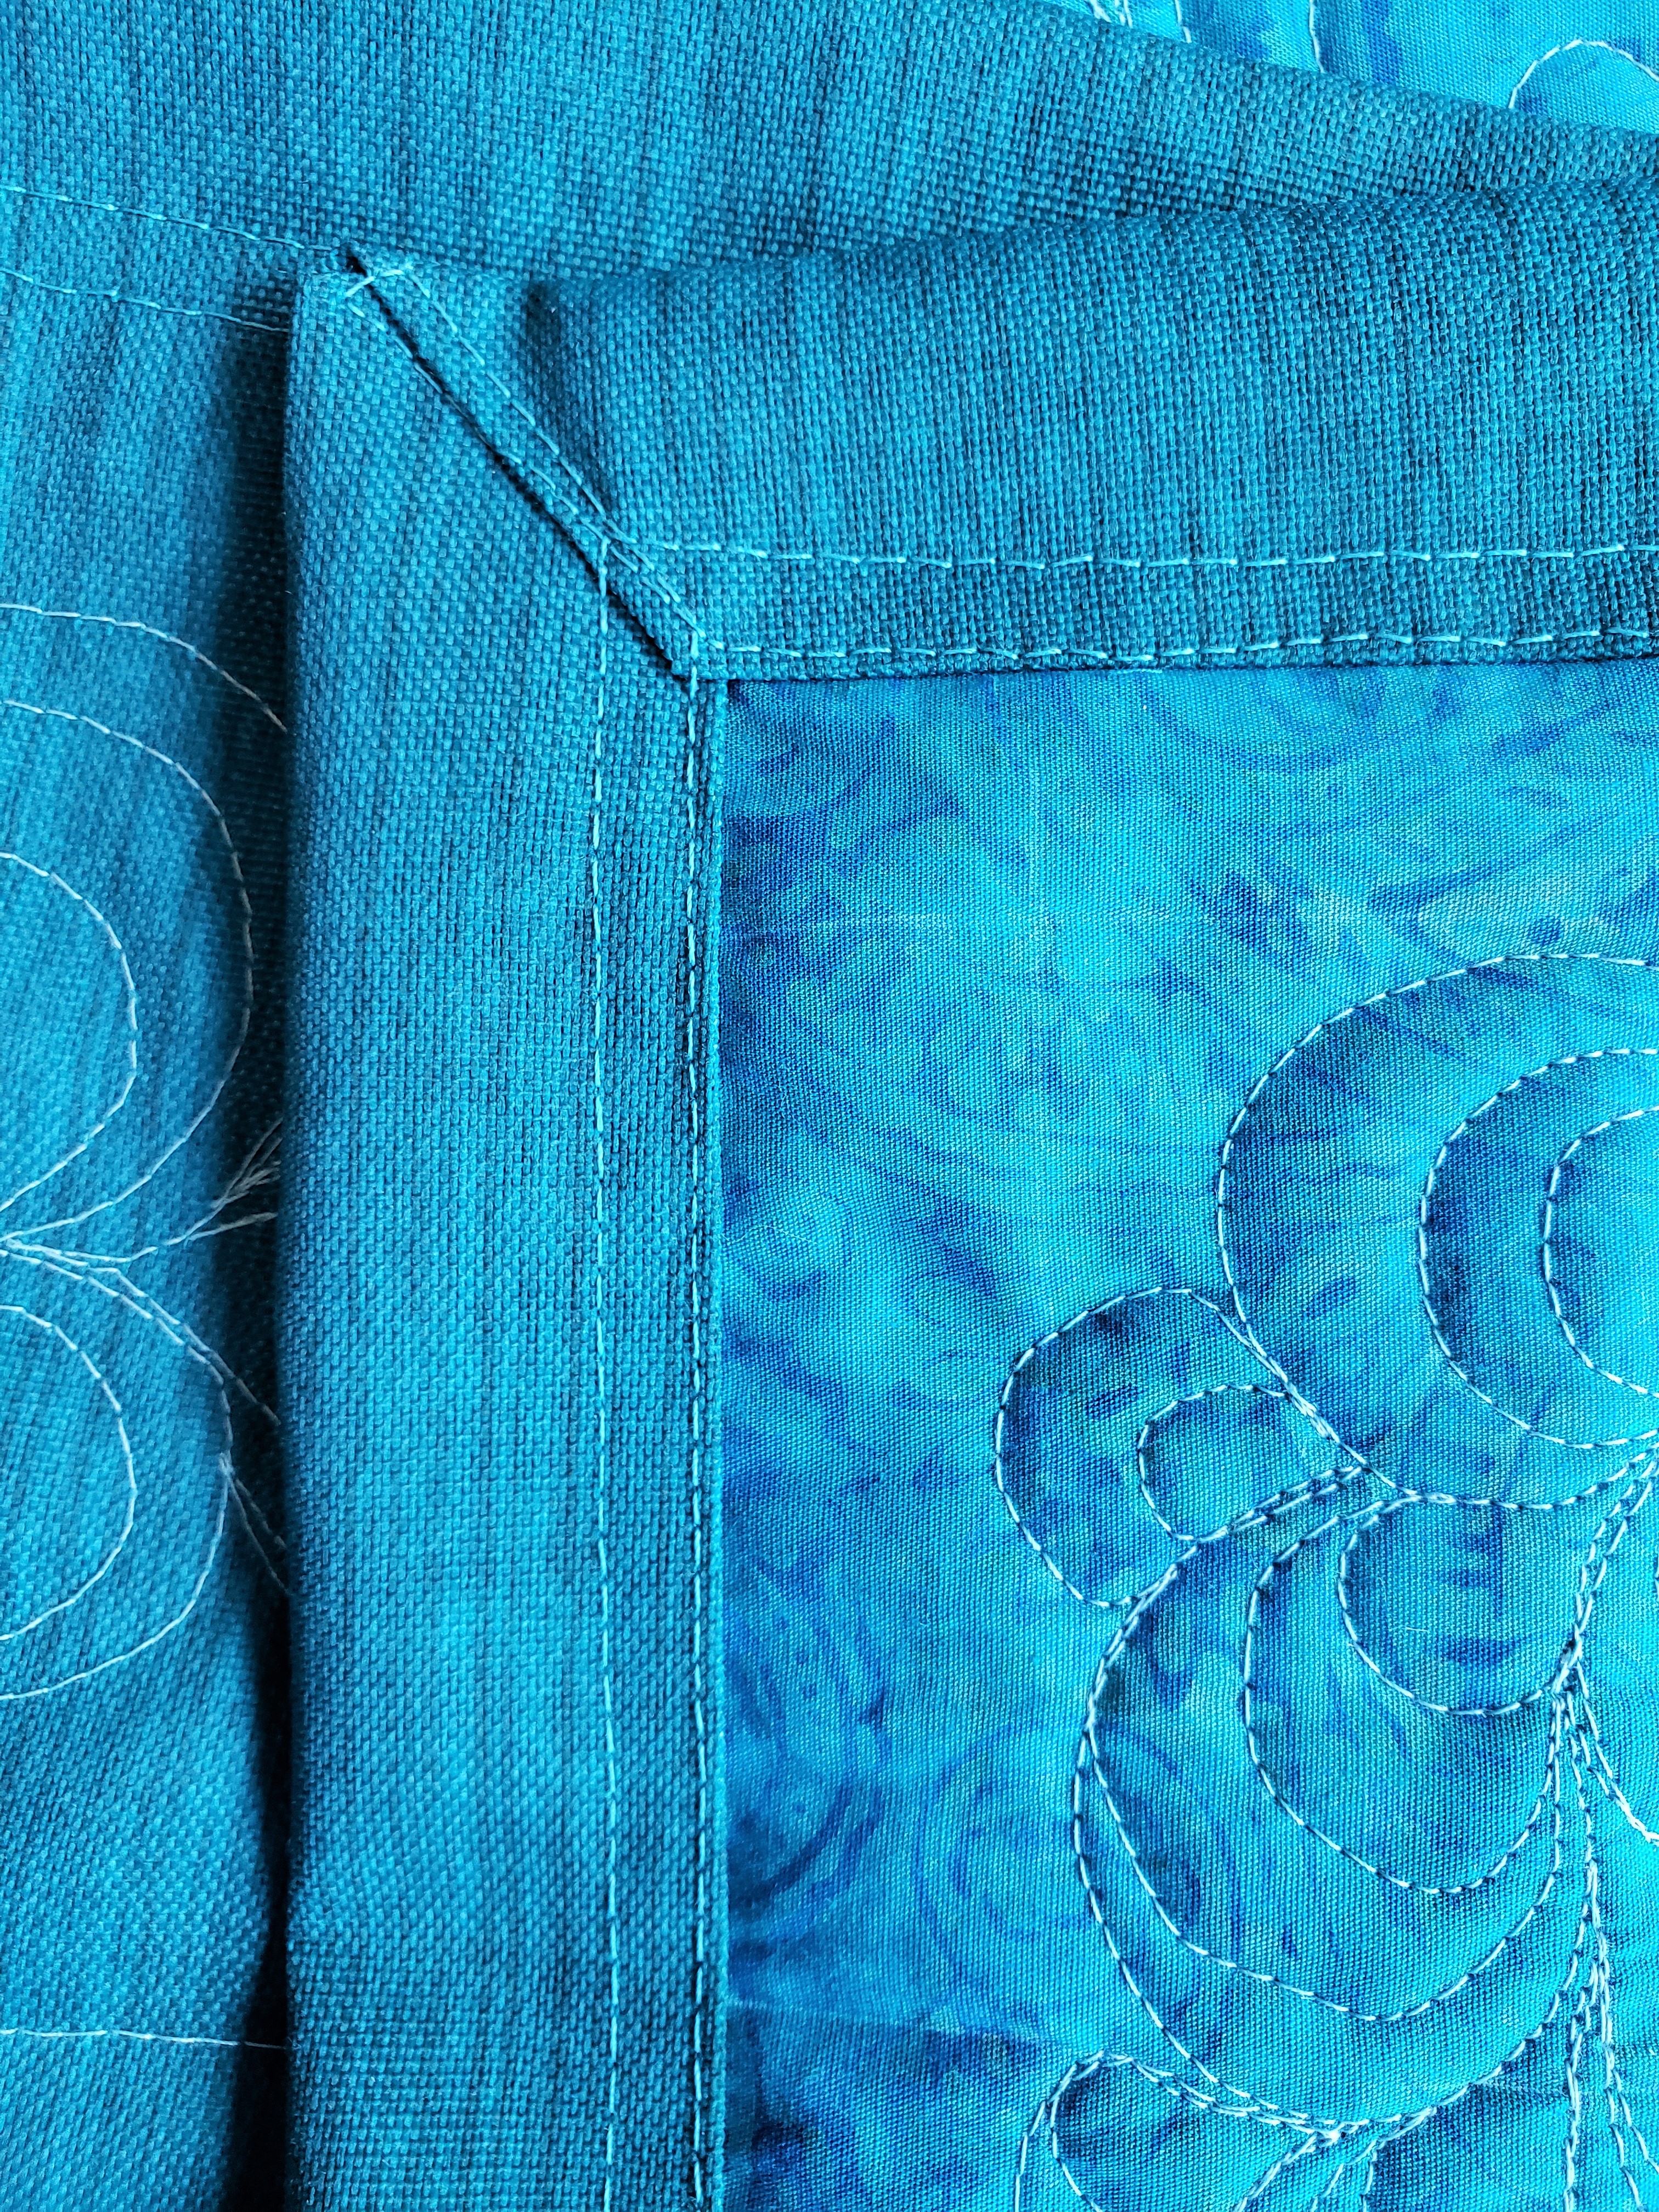
Yes, I quilted a somewhat fancy border, which my husband thought was “wasted” on a picnic quilt, but I wanted the practice. And to bind the quilt, I pulled about four extra inches from the back around to the front and sewed it in place.
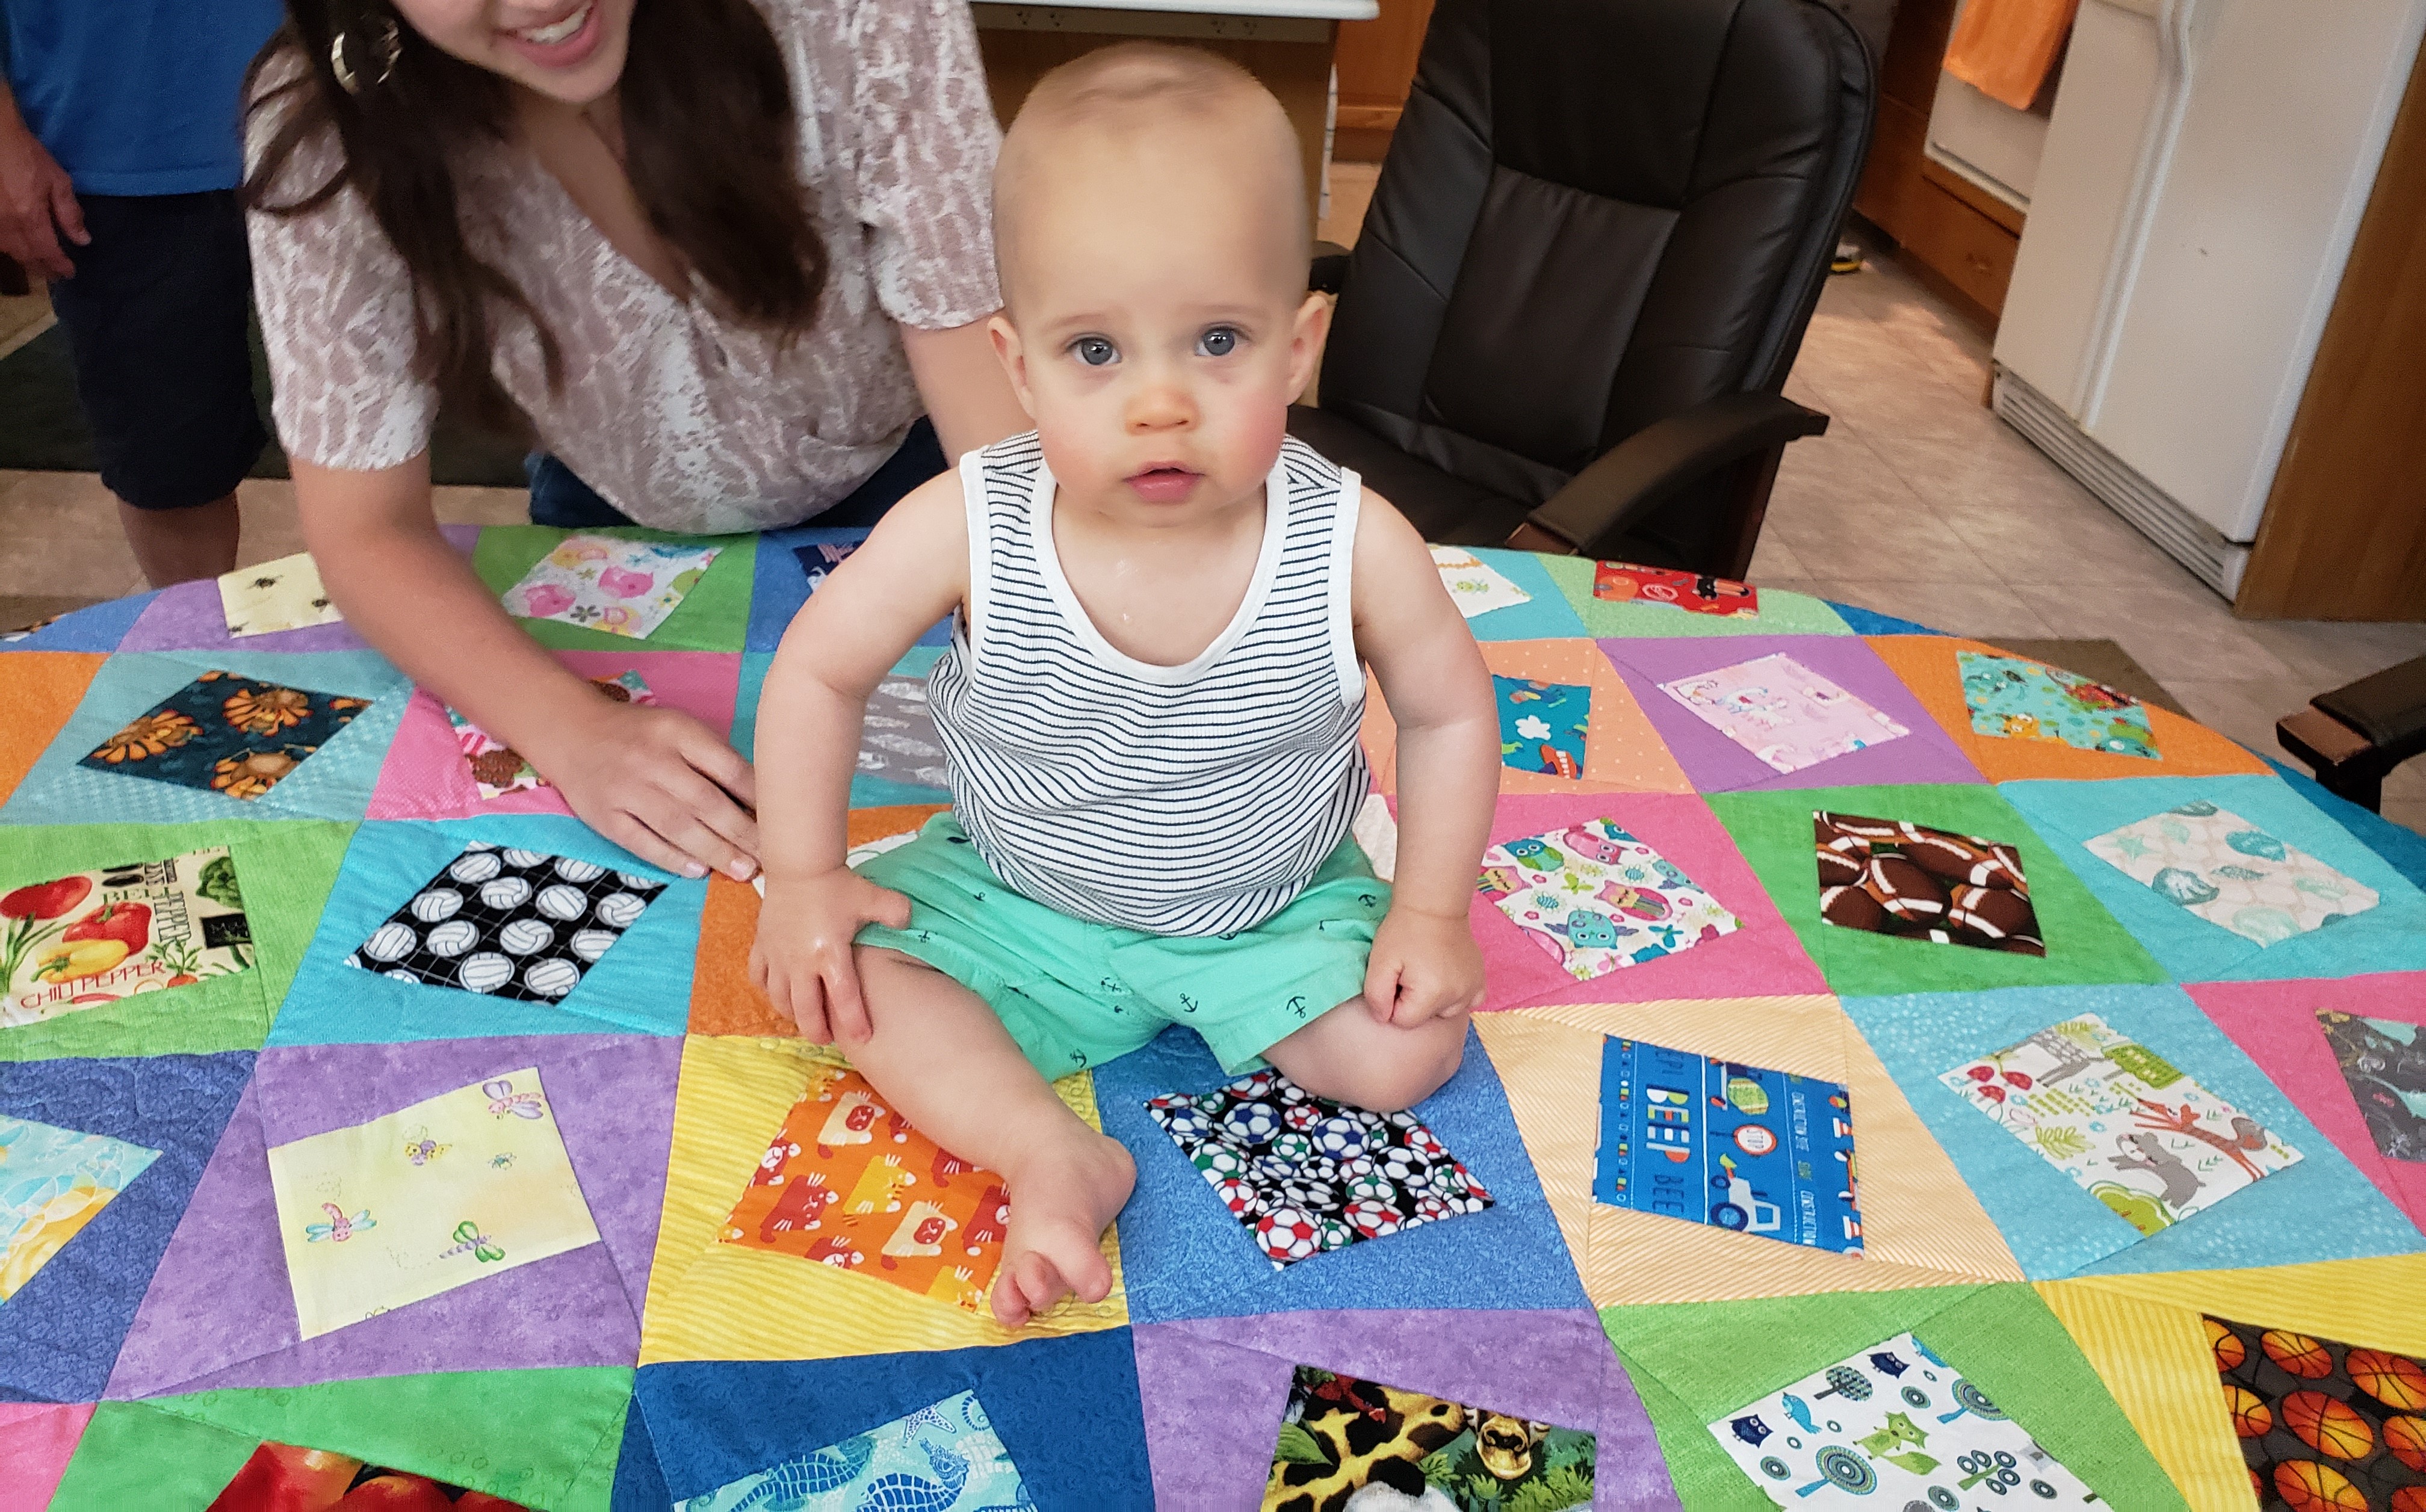
And here’s proof that the quilt was a resounding success: it has already been drooled upon by its new owner! I hope he enjoys many happy picnics on his I-Spy picnic quilt.