By Allison Sharp
In the quilting world, UFO stands for UnFinished Objects, and most quilters have several lying around, just hoping someone will work on them. One of my goals for the summer was to get rid of some of mine. Here’s the first:
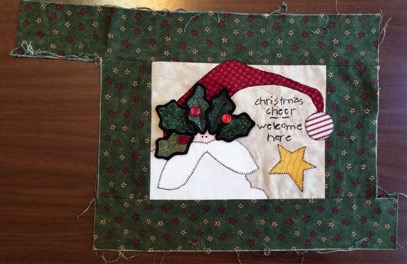
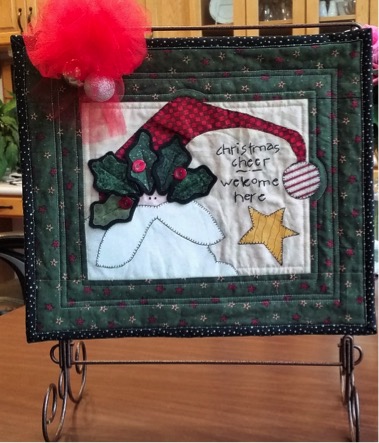
This is a hand-embroidered Christmas wall-hanging that my daughter made when she was 13, about 15 years ago. I wanted to display it at Christmas, but the edges were fraying, and I worried that the embroidery thread on the back would come loose. In order to protect this little project and make it easier to hang, I decided to add a border and backing fabric, machine quilt it, and then bind it. I chose a red border, which brought out the color of the thread.
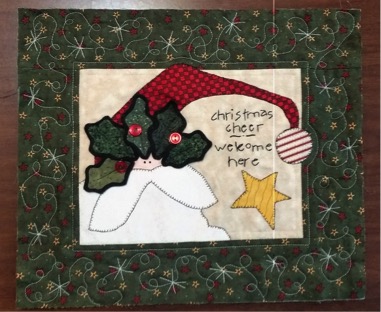
I quilted it with simple lines because I didn’t want to add anything that would take away from the embroidery.
Finally, I added a fun binding fabric. Voila! I love it.

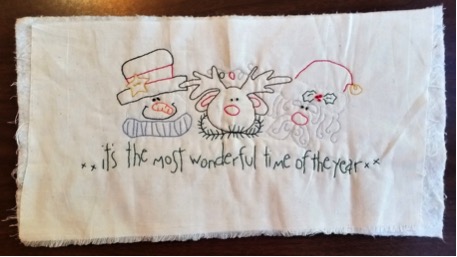
I found my next UFO in the same box that housed the first one. It was also made by hand by my daughter 15 years ago.
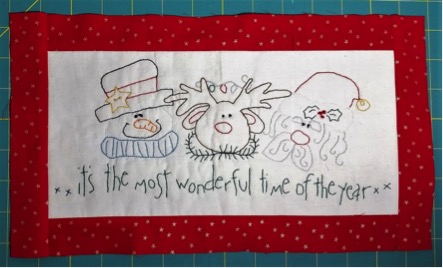
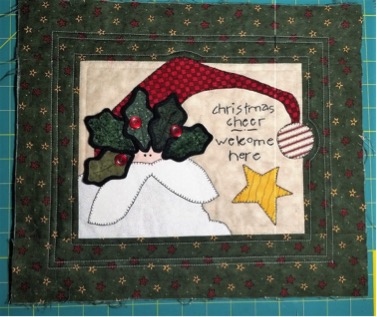
This one already had a border, so I cleaned up the edges, backed it, and machine quilted it. And I hated the quilting.
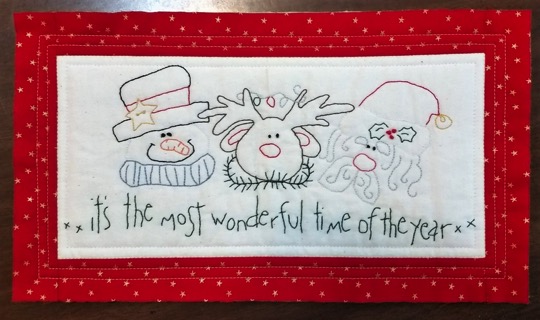
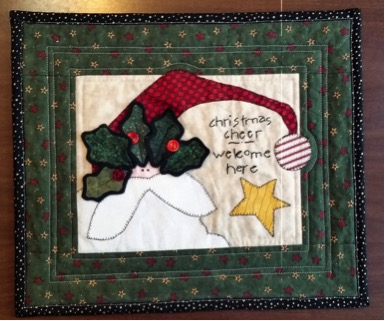
This quilting was much too busy for this small wall hanging, so I spent two hours one evening and unpicked every stitch. I would not recommend this activity, unless you are really desperate or really a perfectionist. When I quilted it the second time, I used straight lines. As you can see from the photo below, this quilting is much better.
The straight-line quilting frames the center embroidery, but doesn’t compete with it, and the simple lines are much more restful to look at. I bound it with black fabric with specks of gold.
Here’s the quilt attached to a quilt stand. These stands come with “headers” that you put on the top of the stand to make it look more decorative. I didn’t buy one, because I am cheap, so I added a tulle bow and some Christmas balls. (Not my favorite bow, but you get the idea.)
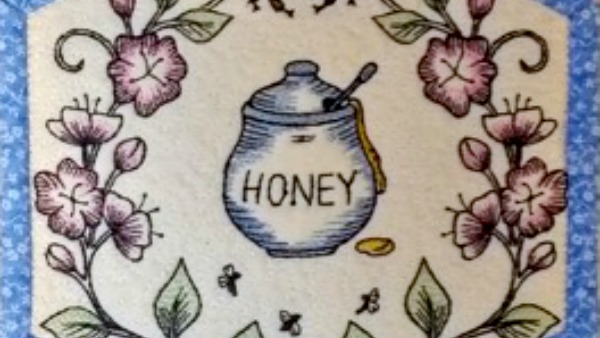
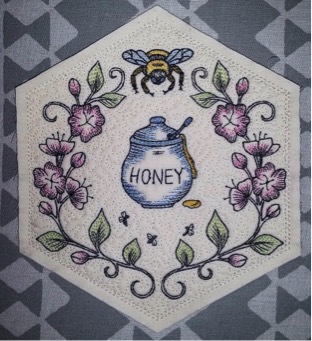
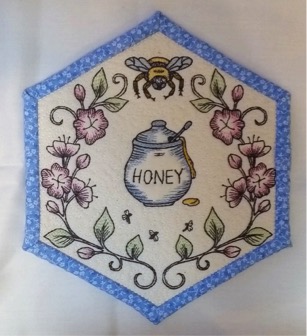
My final UFO was made by my daughter just a few months ago. It was embroidered by machine from an Anita Goodesign pattern, which my daughter bought to accompany Jennifer’s Honeybee books. This little hanging is made with a front and back panel and is only 6 ½” wide. Here’s the front:
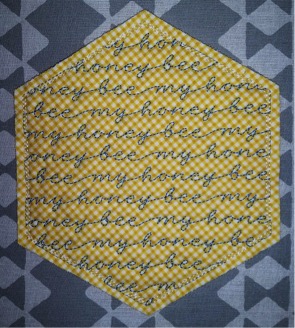
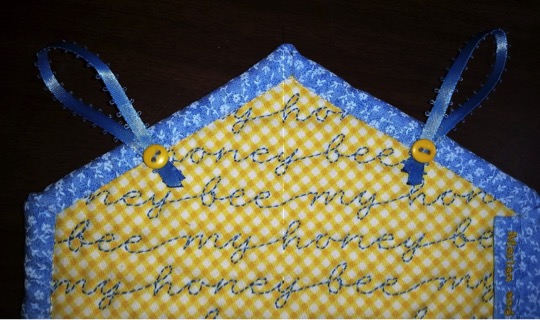
And I love the back:
My daughter picked out the thread colors, and the embroidery machine did the stitching. I sewed the two panels together, back to back.
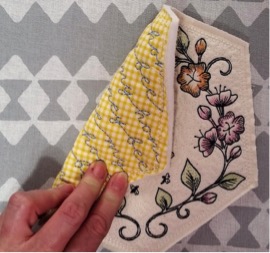
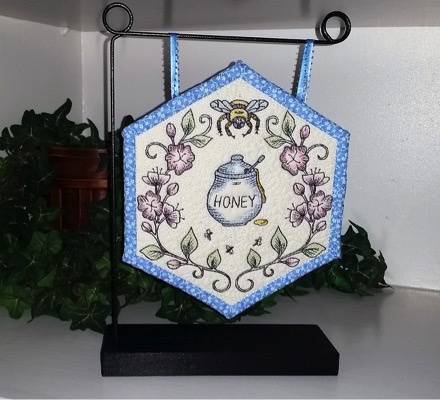
The hardest job for me was choosing a binding fabric. I actually made two different pieces of binding. I didn’t like the first, so I made and used the second. I love it. (Yes, I’m a perfectionist. I do not recommend encouraging this personality trait.)
I added two small loops to the back to make this small quilt easier to hang.
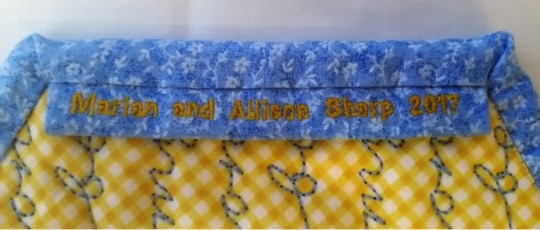
My daughter embroidered a label for our little quilt. She used a “micro-font” so the label would not overpower the rest of the wall-hanging.
I found a charming quilt stand which is a perfect match for the quilt.
That’s three UFOs finished in one month! I will not tell you what fraction of my UFOs that this number represents because I try to think only positive thoughts. Join me next month for photos of some beautiful strip quilts. No, these are not x-rated photos. (Ha, ha. Quilting humor.)
*I wish I could credit the pattern designers of the hand-embroidered panels. Unfortunately, they are 15 years old, and my daughter made them in a class in junior high, so I have no access to the patterns
*The beautiful honeybee panels are from the Anita Goodesign Honeycomb Quilt. https://www.anitagoodesignonline.com/product/honeycomb-quilt/

Congratulations on completing 3 UFOs. Now they are ready to bring you pleasure. I, too, am a bit of a perfectionist but have learned that my best is good enough. The UFO pile is getting whittled down in between quilt tops for two quilt ministries. Keep sharing; it is an encouragement to me.
Yes, Allison is quite the perfectionist. I am a perfectionist too and that’s probably why I don’t sew much. 🙂